RUM Installation Page
The RUM installation page is where every Real User Monitoring setup starts. You create an application, get its token, and follow setup steps with your application name, token, and endpoint already filled in. The page then waits for your first session and tells you when data arrives.
It covers five platforms: Browser, iOS, Android, React Native, and Flutter. The platform guides in these docs go deeper on SDK options. This page explains the installation page itself.
Open the installation page#
- Select Installation in the left navigation of your Middleware account.
- Open the RUM tab.
- Pick your platform from the list on the left: Browser, iOS, Android, React Native, or Flutter.
The page has two columns. The left panel holds the application picker, the data status, the credentials, and Copy setup for AI assistant. The right side lists the setup steps, with a Main Steps bar at the top that jumps to each step and marks it done as you go.
Create an application#
Each application has its own token and settings. Create one per app you want to monitor, for example one for your storefront and one for your admin console.
- Select New Application. If the platform has no applications yet, the form is already open.
- Enter an Application name between 3 and 50 characters. The name must be unique in your account.
- Select Create application.
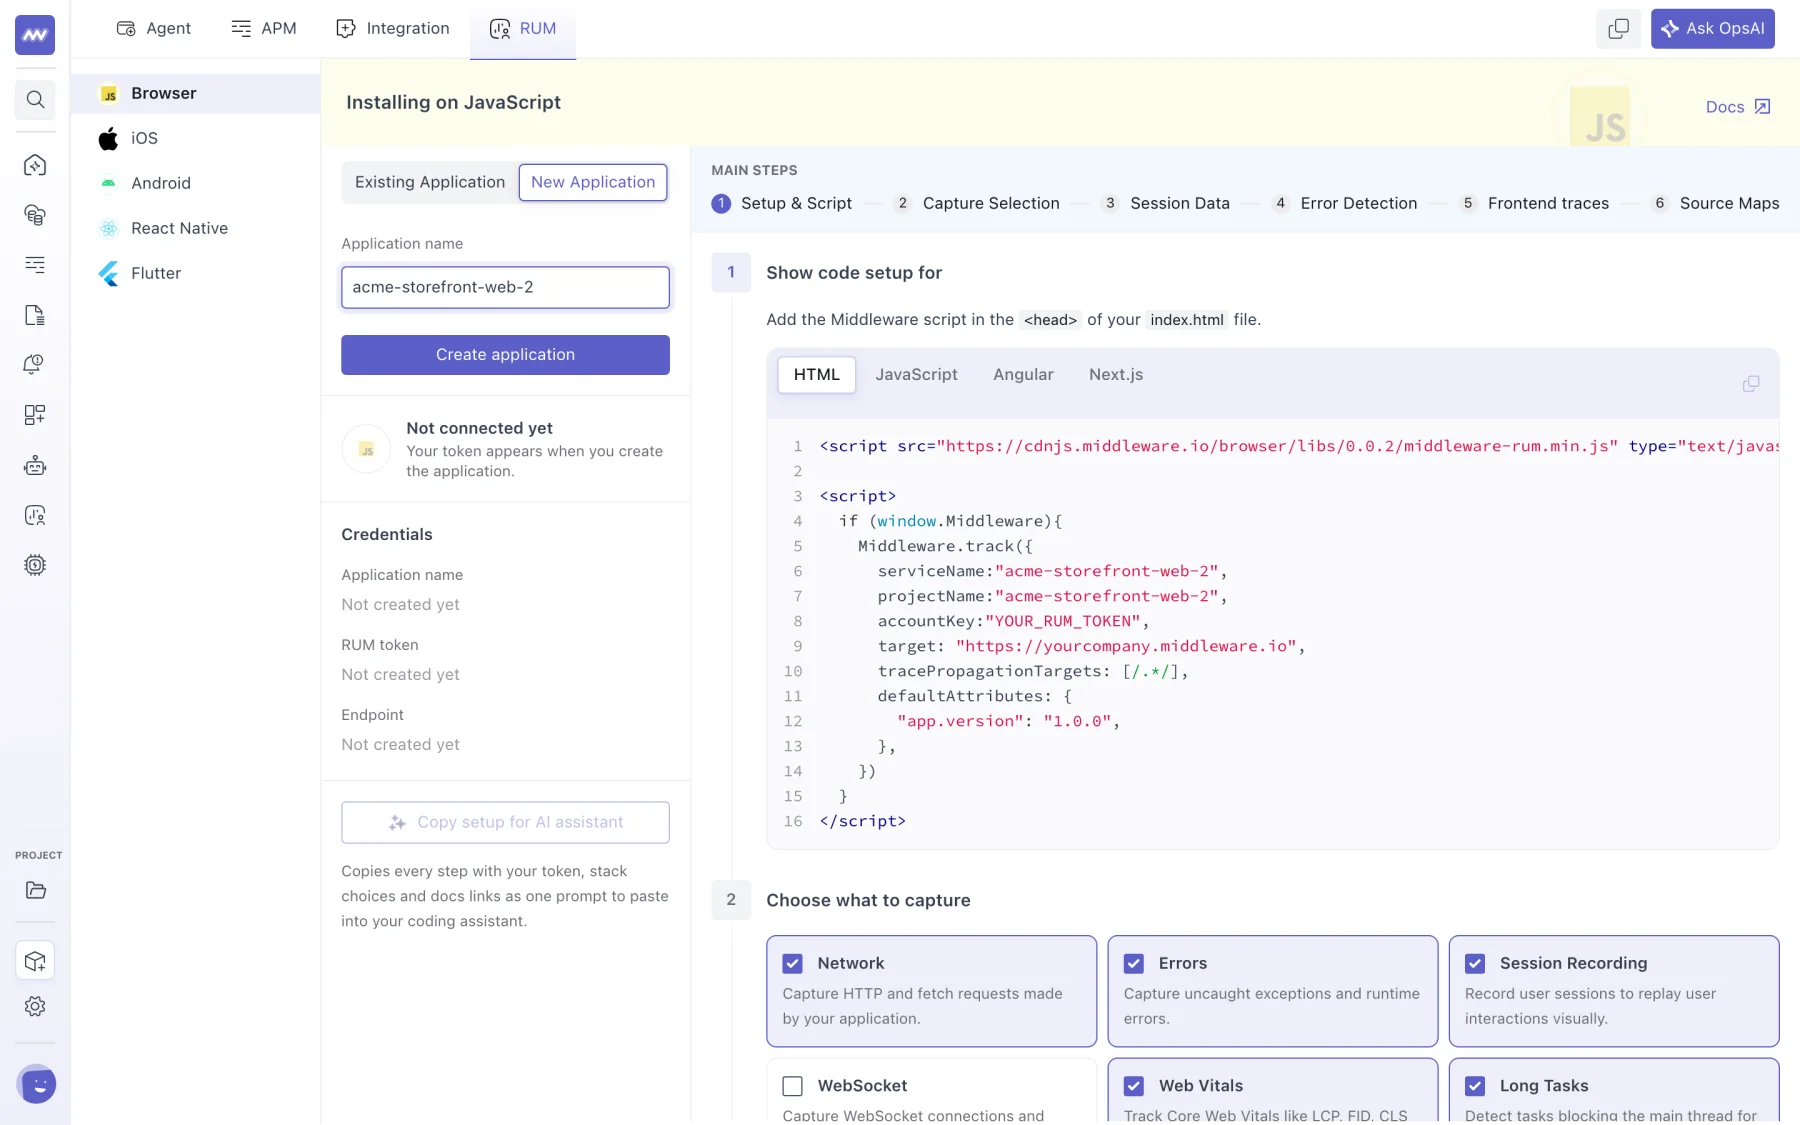
Until you create the application, the code snippets show the placeholders your-app-name and YOUR_RUM_TOKEN. After you create it, every snippet updates with the real values.
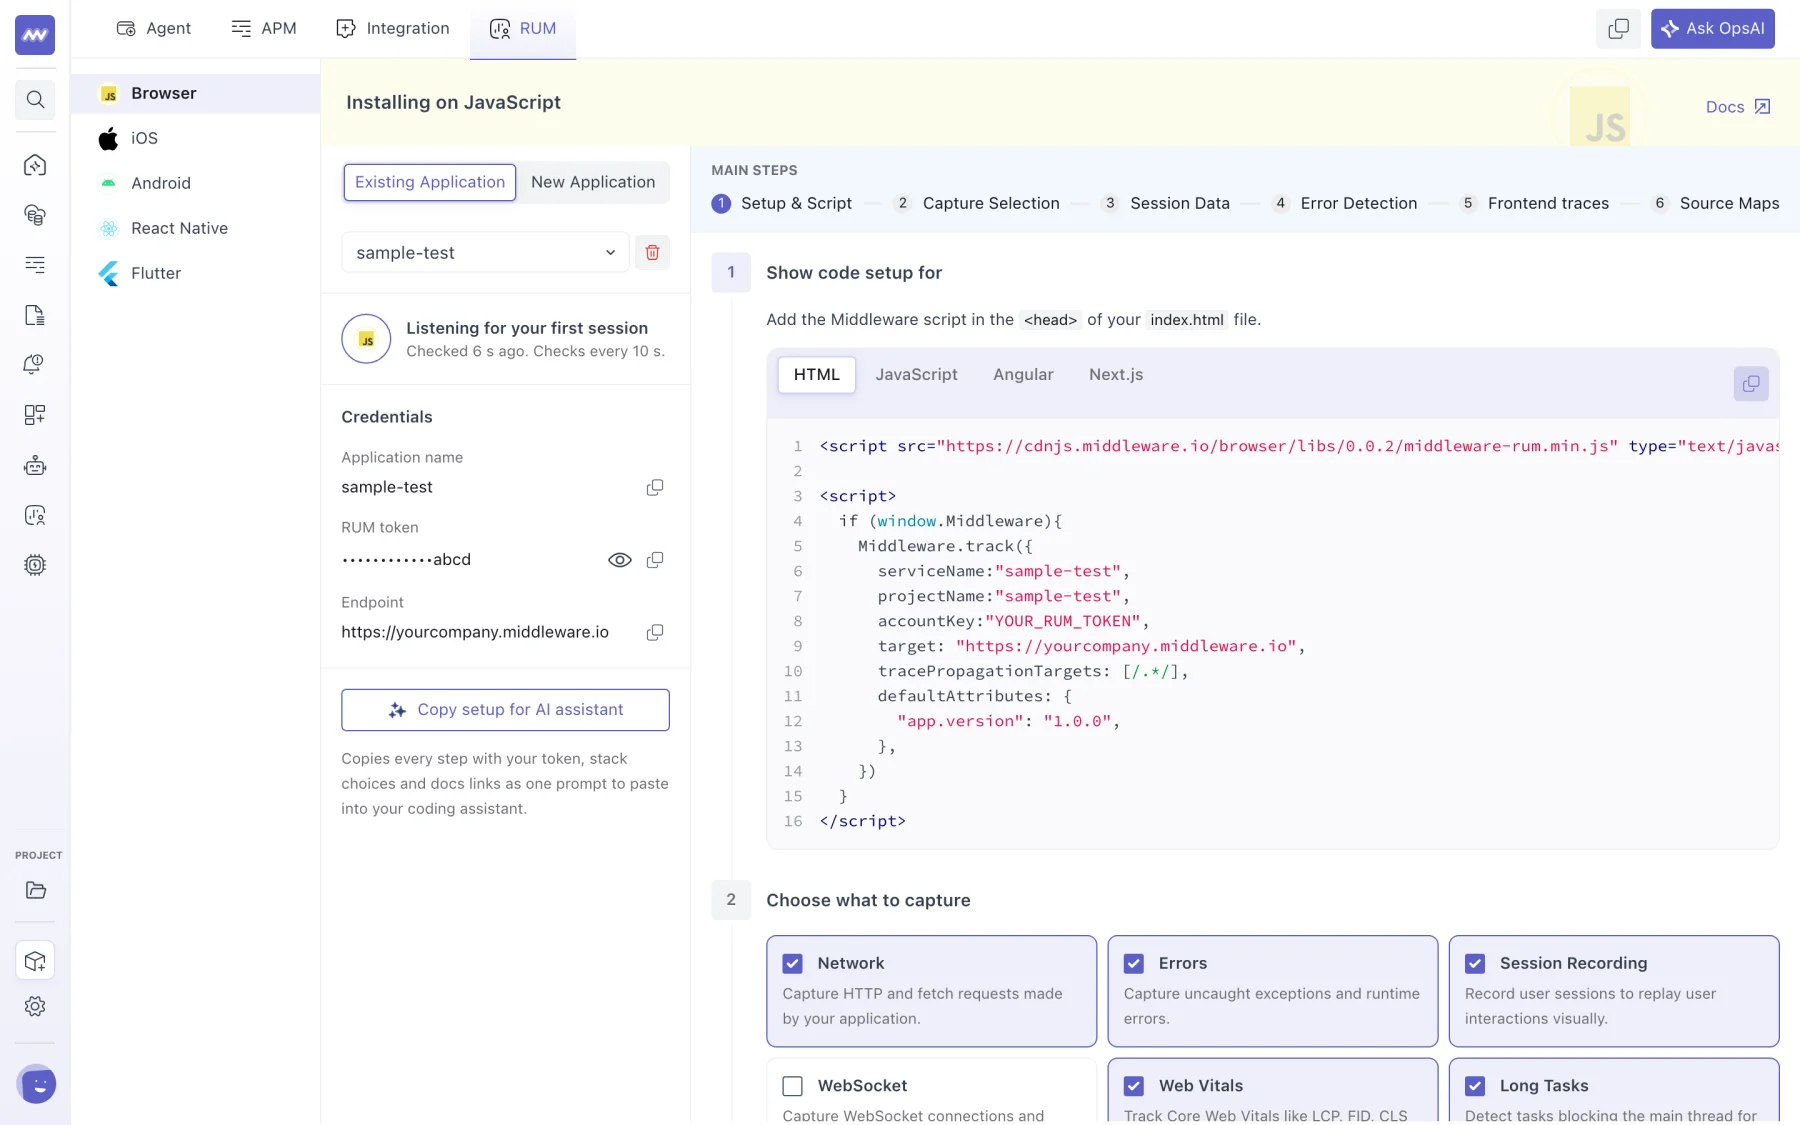
To work on an application you created earlier, select Existing Application and pick it from the dropdown. The delete button next to the dropdown removes the selected application.
Credentials#
The Credentials section lists the three values the SDK needs. Each one has a copy button, and the token is hidden until you select the eye icon.
| Credential | Where it goes |
|---|---|
| Application name | projectName and serviceName in the browser script, and the service and project name in the mobile SDKs. The page matches incoming data on this name, so keep it exactly as shown. |
| RUM token | accountKey in the browser script, rumAccessToken on iOS and Android, and the account key on React Native and Flutter. |
| Endpoint | target in every SDK. It is your Middleware URL, in the form https://<UID>.middleware.io. |
Set up with an AI coding assistant#
Copy setup for AI assistant copies the whole setup as one prompt that you can paste into Claude Code, Cursor, GitHub Copilot, or any other coding assistant. The prompt includes:
- The stack you picked on the page, such as HTML, Angular, or Next.js for Browser, or CocoaPods and UIKit for iOS.
- Your application name, RUM token, and endpoint.
- Every required code step, with the file it belongs in.
- Links to these docs for user identification, custom attributes, privacy masking, and logs.
Paste it in your project and the assistant applies each step to your codebase, adjusting file paths to match your project. The prompt ends by asking the assistant to build and run the app, so your first session can arrive.
Copying the prompt marks the code steps as done in the Main Steps bar. Capture settings and the optional steps are not part of the prompt, so set them on the page.
Follow the setup steps#
The steps change with the platform. Where a platform has several ways to install, tabs at the top of the steps let you choose your stack, and the snippets switch to match. The page remembers your choice for next time.
| Platform | Stack choices | Required steps | Optional steps |
|---|---|---|---|
| Browser | Framework: HTML, JavaScript, Angular, Next.js | Add the script, Choose what to capture, Load your site and wait for the first session | See errors in your code, Link frontend traces to your backend, Source maps |
| iOS | Package manager: Swift Package Manager, CocoaPods. App entry point: SwiftUI, UIKit | Add the SDK, Initialize the SDK as soon as your app launches, Run your app and wait for the first session | Upload your dSYM zip for each app version |
| Android | Build script: Kotlin DSL, Groovy. Language: Kotlin, Java | Enable core library desugaring, Add the Middleware Android SDK, Initialize the SDK in your Application class, Register the Application class in your manifest, Run your app and wait for the first session | Trace network requests made with OkHttp or Retrofit |
| React Native | Install with: npm, yarn, Expo. Android build script | Install the SDK, Enable core library desugaring on Android, Wrap your app with MiddlewareWrapper, Run your app and wait for the first session | Track screen views with React Navigation |
| Flutter | Add package with: command line, pubspec.yaml. Android build script | Add the Middleware Flutter SDK, Set the minimum platform versions and enable desugaring on Android, Initialize the SDK in main.dart before runApp, Run your app and wait for the first session | Track screen views by adding the route observer |
Mobile platforms list their requirements above the steps, such as the minimum iOS version, Android minSdk, and whether desugaring is needed, together with a link to the latest SDK release.
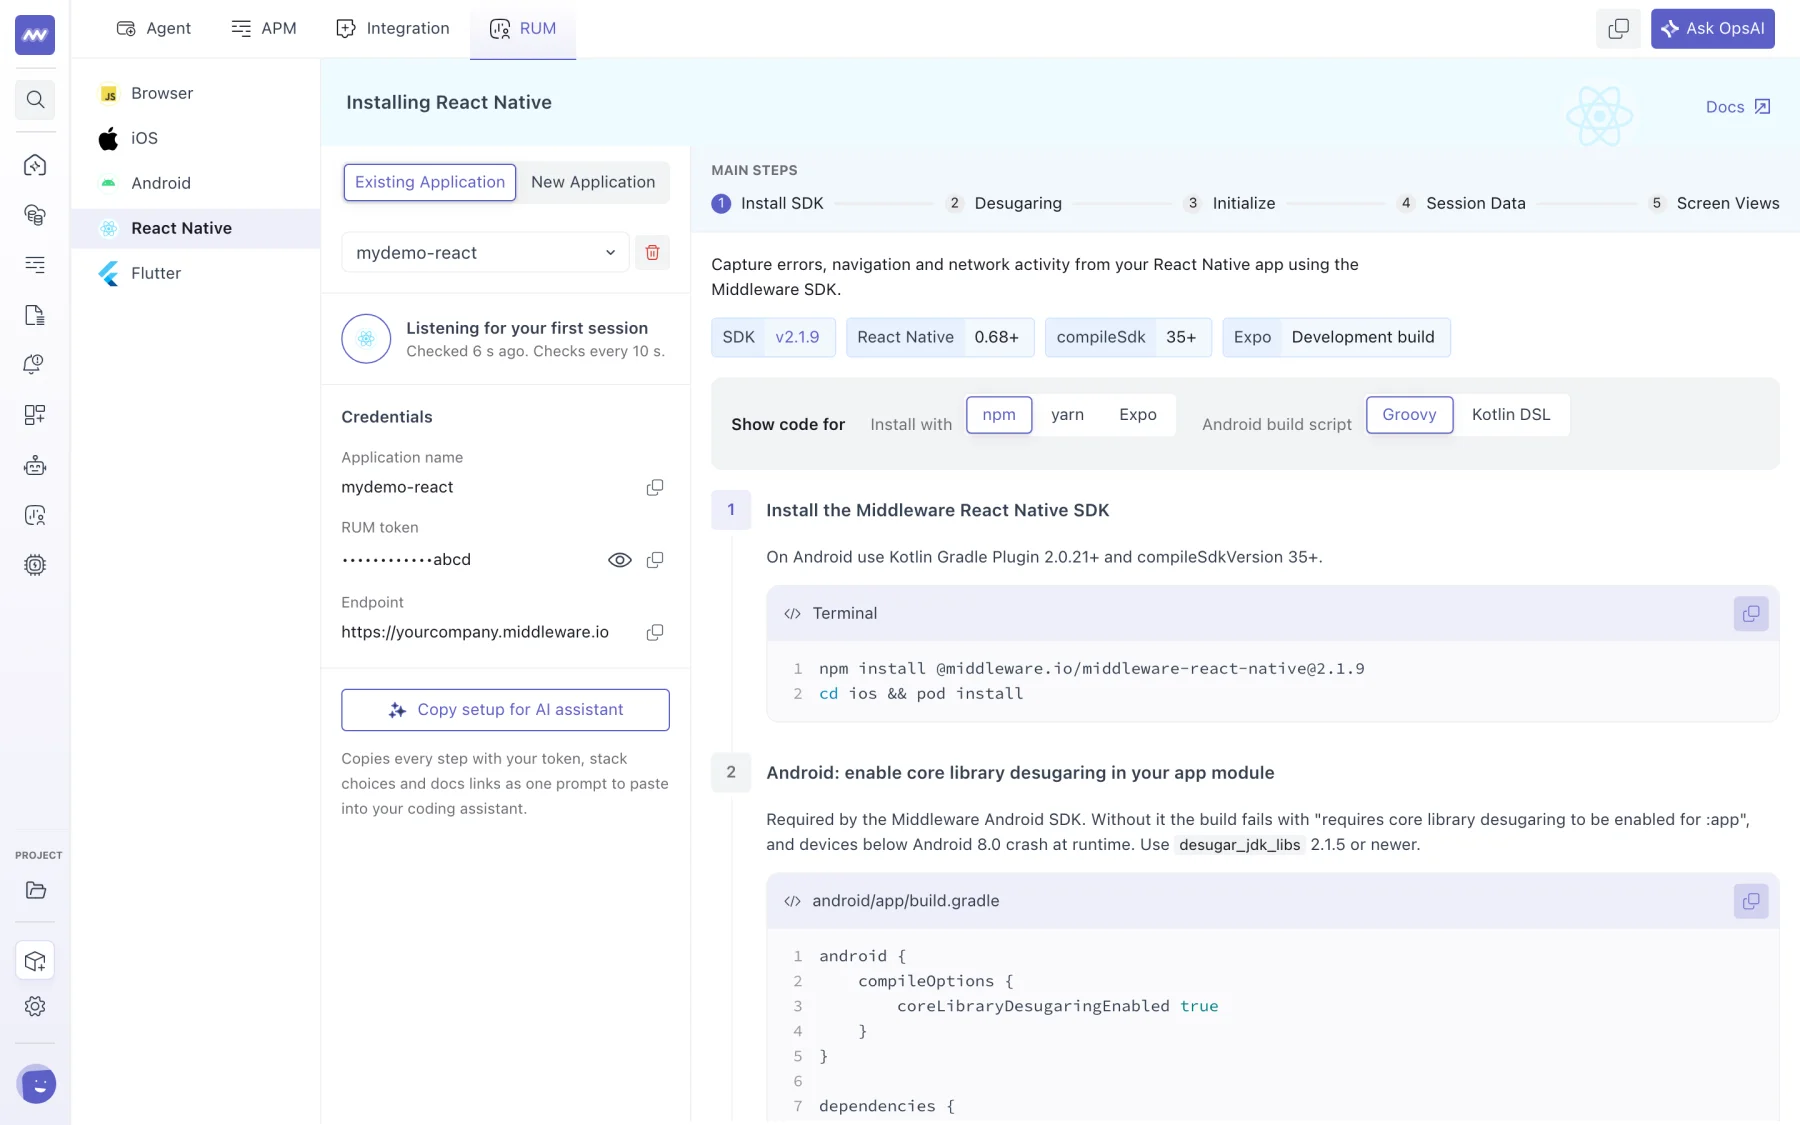
Copying a code block marks its step as done. When the first session arrives, every required step is marked done.
Choose what to capture#
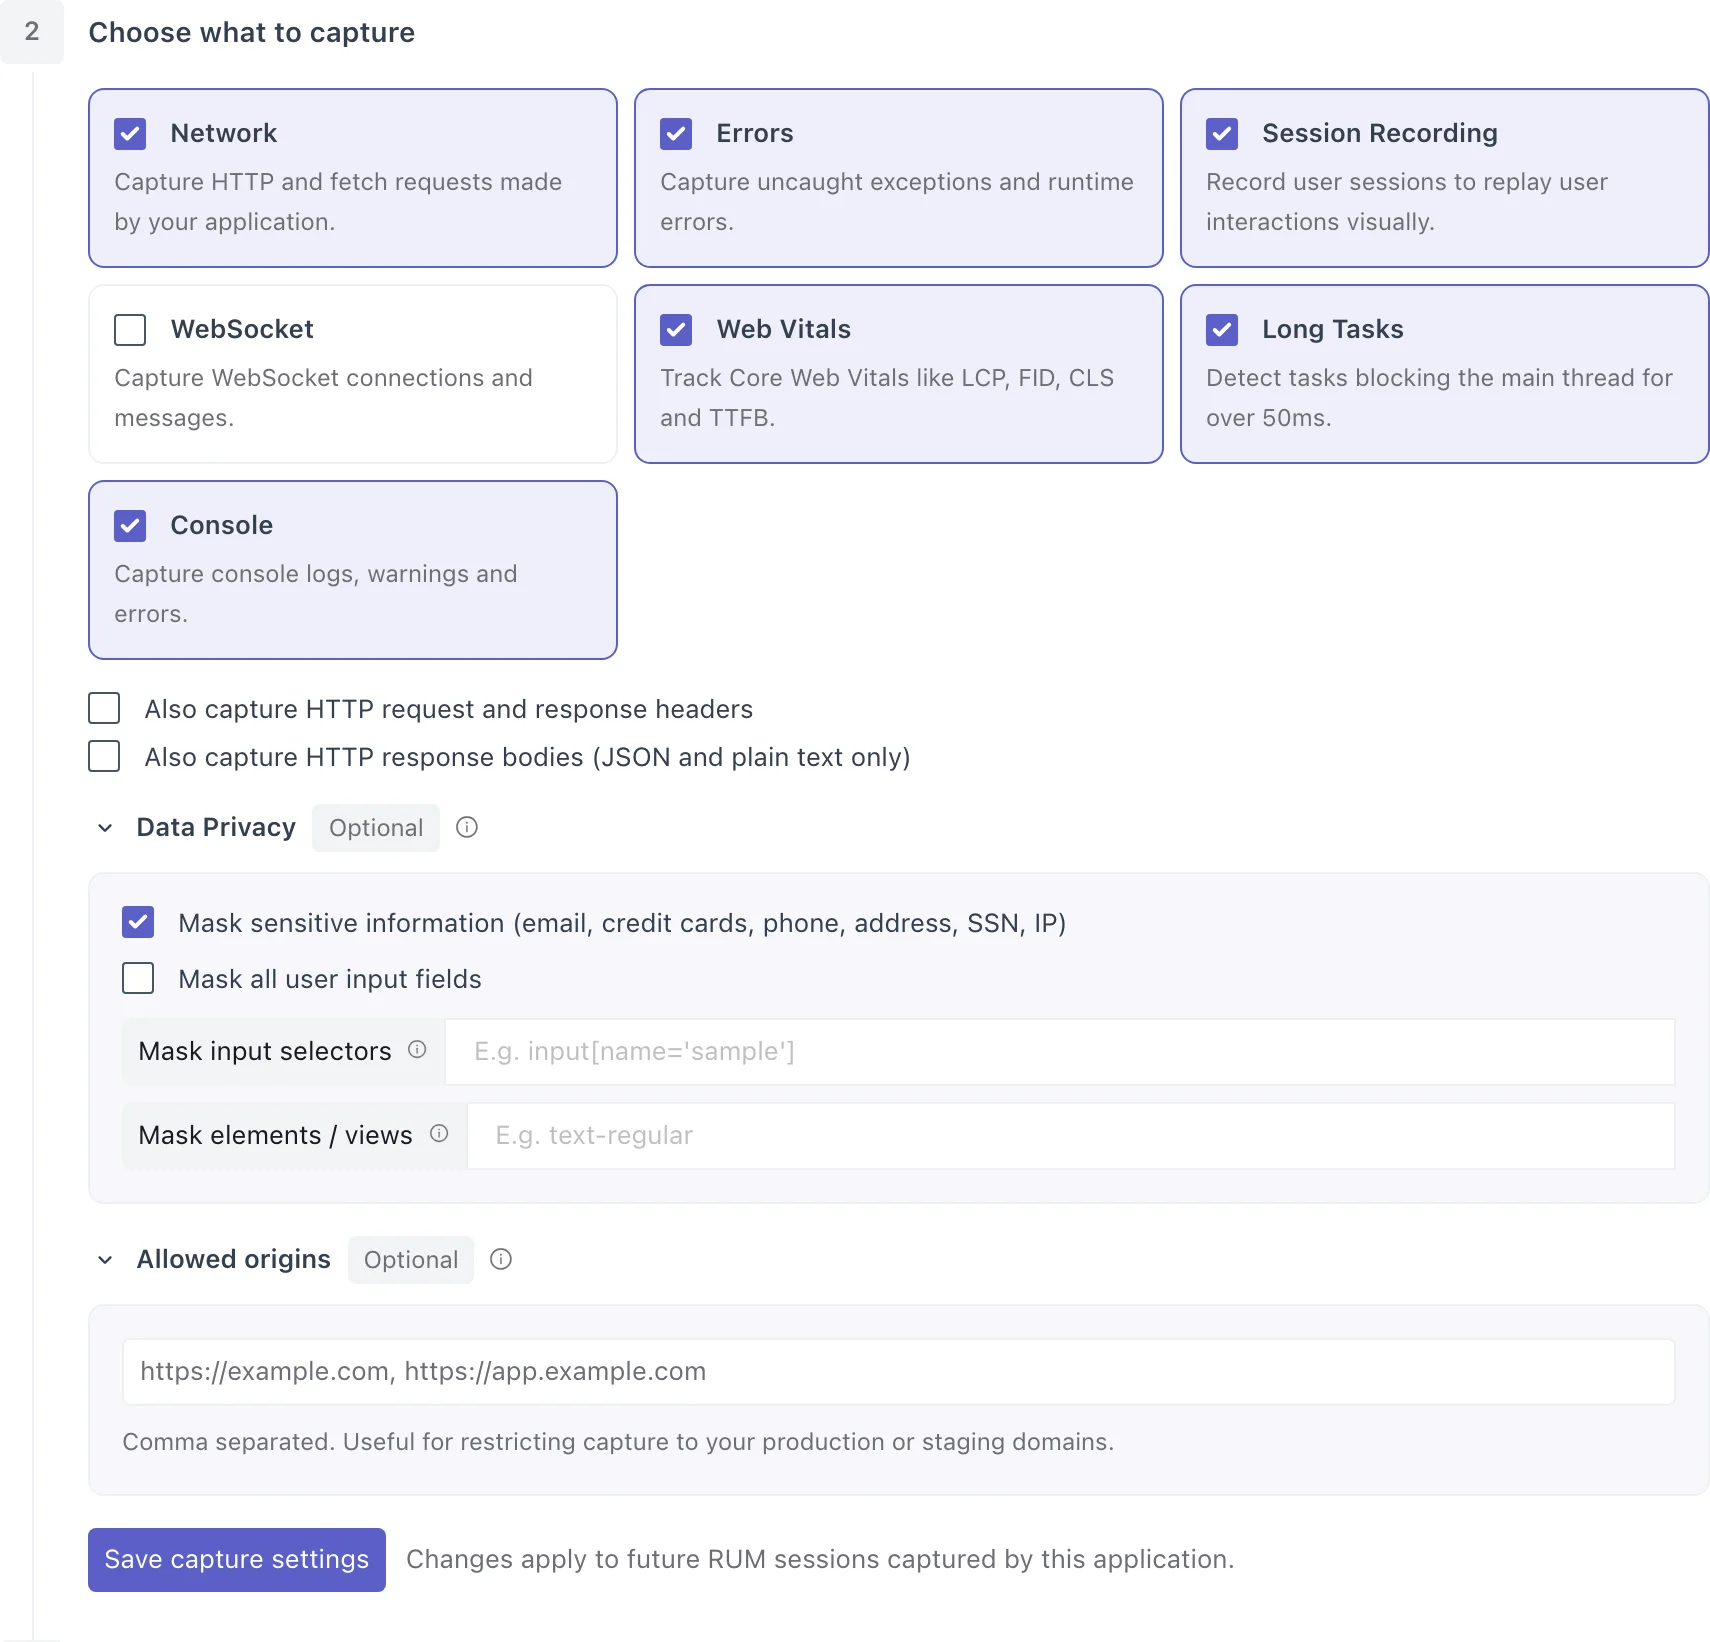
Browser applications have a Choose what to capture step. Mobile platforms set these options in code instead. Settings saved here are stored with the application and override the values passed to Middleware.track(), so you can change what is captured without redeploying your site.
| Option | Captures | Default |
|---|---|---|
| Network | HTTP and fetch requests made by your application | On |
| Errors | Uncaught exceptions and runtime errors | On |
| Session Recording | Session replays of user interactions | On |
| WebSocket | WebSocket connections and messages | Off |
| Web Vitals | Core Web Vitals such as LCP, CLS, and TTFB | On |
| Long Tasks | Tasks that block the main thread for more than 50 ms | On |
| Console | Console logs, warnings, and errors | On |
With Network on, two more checkboxes turn on recording of request and response headers, and of JSON and plain-text response bodies. Both are off by default because they can contain credentials and personal data.
Two optional sections sit under the capture options:
- Data Privacy masks sensitive values before they leave the browser, so they never appear in session recordings. Sensitive information such as email addresses, card numbers, and phone numbers is masked by default. You can also mask every input field, or list CSS selectors and class names to mask. See Session Recording Privacy.
- Allowed origins limits which sites can send data, as a comma-separated list such as
https://example.com, https://app.example.com. Leave it empty to accept every origin.
Select Save capture settings to apply your changes. They apply to sessions captured from then on.
Optional browser steps#
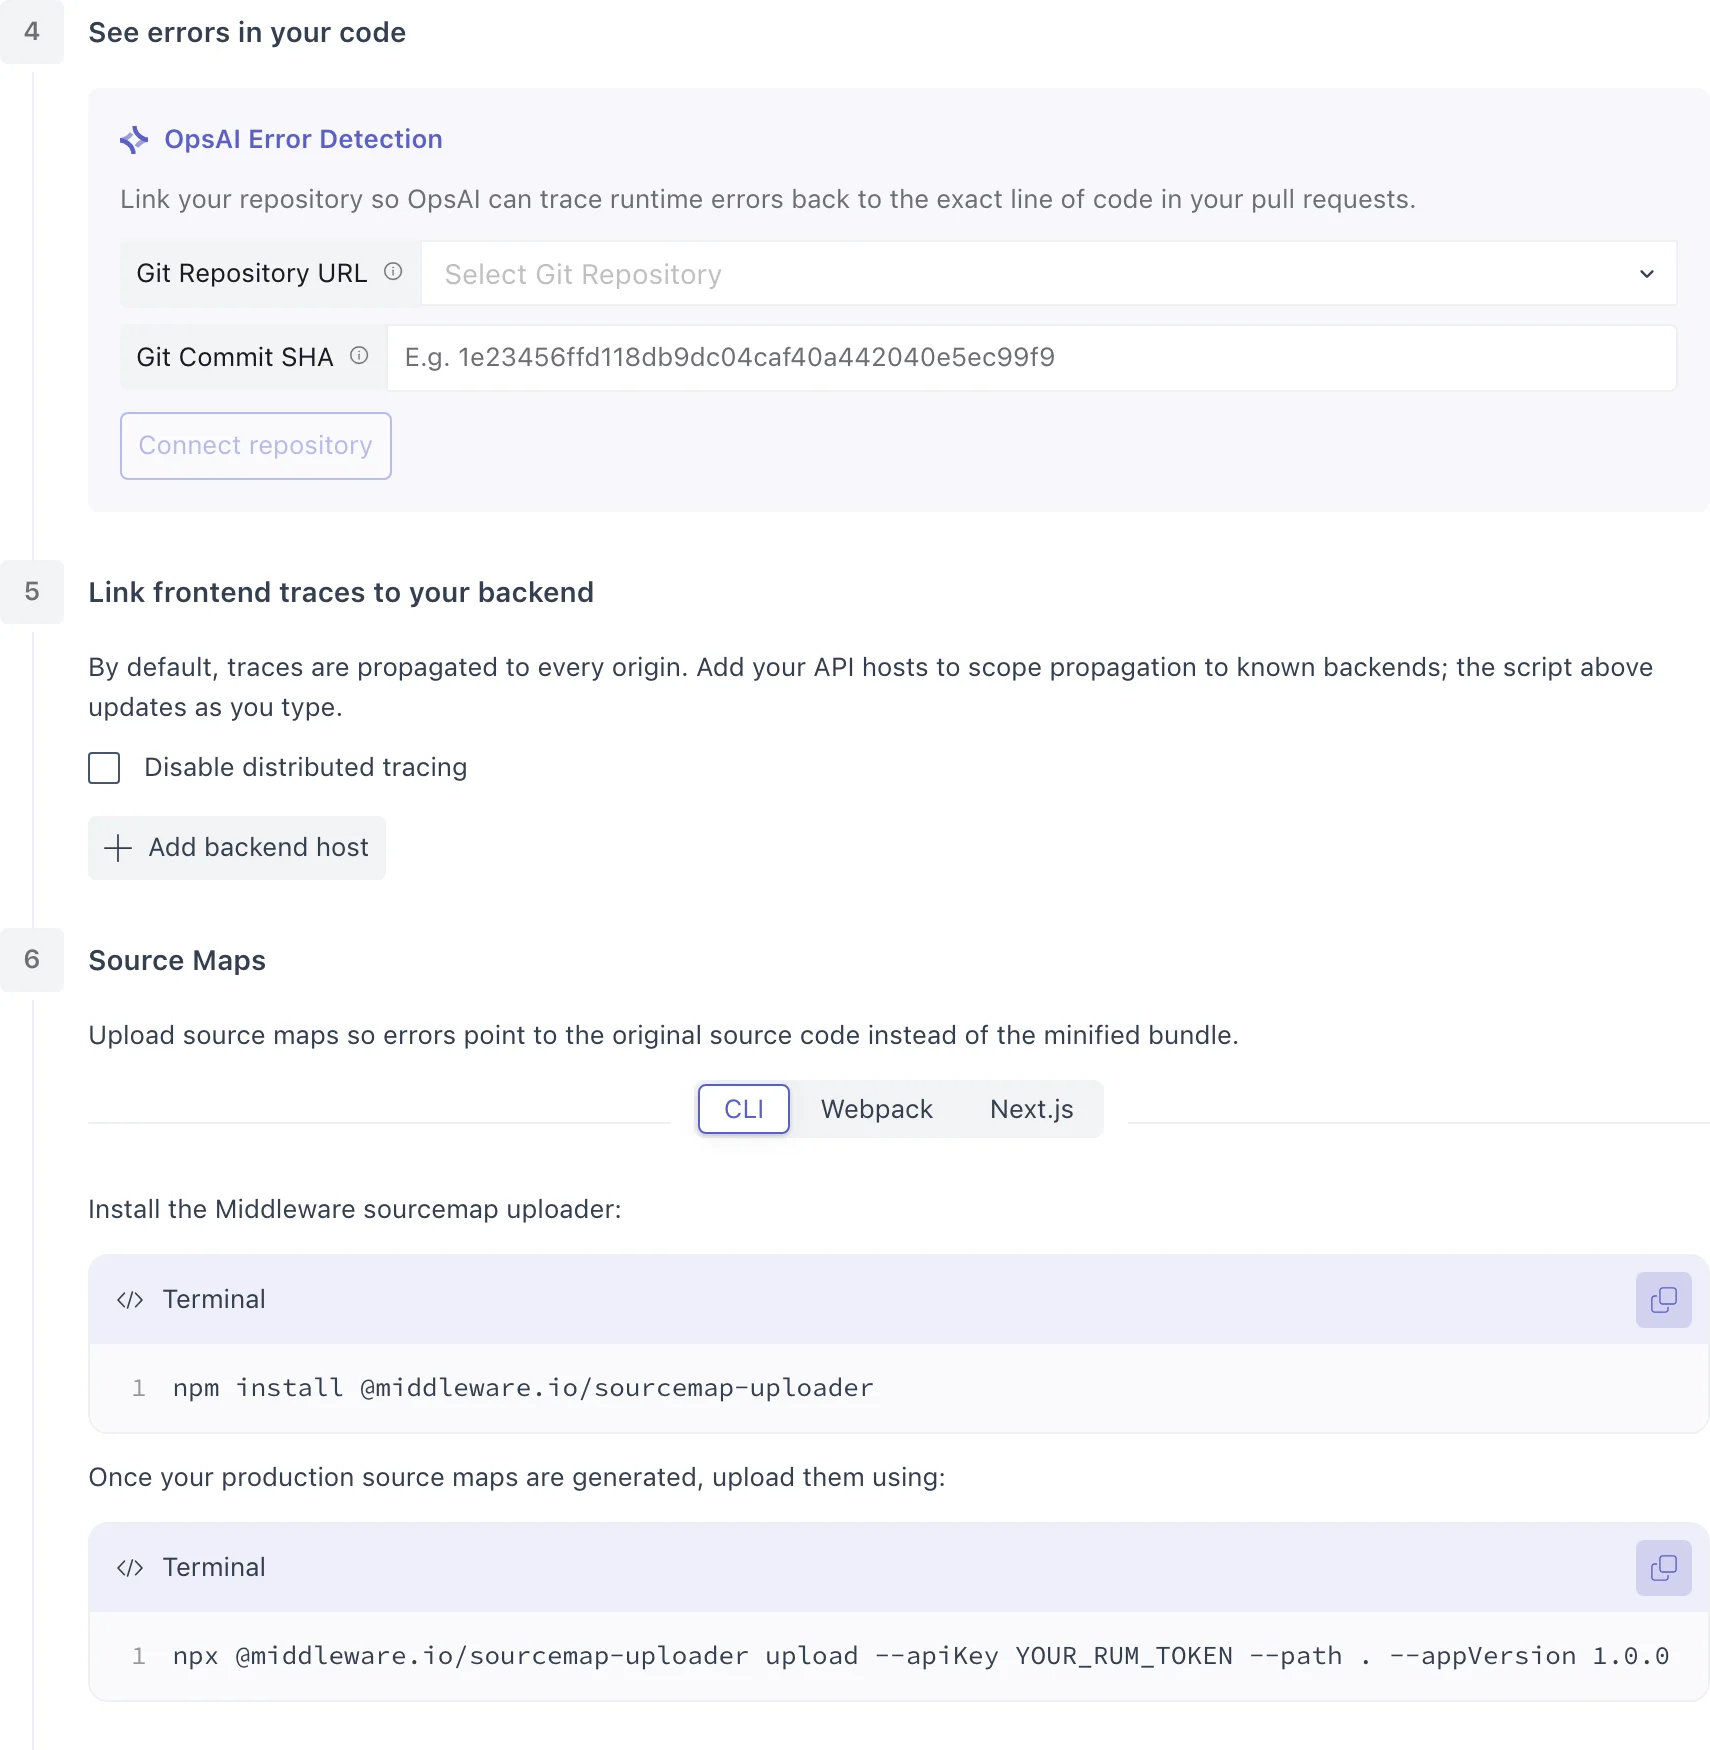
- See errors in your code links the application to a GitHub or Bitbucket repository, so OpsAI can trace runtime errors back to the exact line of code. Set up the GitHub or Bitbucket integration first, then pick the Git Repository URL, enter the Git Commit SHA of your deployed build, and select Connect repository. See Error Debugging.
- Link frontend traces to your backend controls trace propagation. By default, trace headers are added to requests to every origin. Select Add backend host to send them only to your own API hosts, or select Disable distributed tracing. The script in step 1 updates as you type.
- Source maps shows commands to upload source maps with the CLI, Webpack, or Next.js, so errors point to your original source code instead of the minified bundle.
Confirm the first session#
After you create the application, the status at the top of the left panel shows Listening for your first session. It checks for data every 10 seconds, and the last step on the page has a Check now button for an immediate check.
Load your site, or build and run your app on a device or emulator, and use it for a moment. Data usually arrives within a minute. The status then changes to Receiving data with the number of sessions in the last 24 hours.
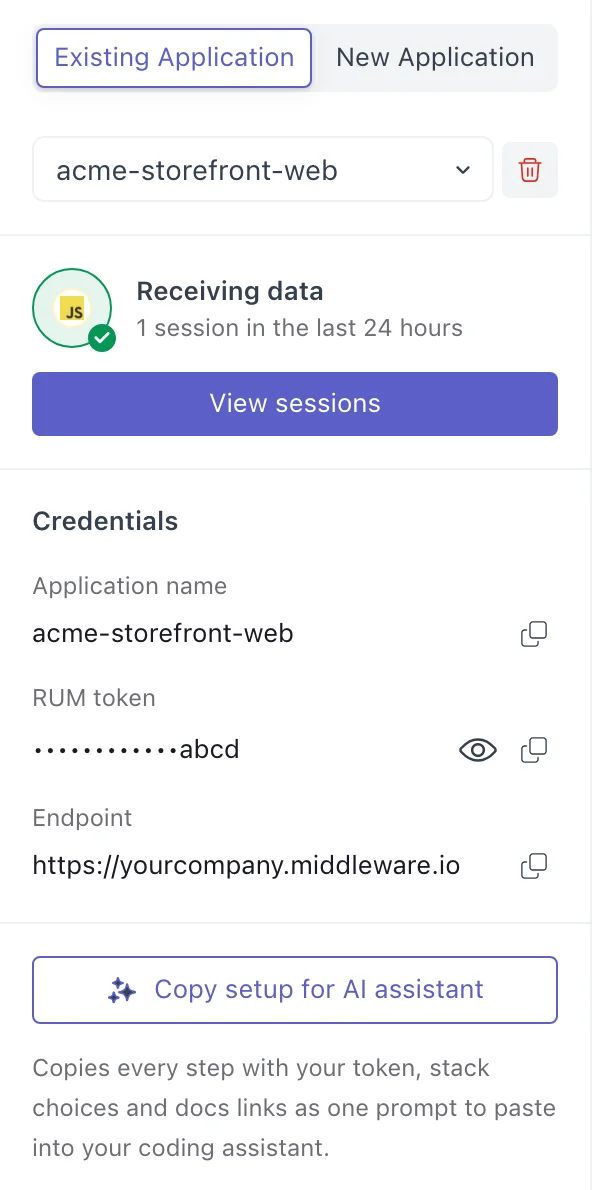
Select View sessions to open the application in the Session Explorer, where you can replay the session.
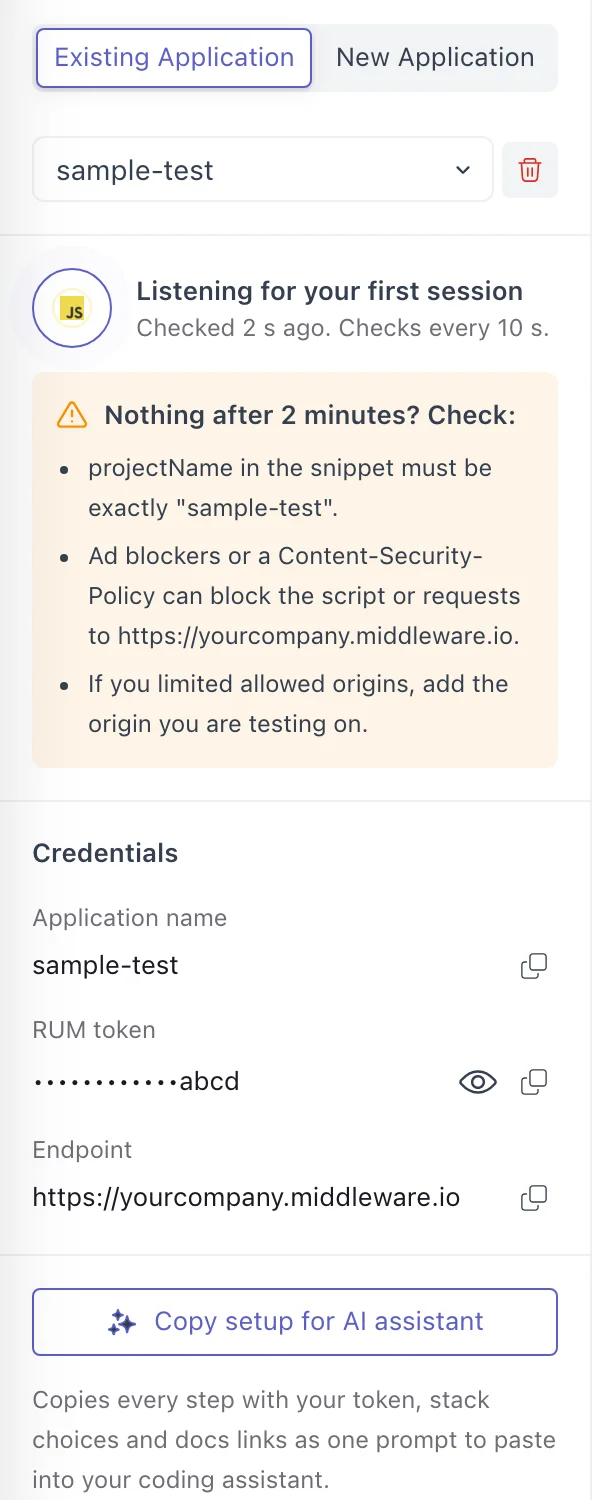
If nothing arrives after two minutes, the panel lists checks for your platform:
| Platform | Checks |
|---|---|
| Browser | projectName in the script matches the application name exactly. Ad blockers or a Content-Security-Policy are not blocking the script or requests to your endpoint. If you set allowed origins, the origin you are testing on is in the list. |
| iOS | The Xcode console shows no error from build(), which logs and returns false when a required value is missing. The service and project name match the application name. The device can reach your Middleware URL. |
| Android | The Application class is registered with android:name in AndroidManifest.xml, so onCreate runs. The service and project name match the application name. The device can reach your Middleware URL. |
| React Native | The native app was rebuilt after installing (pod install, Gradle sync). A Metro reload does not load native modules. The names and network access are correct, as for iOS and Android. |
| Flutter | The app was fully rebuilt after adding the SDK. Hot reload does not load the native SDKs. The names and network access are correct, as for iOS and Android. |
Note: The browser SDK skips headless browsers and automation tools such as Puppeteer, Playwright, and Selenium by default. Test from a regular browser, or see Bot traffic filtering.
Permissions#
Creating an application needs permission to add RUM applications. Changing the capture settings, tracing, or repository of an existing application needs permission to edit them. Without these permissions, the page is read-only and shows a tooltip explaining why. Ask an administrator for access.