Projects
Users have access to all Projects and can see details in the Usage section. Per Project user access has not ben released.
Projects are the recommended way to organize environments like development (dev), staging (stage), and production (prod) in the Middleware Platform.
Each Project is fully isolated and includes its own:
- Subdomain
- Platform view
- API key
This separation reduces noise, ensures environments remain visually distinct, and enables environment-specific API keys. For example, creating Projects for dev, stage, and prod allows you to visually and functionally separate monitoring data, metrics, and logs for each environment.
Create New Project
Step 1: Navigate to Projects
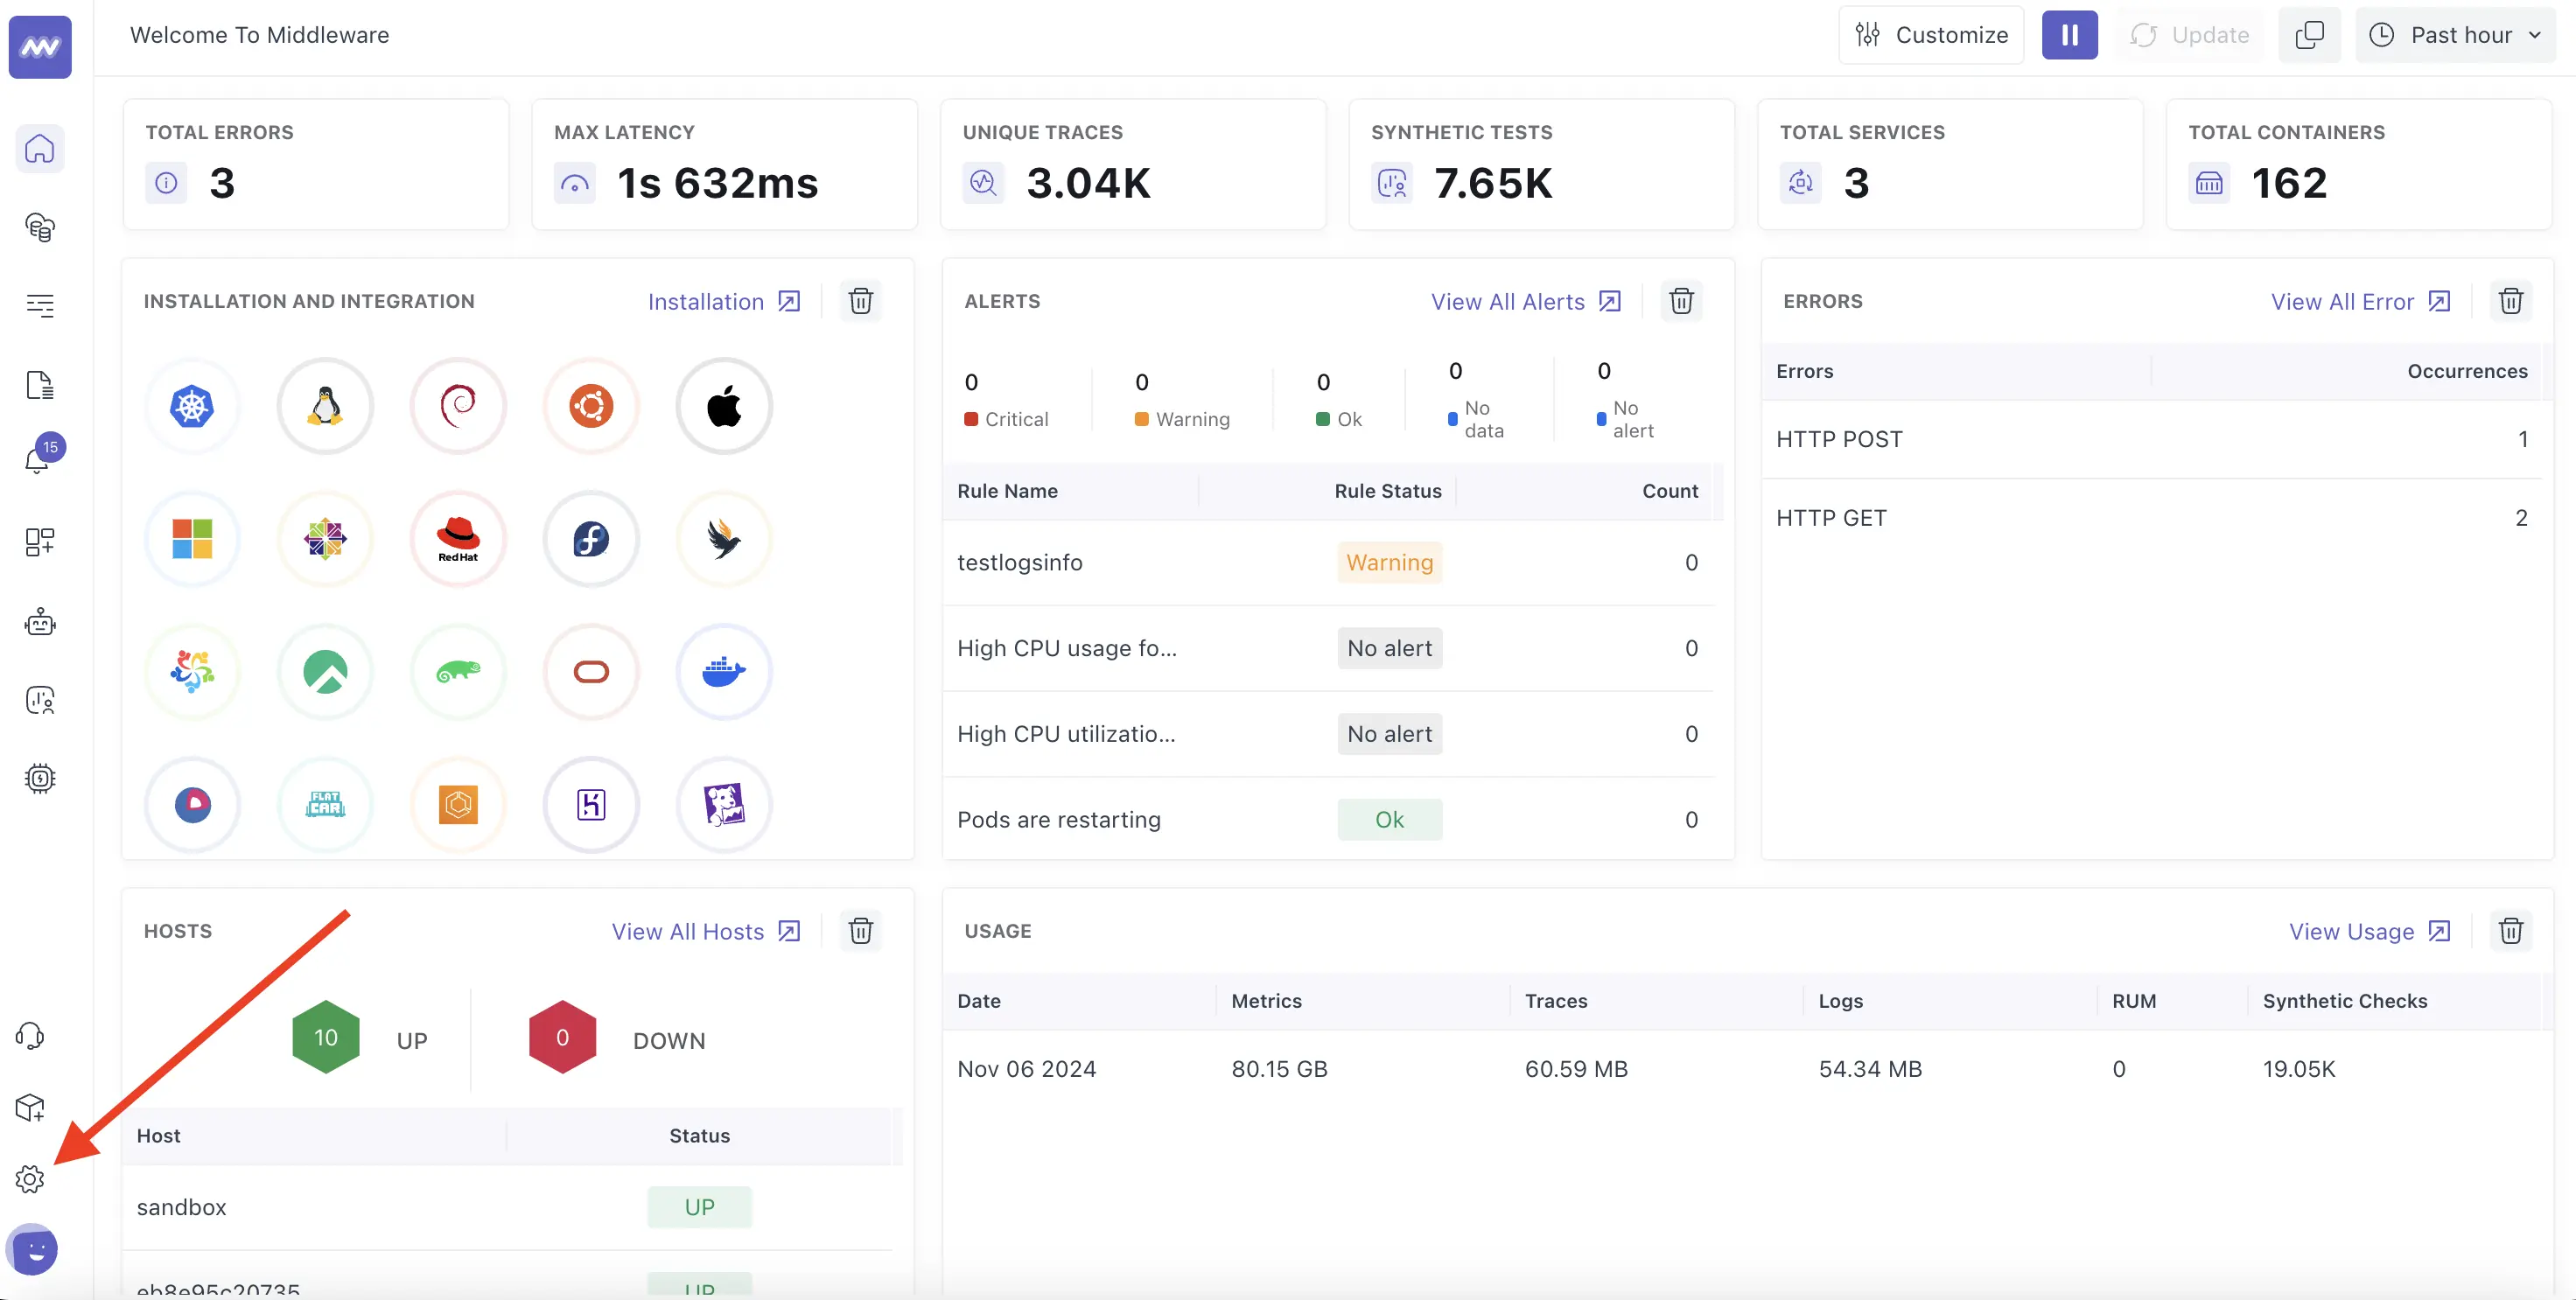
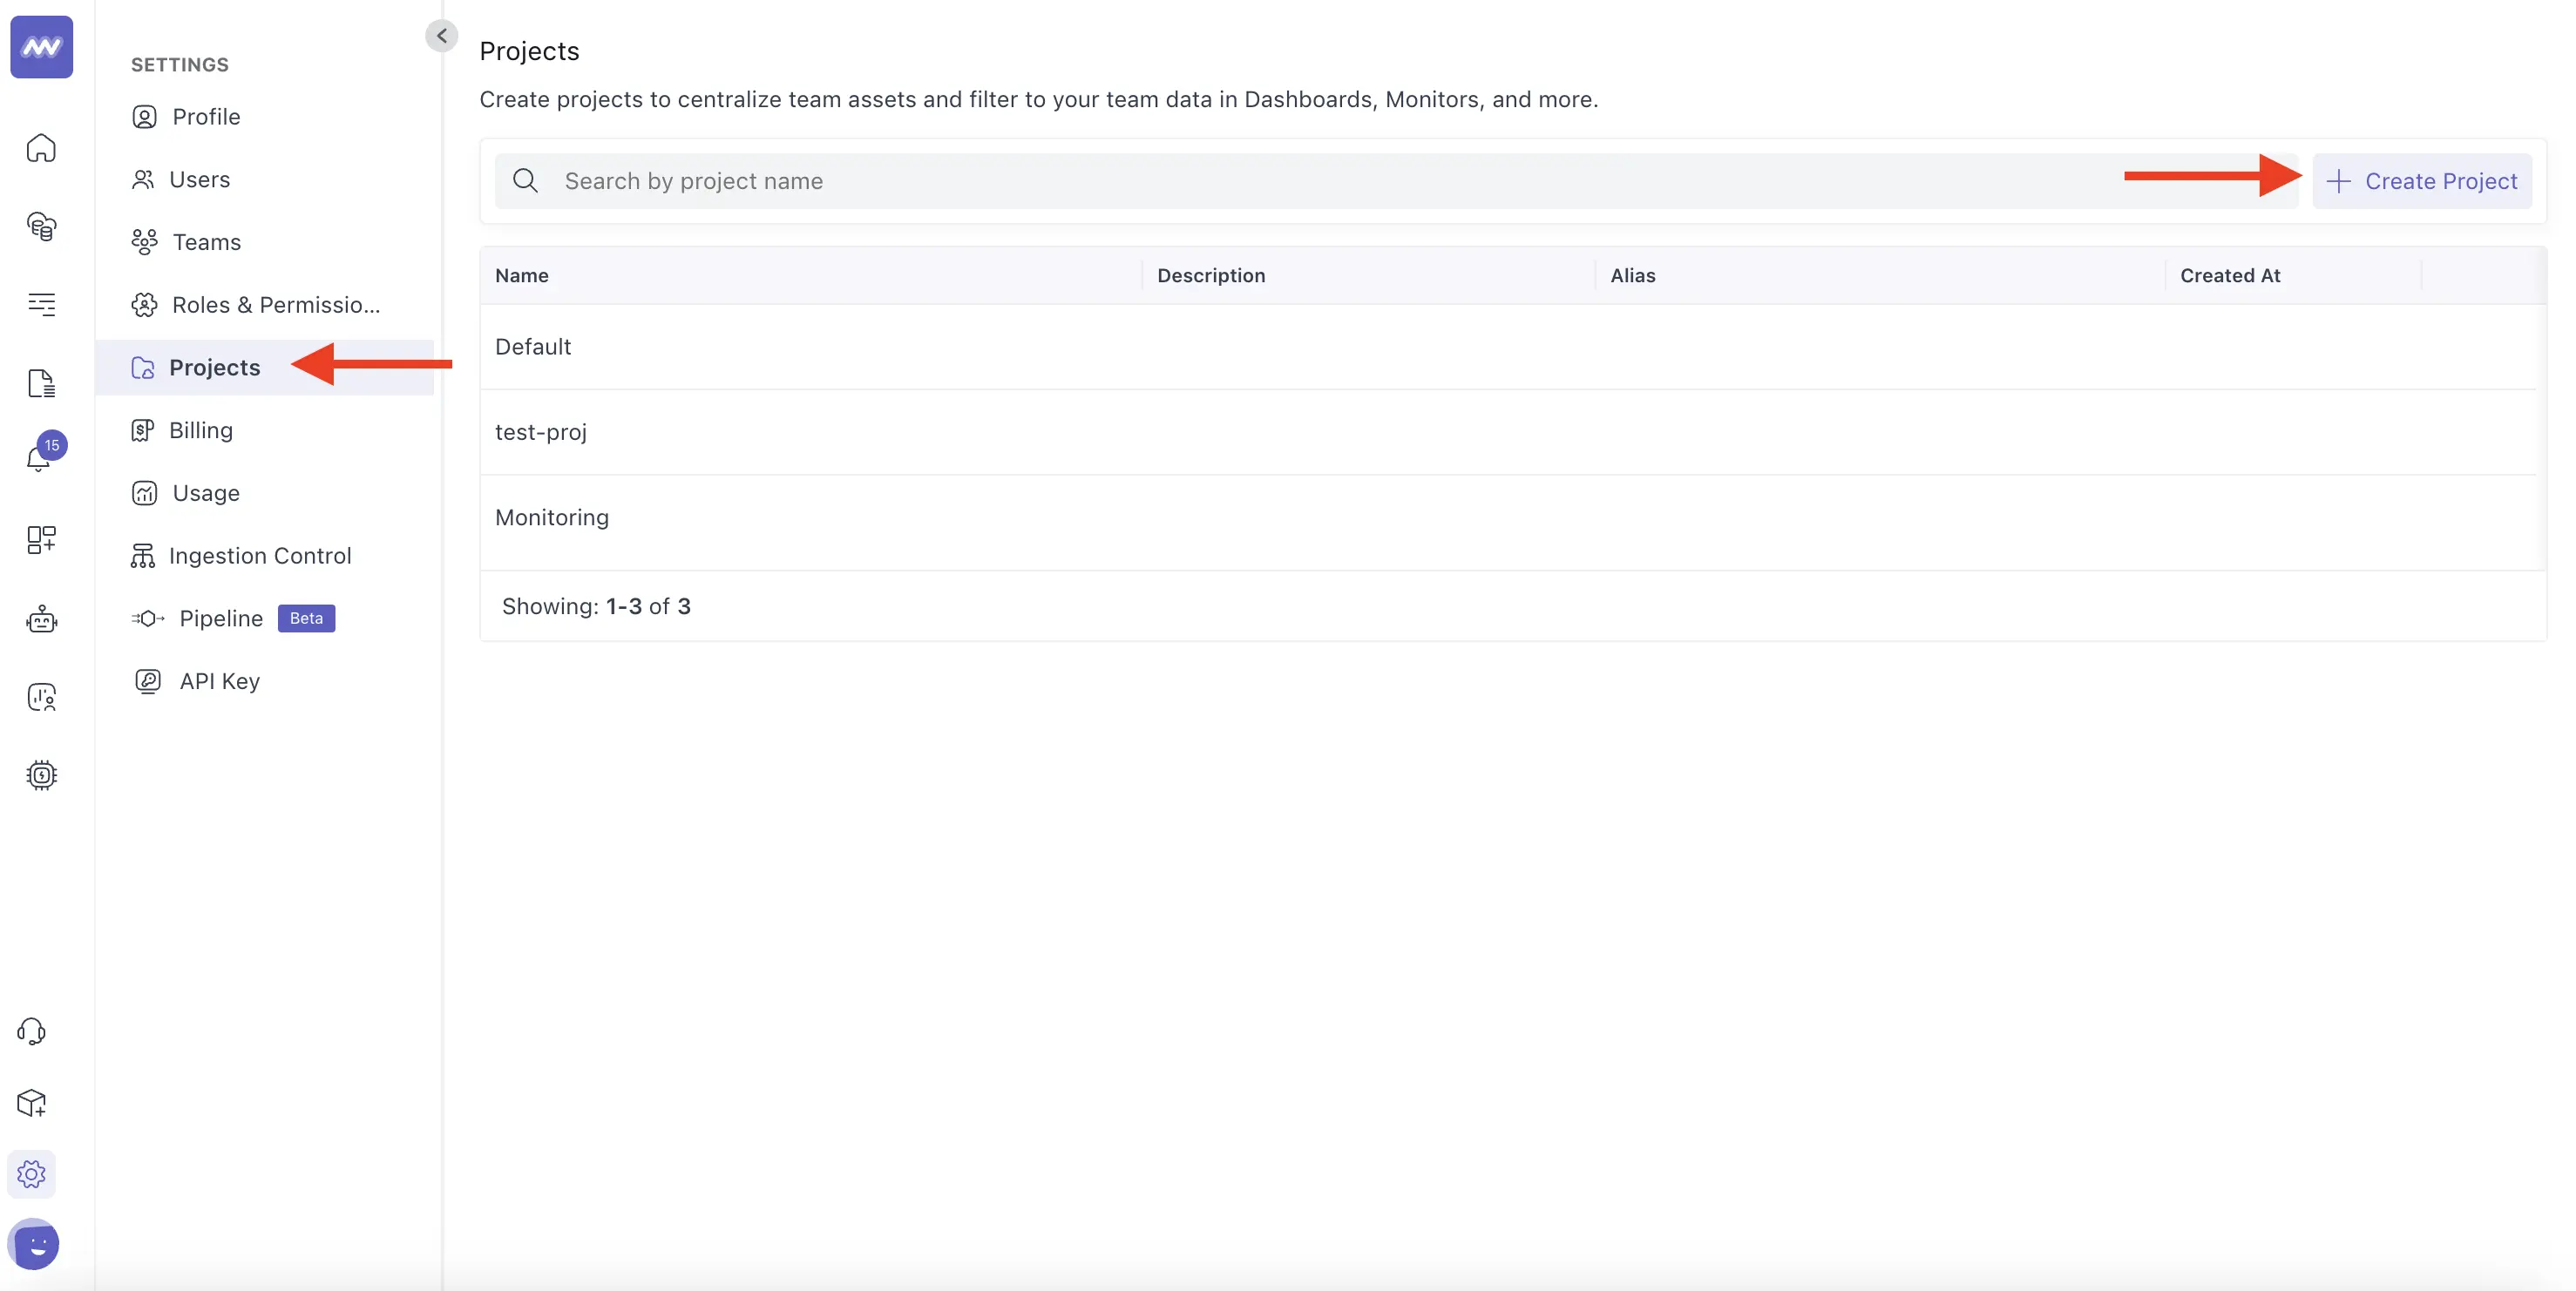
Navigate to Settings (Gear Icon) > Projects > and click + Create Project:


Step 2: Enter Project Details
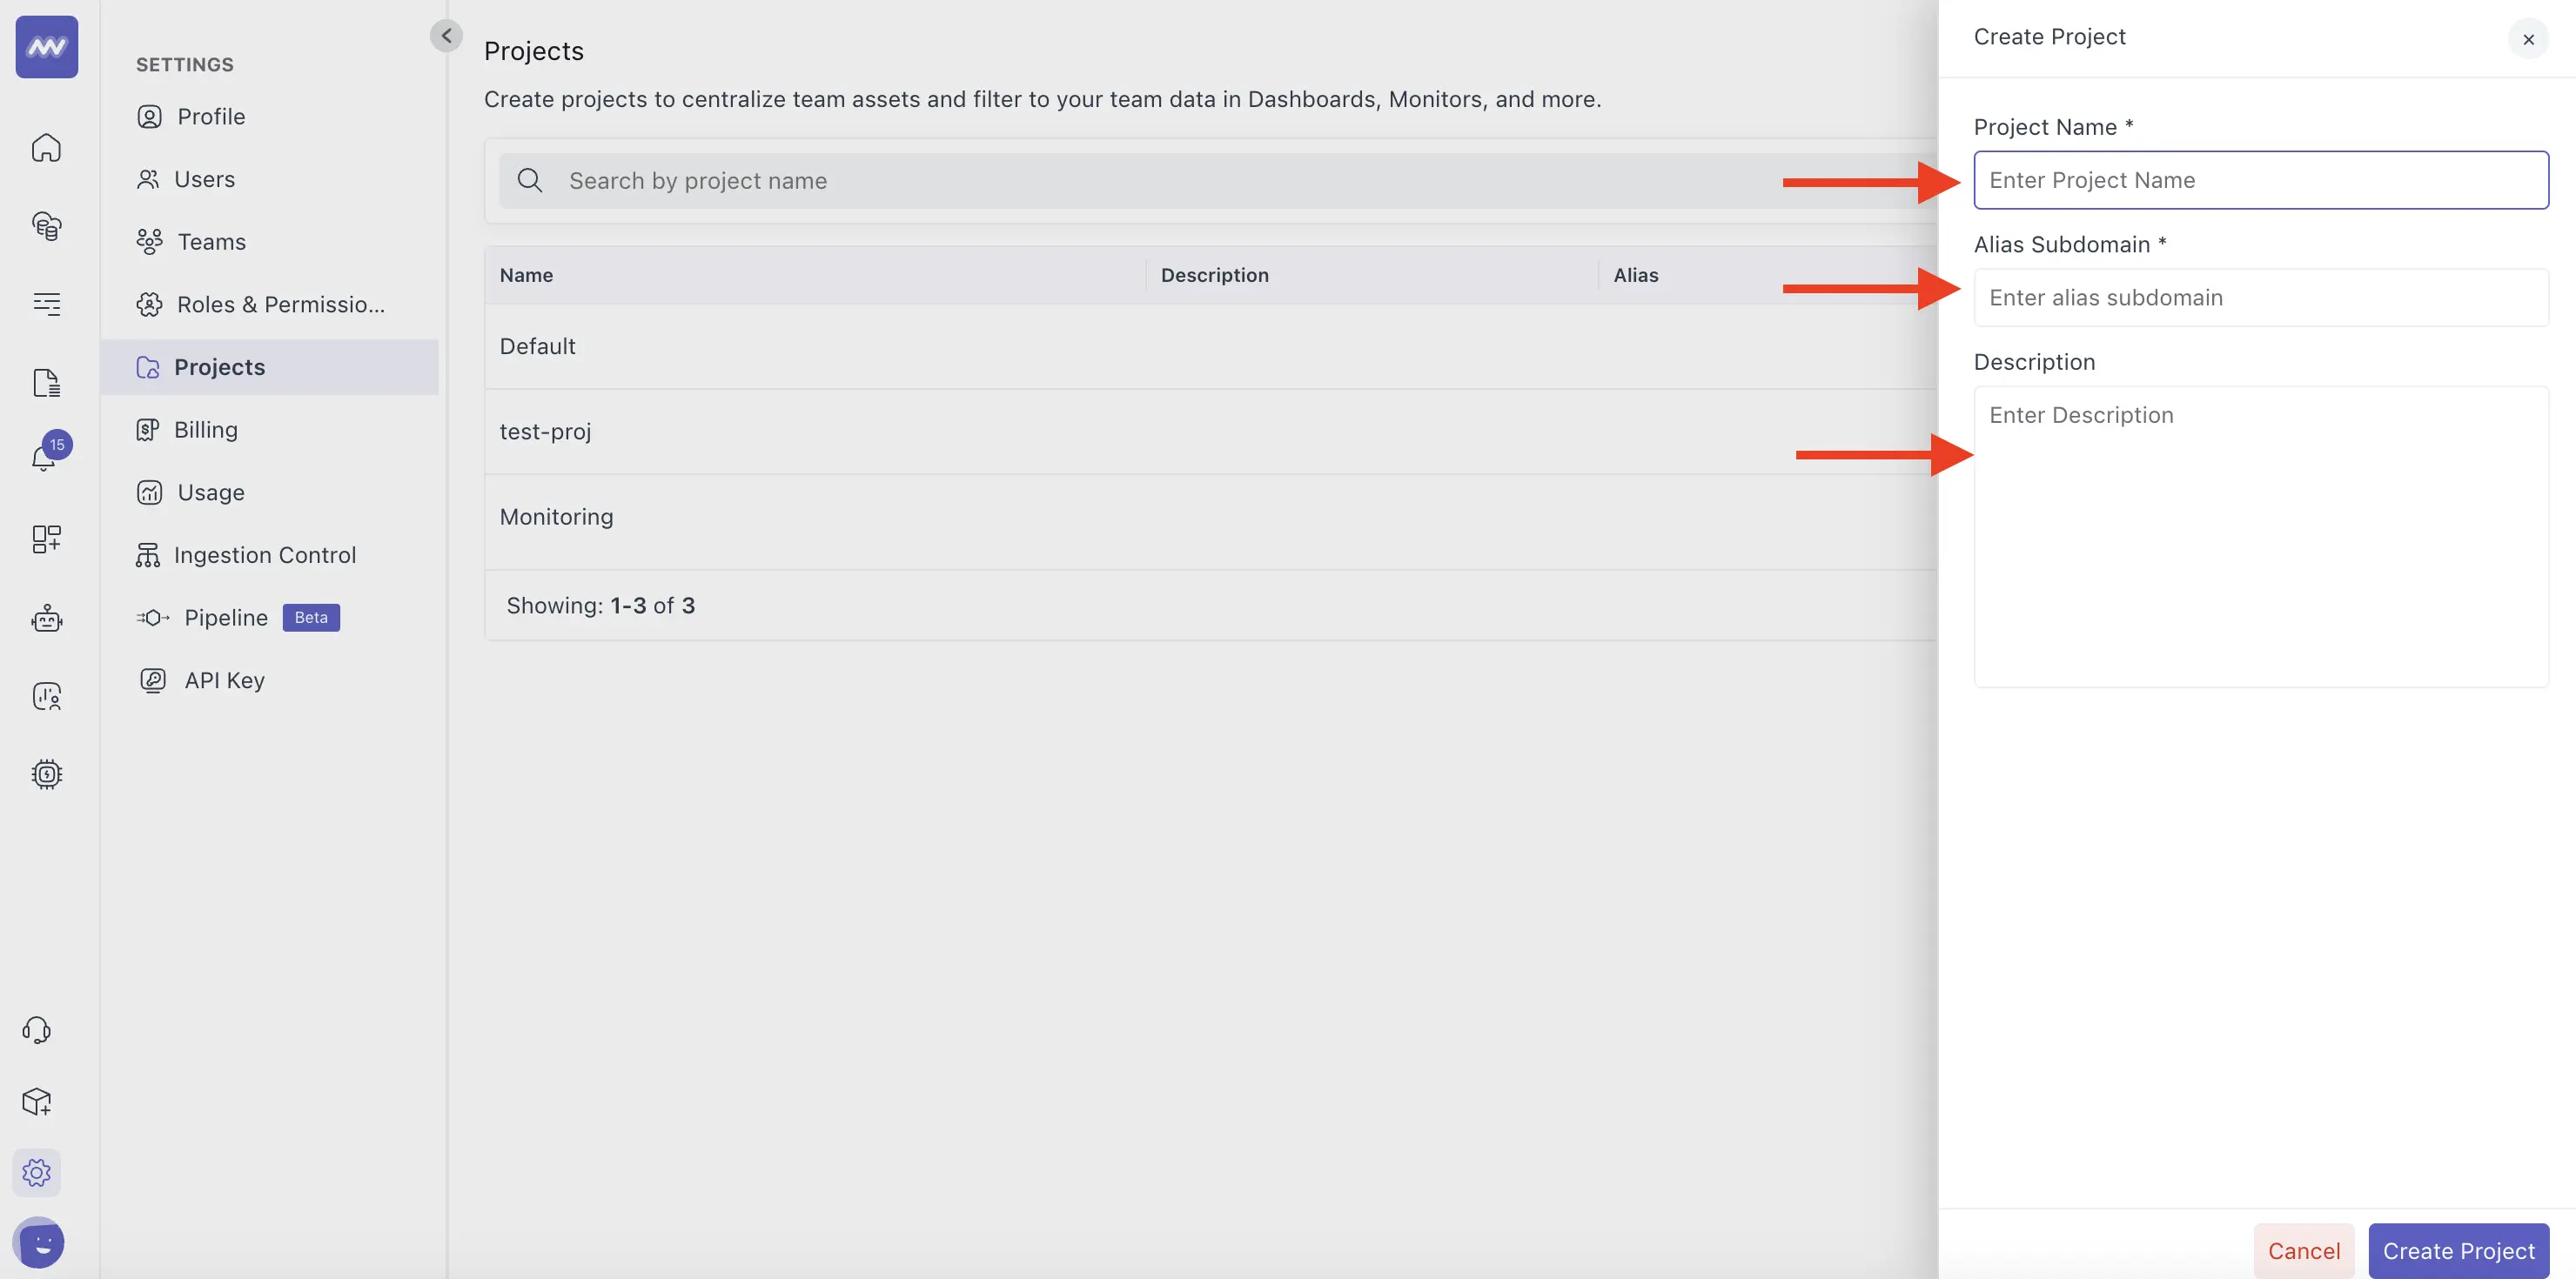
The name of your Alias will be the default subdomain (e.g., the subdomain & URL of the below account will be new-project.middleware.io). Subdomains must be unique across all Middleware Accounts and are adjustable at any time.
Enter your Project Name, Alias Subdomain, and a Description:

Step 3: Use Your New Project
After creating a new Project, you can either follow your desired installation guide or come back to this page and use the provided .env below
MW_TARGET=https://<MW_UID>.middleware.io:443
MW_API_KEY=<MW_API_KEY>
Switch Between Projects
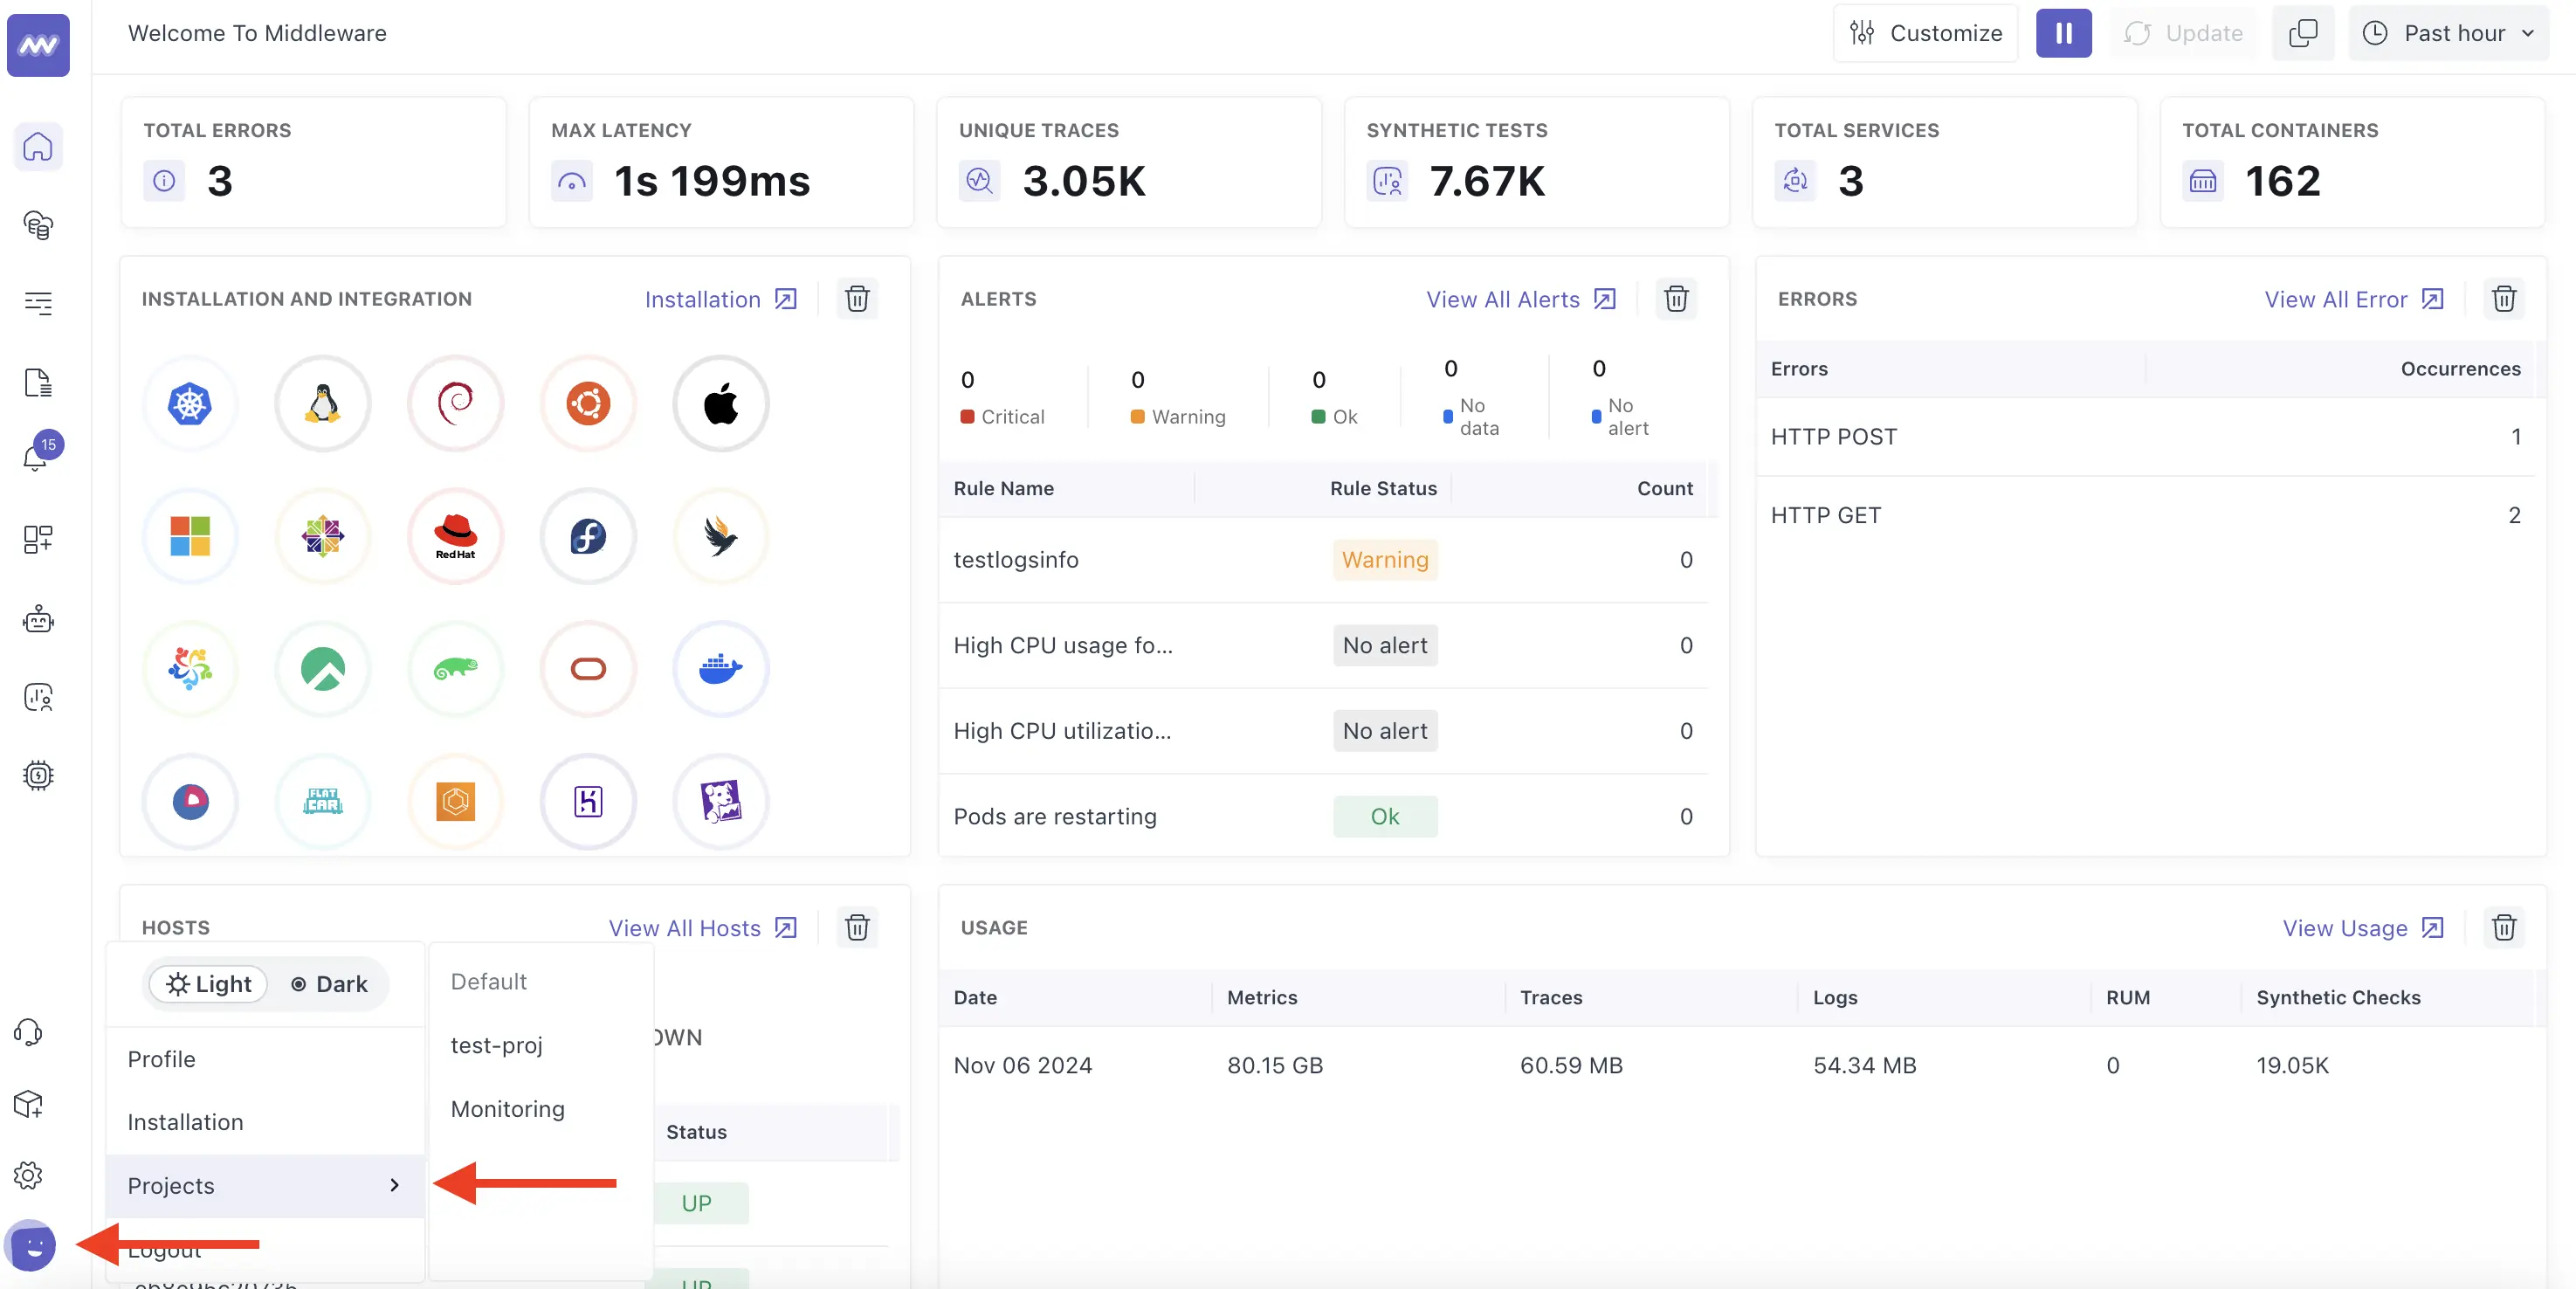
Navigate to your Profile Icon, select Projects, and choose your desired Project:

Install Project Modules
You are required to install modules for new Projects on your own machine to access all data within that Project. See the related Getting Started guides to install all necessary modules.
Need assistance or want to learn more about Middleware? Contact our support team at [email protected] or join our Slack channel.