Install the Middleware.io Agent on macOS
This guide walks you through installing the Middleware Agent (MW Agent) on a macOS machine. These instructions can also be found on the Installation page in the Middleware application.
We offer an install script specifically for macOS. Please note that not all macOS versions are supported. A list of supported versions can be found under Prerequisites.
Prerequisites#
- macOS Version: v10.15 (Catalina) or later
- Hardware: Apple Silicon (M1/M2/M3/M4) or Intel (x86_64)
- Permissions: You’ll need admin (sudo) access to install
Install#
There are two ways you can install the Middleware agent on macOS. You can either use the one-liner command execution or go with the GUI installer.
Copy & paste by replacing the placeholders:
1MW_API_KEY="<MW_API_KEY>" MW_TARGET="https://<MW_UID>.middleware.io:443" \
2bash -c "$(curl -L https://install.middleware.io/scripts/mw-macos-agent-install.sh)"
The above command will trigger the following:
- Auto-detects your CPU (Apple Silicon vs Intel) and installs into
/opt/mw-agent. - Config files land in
/etc/mw-agent; logs in/var/log/mw-agent.
- Download the PKG for your architecture from GitHub:
- Apple Silicon: Middleware agent for Apple Silicon
- Intel: Middleware package for Apple Intel machine
- Double-click the
.pkgand follow the wizard. - Enter your
MW_API_KEYandMW_TARGETwhen prompted.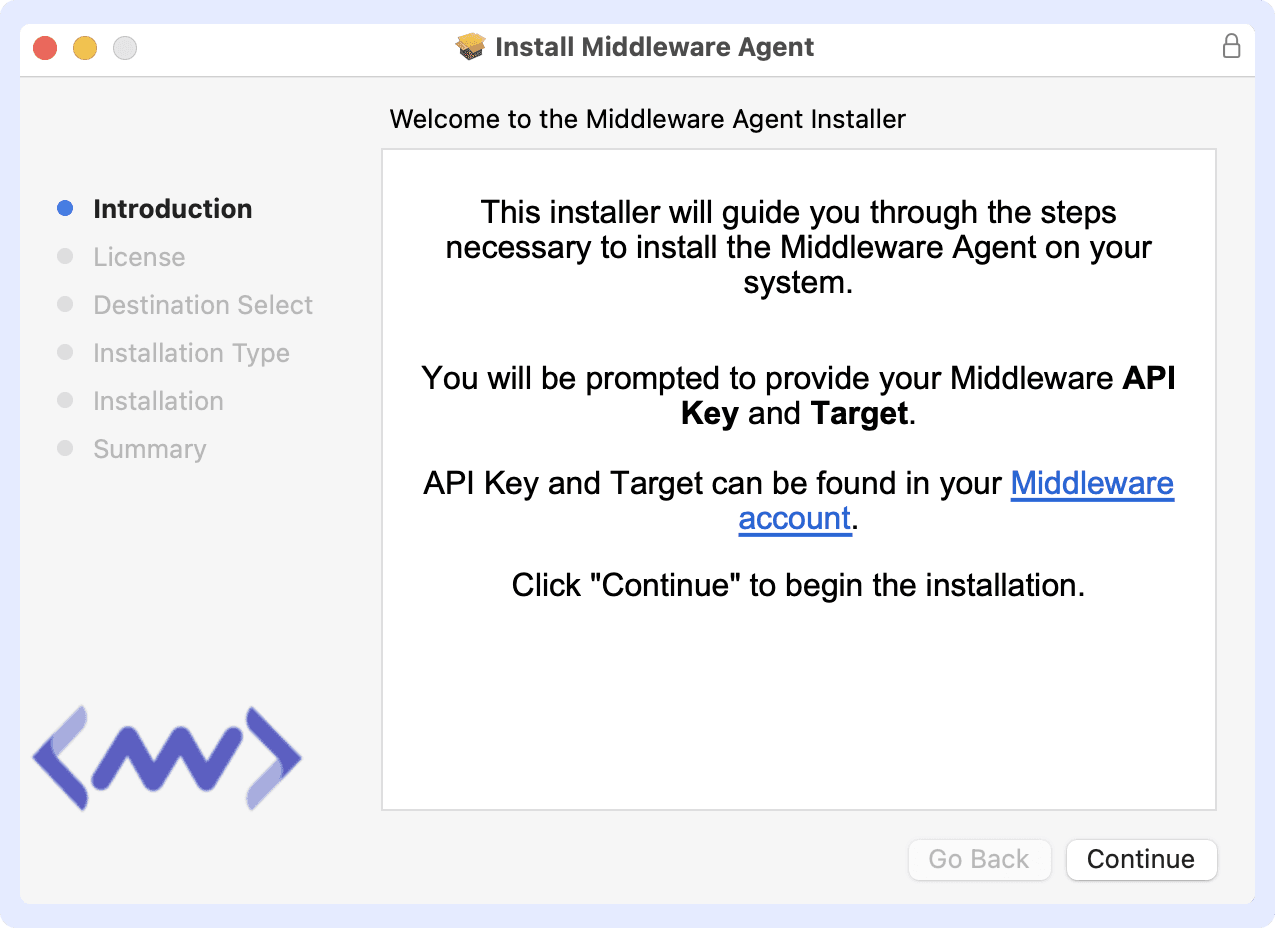
Agent Directory Layout#
| Path | Contents |
|---|---|
/opt/mw-agent | Agent binary & libraries |
/etc/mw-agent | mw-agent.yaml & conf.d/ |
/var/log/mw-agent | Agent log files |
Why this matters: A clear, sandboxed layout makes upgrades, backups, and troubleshooting straightforward.
Verify Installation#
Once you are done with the previous steps, the installation can be verified using the following:
1sudo launchctl list | grep mw-agentA healthy agent returns something like:
133105 0 io.middleware.mw-agentCollect Docker Container Logs#
On macOS, Docker Desktop runs containers inside a Linux VM, so container log files (/var/lib/docker/containers) are not visible to the MW Agent on the host. Instead, use Docker's fluentd log driver to forward container logs to the MW Agent's Fluent Forward receiver, which listens on port 8006 by default.
With Docker Engine 20.10 or later, Docker also keeps a local copy of the logs (dual logging), so docker logs continues to work after switching to the fluentd driver.
- Open Docker Desktop and go to Settings → Docker Engine.
- Add the
log-driverandlog-optskeys to the existing JSON configuration:1{ 2 "log-driver": "fluentd", 3 "log-opts": { 4 "fluentd-address": "host.docker.internal:8006", 5 "fluentd-async": "true", 6 "tag": "{{.Name}}", 7 "cache-max-size": "20m", 8 "cache-max-file": "5", 9 "cache-compress": "true" 10 } 11} - Click Apply & restart.
The log driver of an existing container cannot be changed. Remove the container and recreate it with the fluentd log driver:
1docker run -d --name <container-name> \
2  --log-driver=fluentd \
3  --log-opt fluentd-address=host.docker.internal:8006 \
4  --log-opt fluentd-async=true \
5  --log-opt tag="{{.Name}}" \
6  --log-opt cache-max-size=20m \
7  --log-opt cache-max-file=5 \
8  --log-opt cache-compress=true \
9  <image>
Add a logging section to each service, then run docker compose up -d --force-recreate:
1services:
2  myapp:
3    logging:
4      driver: fluentd
5      options:
6        fluentd-address: host.docker.internal:8006
7        fluentd-async: "true"
8        tag: "{{.Name}}"
9        cache-max-size: "20m"
10        cache-max-file: "5"
11        cache-compress: "true"
The default log driver only applies to containers created after the change. Recreate existing containers for them to use the fluentd driver. Keep fluentd-async set to "true", otherwise containers fail to start when the MW Agent is not running.
Log options
| Option | Description |
|---|---|
fluentd-address | Address of the MW Agent Fluent Forward receiver |
fluentd-async | Buffers logs in the background instead of blocking the container when the agent is unreachable |
tag | Tag attached to each log; {{.Name}} uses the container name, which appears as the log source in Middleware |
cache-max-size, cache-max-file, cache-compress | Size, count, and compression of the local log copy used by docker logs |
Verify that containers are using the fluentd driver:
1docker info --format '{{.LoggingDriver}}'
2docker ps -q | xargs docker inspect --format '{{.Name}} {{.HostConfig.LogConfig.Type}}'
Container logs will appear in the Middleware Logs section with the container name as the source.
Troubleshooting#
Common issues and how to resolve them:#
- Multiple Agents Running
- Only one MW Agent should be installed per macOS host.
1sudo launchctl list | grep mw-agent - If you see more than one entry, remove duplicates:
1sudo /opt/mw-agent/uninstall.sh
- Only one MW Agent should be installed per macOS host.
- No Data Appearing in Middleware.io
- Network access: Verify the host can reach your
MW_TARGETURL on port 443. - API key validity: Double-check that
MW_API_KEYis correct. - Proxy/firewall: Ensure no proxy or firewall is blocking outbound traffic.
- Network access: Verify the host can reach your
- Installation Script Errors
- Permission issues: Rerun the install command with
sudo. - Inspect logs:
1ls /var/log/mw-agent/
2tail -n 50 /var/log/mw-agent/install.log
- Permission issues: Rerun the install command with
If errors persist, contact support with the log excerpt.
Uninstall the Middleware.io Agent#
- Run the uninstall script:
1sudo /opt/mw-agent/uninstall.sh - Confirm cleanup:
1ls /opt/mw-agent         # should report "No such file or directory"
2ls /etc/mw-agent         # no directory
3ls /var/log/mw-agent     # no directory
Need assistance or want to learn more about Middleware? Get in touch with us via our Contact Us or join our Slack channel.