Okta SSO
This guide shows how to configure Okta as your SSO provider for Middleware. It supports both SP-initiated (start at Middleware) and IdP-initiated (start at Okta) flows.
Supported Flows
- Service Provider (SP)–initiated SSO: user begins on the Middleware’s login page, is redirected to Okta, and returns signed in.
- Identity Provider (IdP)–initiated SSO: user launches the Middleware from the Okta side.
Prerequisites
- An Okta tenant.
- Okta administrator privileges for that tenant.
Part A: Add Okta inside Middleware
You’ll first enable Okta in Middleware’s Installations area, then log in with Okta to confirm.
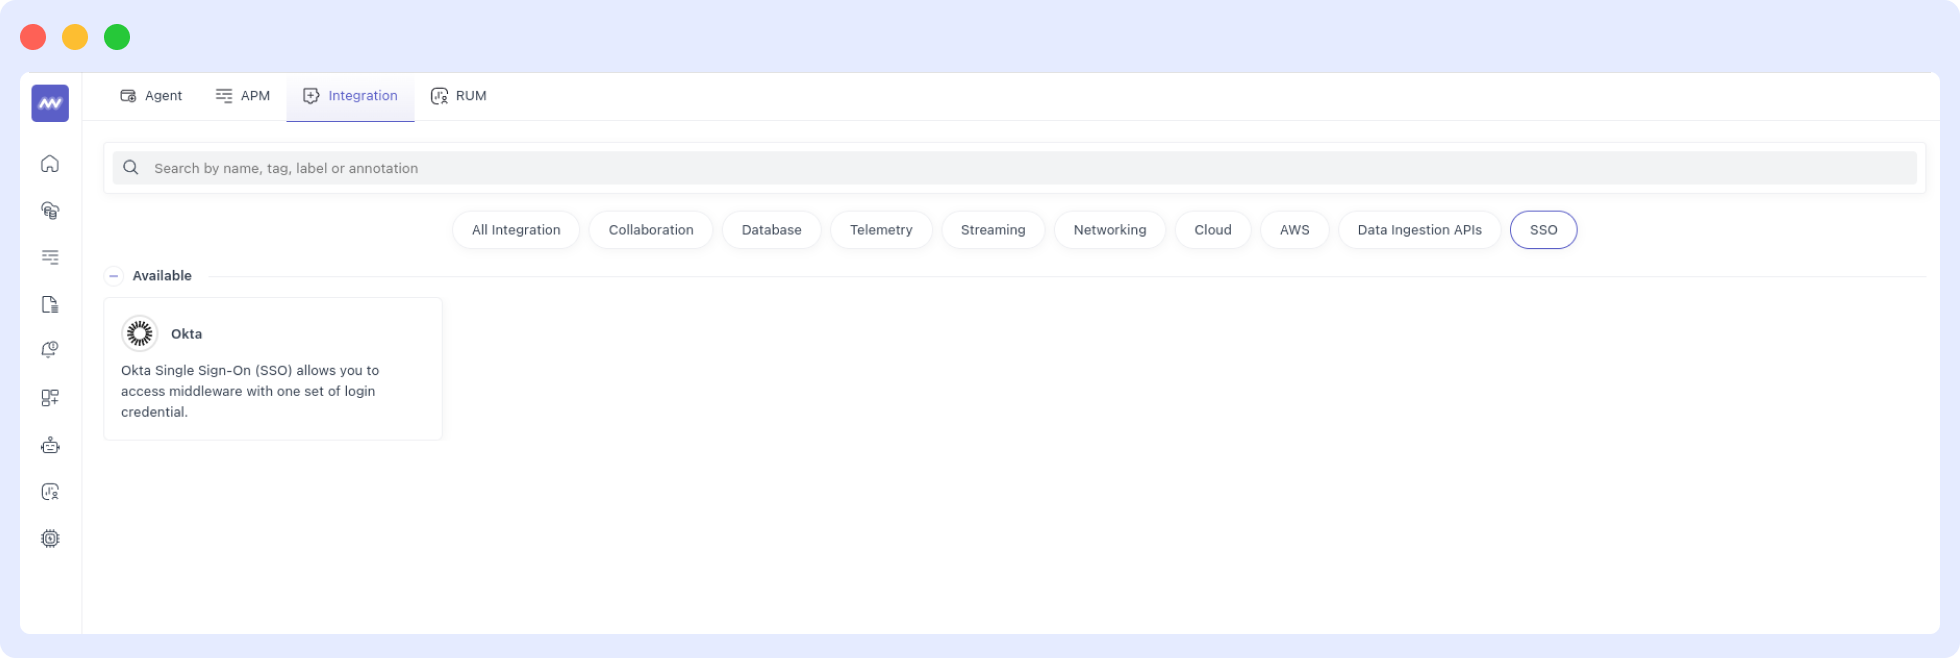
1 Go to Installations and Locate Okta
Open your Middleware account’s Installation page and look for the Okta integration card. (It sits under the SSO category.)

This is where you’ll enter your protocol details in the next step.
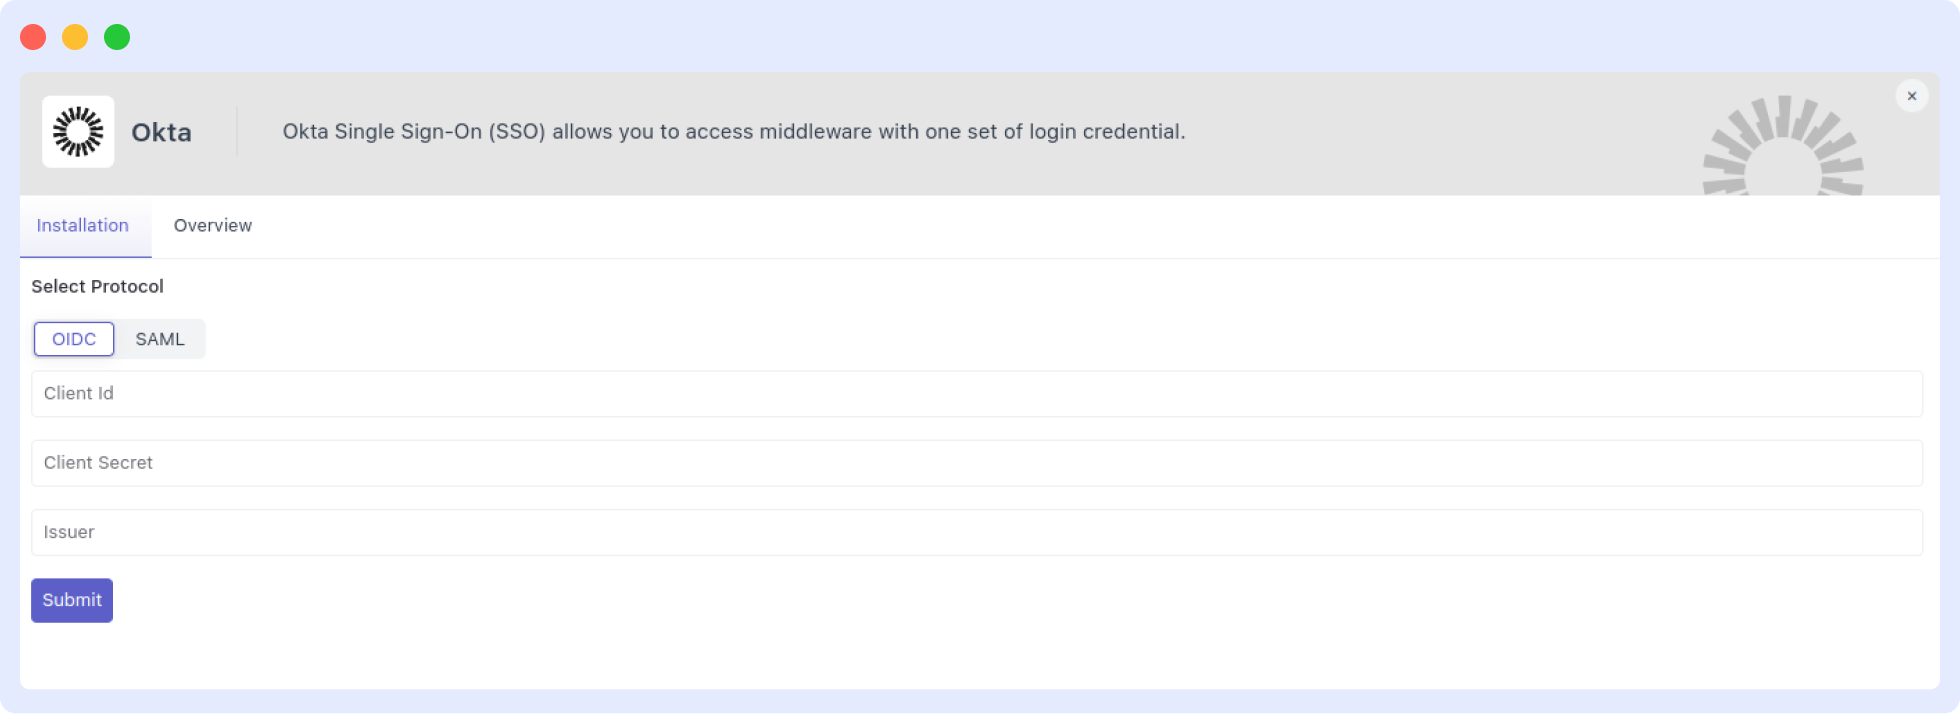
2 Open the Okta Integration and Choose the Protocol
Click the Okta card to open the configuration form. Select OIDC or SAML, then fill in the fields for the chosen protocol and save.

After you save the protocol details, all users in your Middleware account are automatically assigned to this Okta integration.
3 Start Login from Middleware
Go to your Middleware login page, click the Okta option, and enter the same email you use for your Middleware user.
4 Authenticate at Okta
You’ll be redirected to Okta to sign in with your Okta username/password. If successful, Middleware completes the login.
Part B: Configure Okta (choose one protocol path)
Follow these steps in Okta Admin and copy values back to Middleware’s OIDC form.
1 Applications
In Okta Admin, go to Applications → Applications.
2 Add “Middleware” from the App Catalog
Click Browse App Catalog, search for Middleware, and add the app.
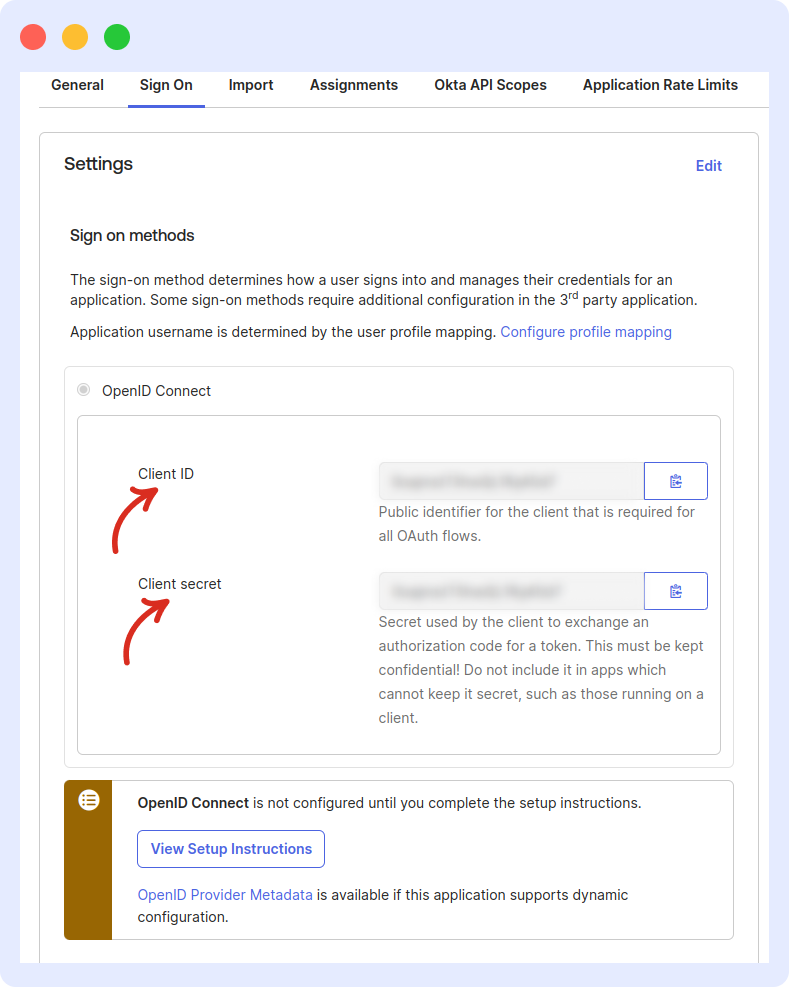
3 Copy the Client ID
Open the app’s Sign On tab and copy Client ID. Paste it into the Client ID field in Middleware’s Okta (OIDC) form.

4 Copy the Client Secret (“Okta Secret”)
From the same Sign On tab, copy Client secret and paste it into the Client Secret field in the Middleware form.
5 Get the Issuer URL from OpenID Provider Metadata
In Sign On, open OpenID Provider Metadata, then copy the Issuer URL. Paste it into the Issuer field in Middleware’s form.
6 Verify Values
Double-check Client ID, Client Secret, and Issuer. Incorrect values (e.g., Issuer typo) will break authentication.
7 Save in Middleware
Return to Middleware and Save the OIDC configuration.
Follow these steps in Okta Admin and copy values back to Middleware’s SAML form.
1 Applications
In Okta Admin, go to Applications → Applications.
2 Add “Middleware” from the App Catalog
Click Browse App Catalog, search for Middleware, and add the app.
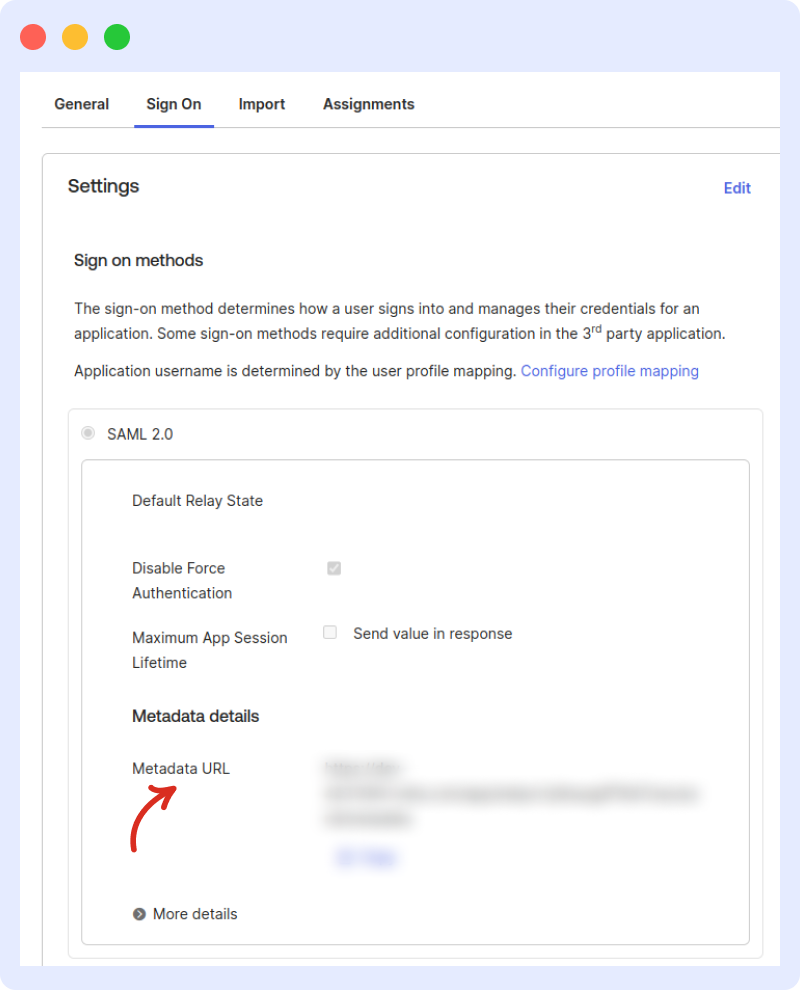
3 Copy the Metadata URL
Open the app’s Sign On tab and copy the Metadata URL.

4 Paste the Metadata URL
In Middleware’s Okta (SAML) form, paste the Metadata URL into the field provided.
5 Verify Values
Confirm the Metadata URL is correct; wrong values will prevent authentication.
6 Log In
From Middleware’s login page, click Okta, and enter the same email used on your Middleware user to authenticate via Okta.
Supported SAML attributes:
| Name | Value |
|---|---|
email | user.email |
SP-initiated SSO (What Users Do)
- Go to Middleware’s Login page (Okta option).
- Use the third login option, enter your email, and click Submit.
- If prompted, enter your Okta username/password.
- On valid credentials, you are redirected back signed in to Middleware.
Need assistance or want to learn more about Middleware? Contact our support team at [email protected] or join our Slack channel.