Import API Tests from cURL and Postman
You don't have to rebuild an API request by hand to monitor it. Paste a cURL command, or upload a Postman Collection, and Middleware fills in the method, URL, headers, cookies, body and authentication for you. You can turn the imported requests into:
- Single-step test: one request fills the standard HTTP test form.
- Multi-step test: each selected request becomes a step in one multistep monitor, in the order you pick them.
- Separate test each: each selected request becomes its own test. All of them share the assertions, locations, frequency and alerts you configure once.
Where to find Import#
There are two ways to open the Import Request dialog:
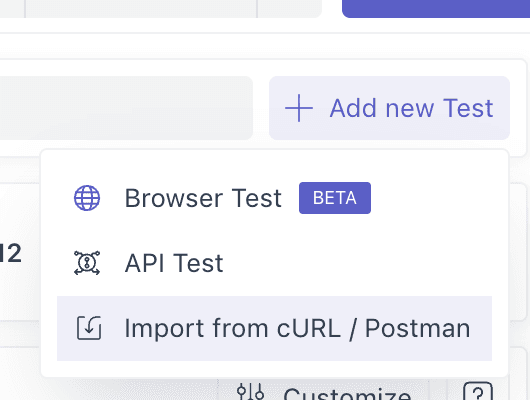
- From the Synthetics list: click Add new Test → Import from cURL / Postman. After you import, the create form opens with the requests already filled in.
- From inside an API test: in the Define Request step of an HTTP test, click Import next to the Single-step / Multi-step API Tests switch.
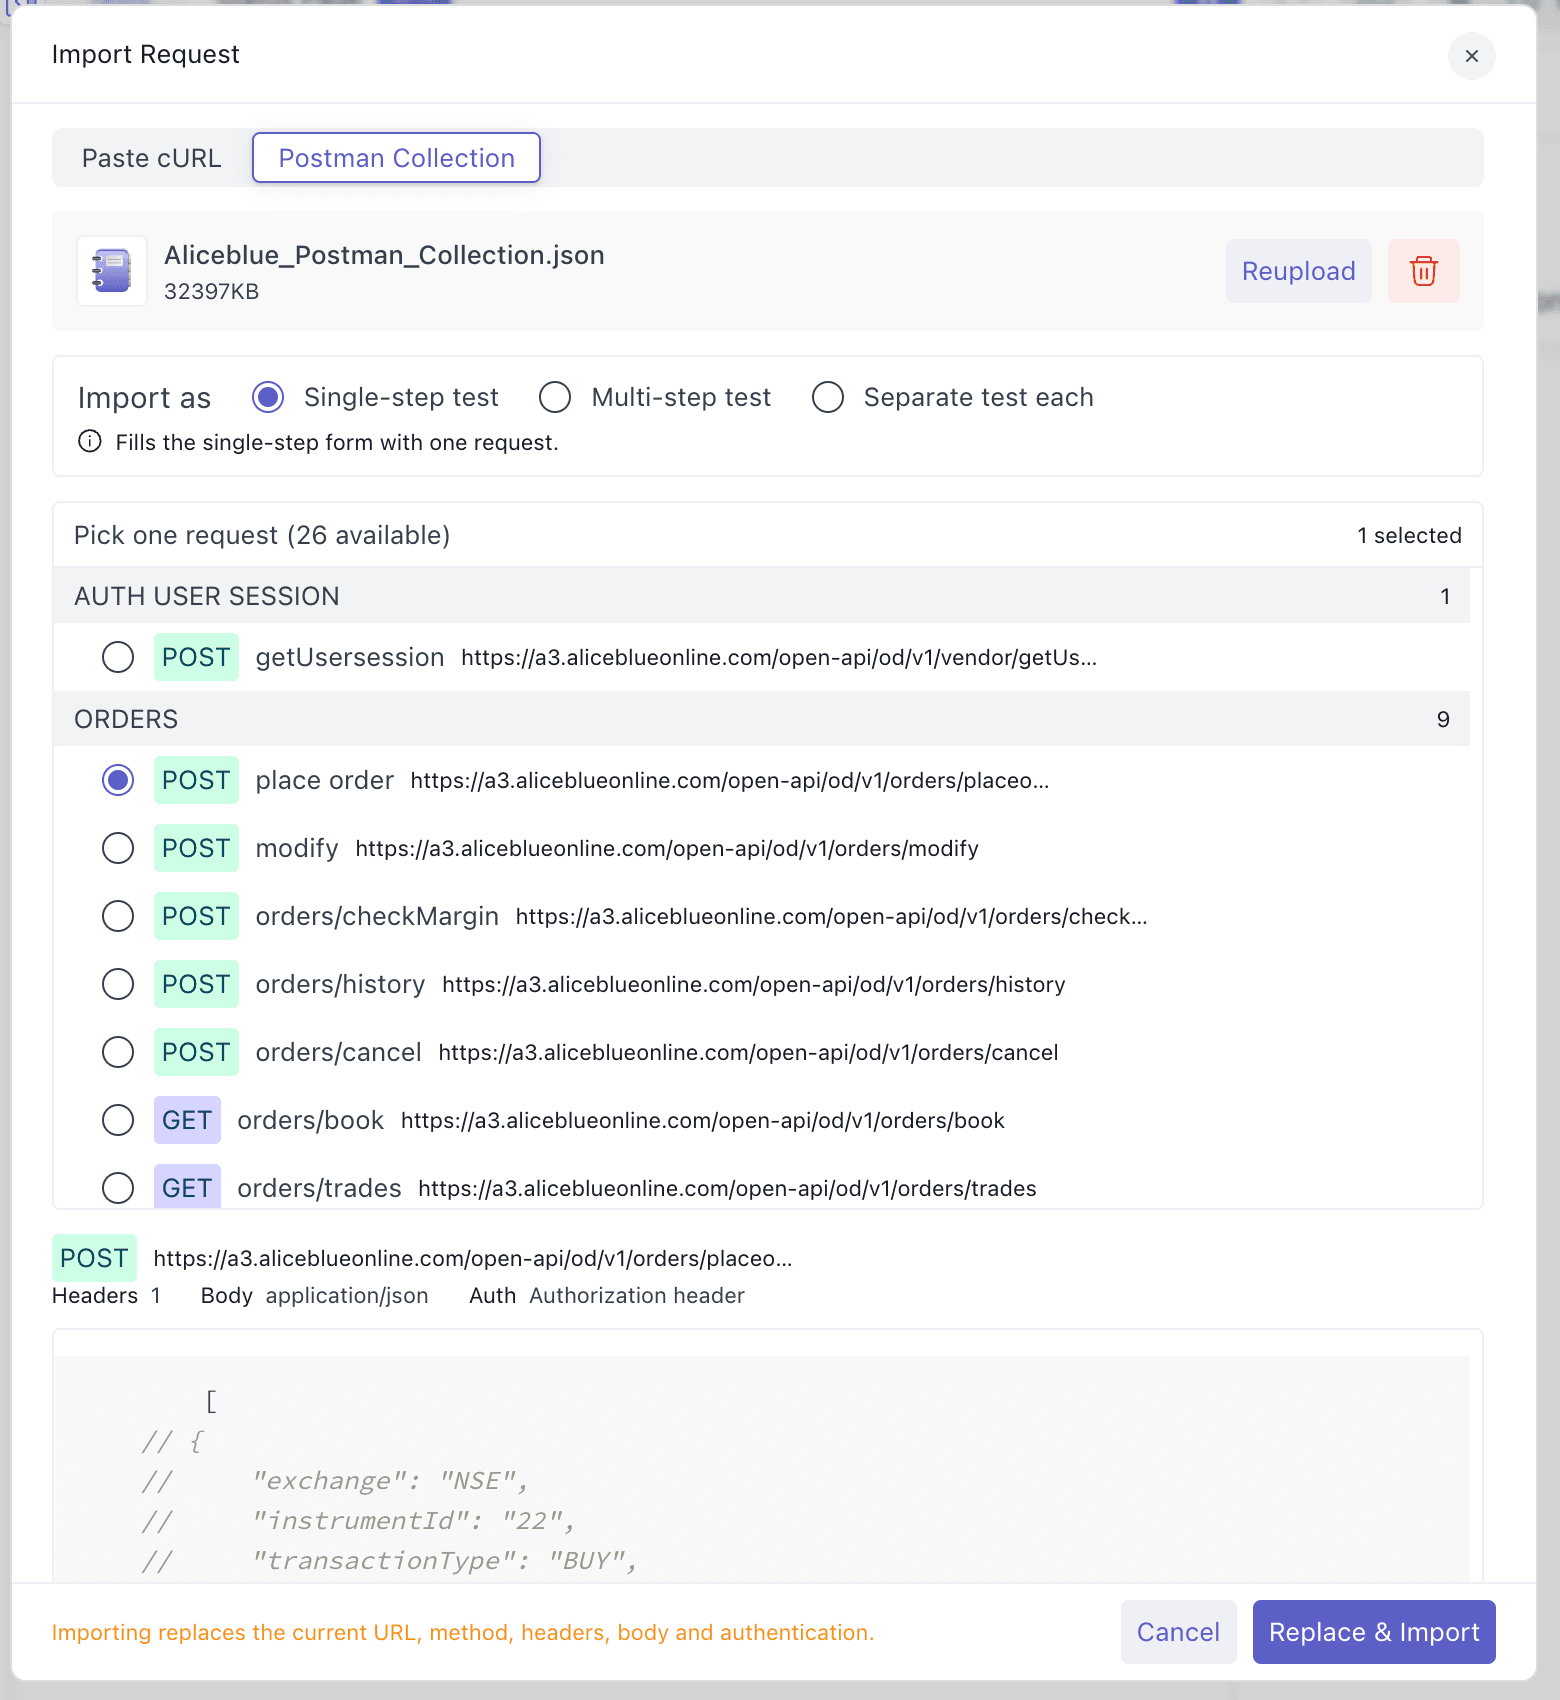
If you import into a form that already has data, the import replaces the current URL, method, headers, body and authentication. The dialog's button changes to Replace & Import to warn you.
Import a cURL command#
1 Copy the command#
Copy the cURL command from wherever you have it: your terminal history, API documentation, or your browser's DevTools (Network tab → right-click a request → Copy → Copy as cURL). Both the bash and cmd variants of Copy as cURL work.
2 Paste it into the Paste cURL tab#
Open the Import Request dialog and keep the Paste cURL tab selected. Paste the command. It is parsed as you type, and a preview shows the method, URL, header count, body type, authentication and cookies that will be imported.
1curl -X POST 'https://api.example.com/v1/orders?limit=10' \
2  -H 'Content-Type: application/json' \
3  -H 'Authorization: Bearer <token>' \
4  --data-raw '{"symbol":"TCS","qty":1}'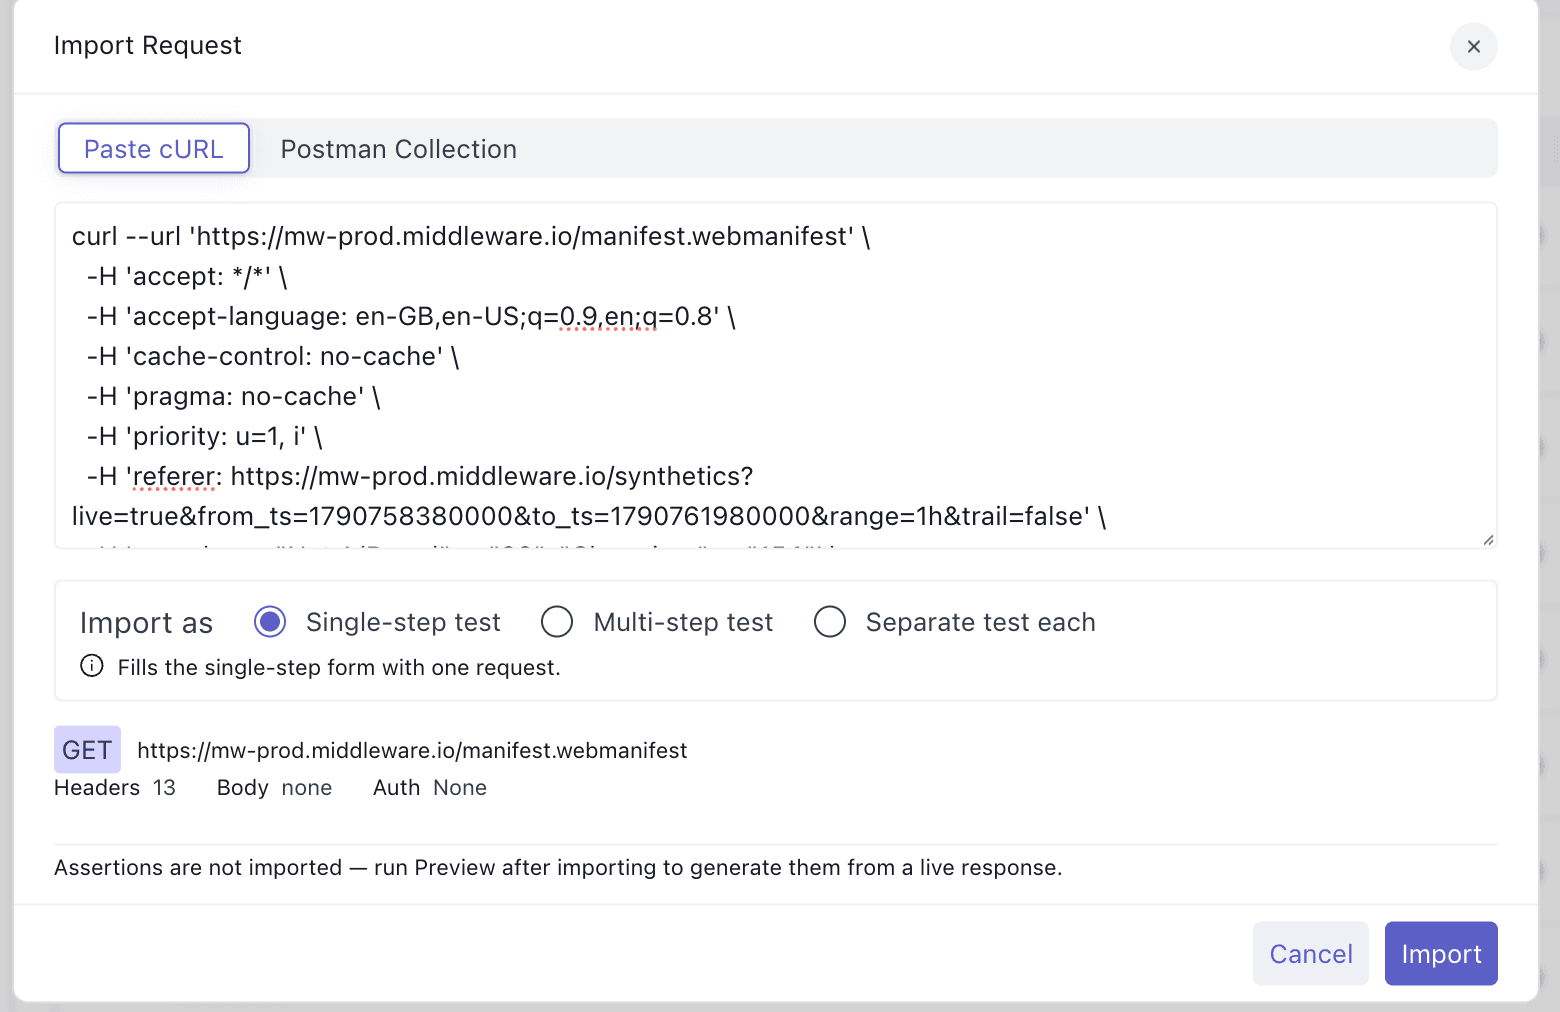
3 Choose how to import and confirm#
Pick Import as → Single-step test (a cURL command is always one request), review any items listed under item(s) need attention, then click Import.
What gets imported from cURL#
| cURL option | Imported as |
|---|---|
-X, --request | HTTP method |
URL (first one only), --url | Endpoint. A URL without a scheme gets https://. |
-H, --header | Request headers. A Cookie header goes into the Cookies field instead. |
-d, --data, --data-raw, --data-ascii, --data-binary, --data-urlencode | Request body. Repeated flags are joined with &. |
--json | JSON body, plus Content-Type and Accept: application/json headers if they are missing |
-F, --form, --form-string | multipart/form-data body |
-u, --user with --basic (default), --digest or --ntlm | Authentication tab: Basic, Digest or NTLM |
-b, --cookie (inline name=value pairs) | Cookies |
-A, --user-agent / -e, --referer | User-Agent / Referer header |
-L, --location | Follow redirects turned on |
-k, --insecure | Ignore server certificate error turned on |
--http2, --http2-prior-knowledge / --http1.1, --http1.0 | HTTP version (HTTP/2 or HTTP/1.1) |
--compressed | Accept-Encoding: gzip, deflate header |
-G, --get | Forces GET and moves the -d data into the query string |
-I, --head | HEAD method |
When no method is given, it is inferred the same way cURL does it: POST if the command sends a body, otherwise GET. The body type comes from the Content-Type header. If there isn't one, the importer detects JSON, URL-encoded form data or plain text from the payload.
Flags that don't affect a synthetic test (for example -s, -v, -o, --max-time, --retry, --proxy, --cert) are ignored silently. Any other unrecognized flag is ignored and listed as a warning.
Import a Postman Collection#
1 Export the collection from Postman#
In Postman, click ⋯ next to your collection → Export → choose Collection v2.1 and save the .json file.
- Only Collection v2.1 is fully supported. v2.0 collections are imported on a best-effort basis, with a warning.
- Upload a collection, not an environment. If you upload a Postman Environment file, the importer tells you so.
- The file must be
.jsonand smaller than 10 MB.
2 Upload the file#
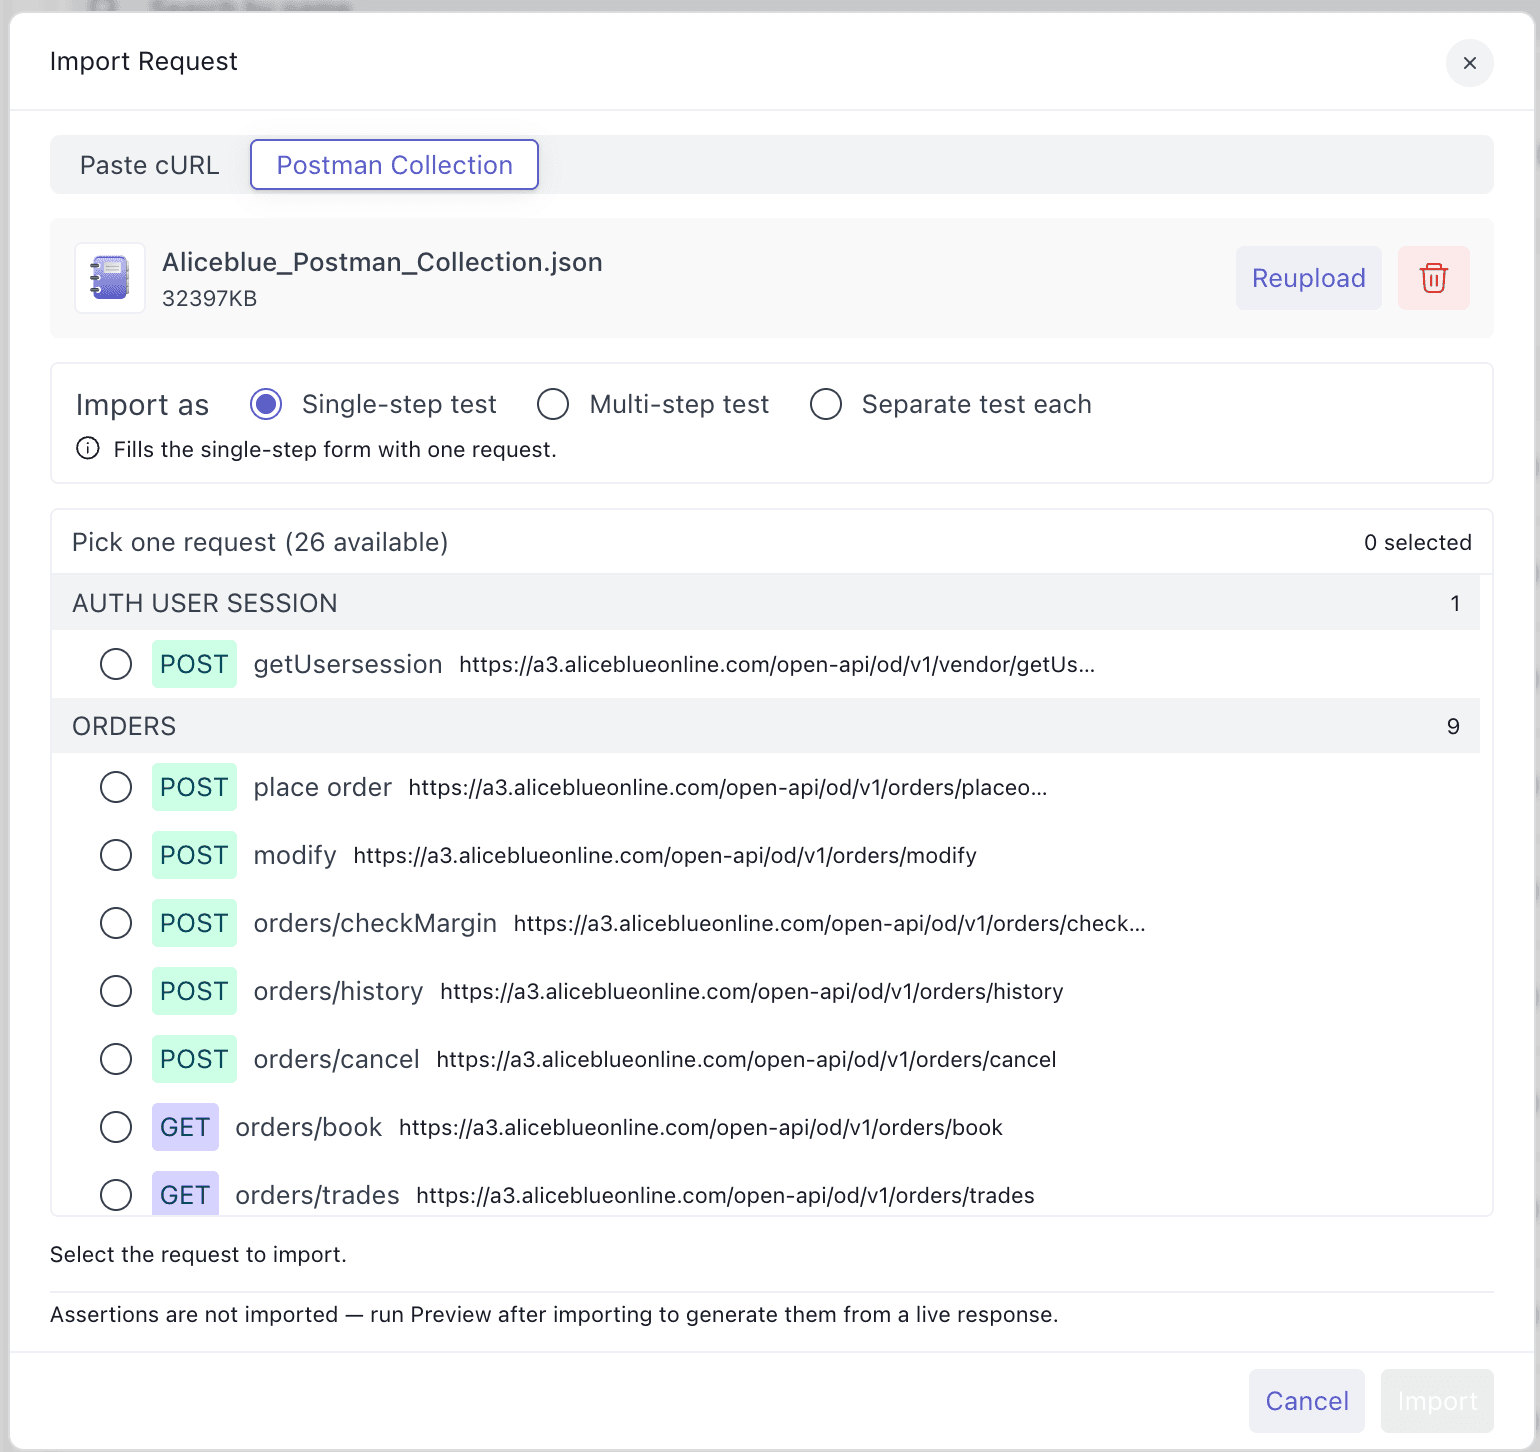
Open the Import Request dialog, switch to the Postman Collection tab and drop the file in. The collection's requests are listed in a tree that keeps your Postman folder structure.
3 Choose how to import#
Select an Import as option:
- Single-step test: select one request. Selecting a request here works like a radio button.
- Multi-step test: select any number of requests. Each one becomes a step, and the preview shows the step order.
- Separate test each: select any number of requests. Each one becomes its own test.
In multi-step and separate-test modes, you can select a whole folder with its checkbox, or use Select all.
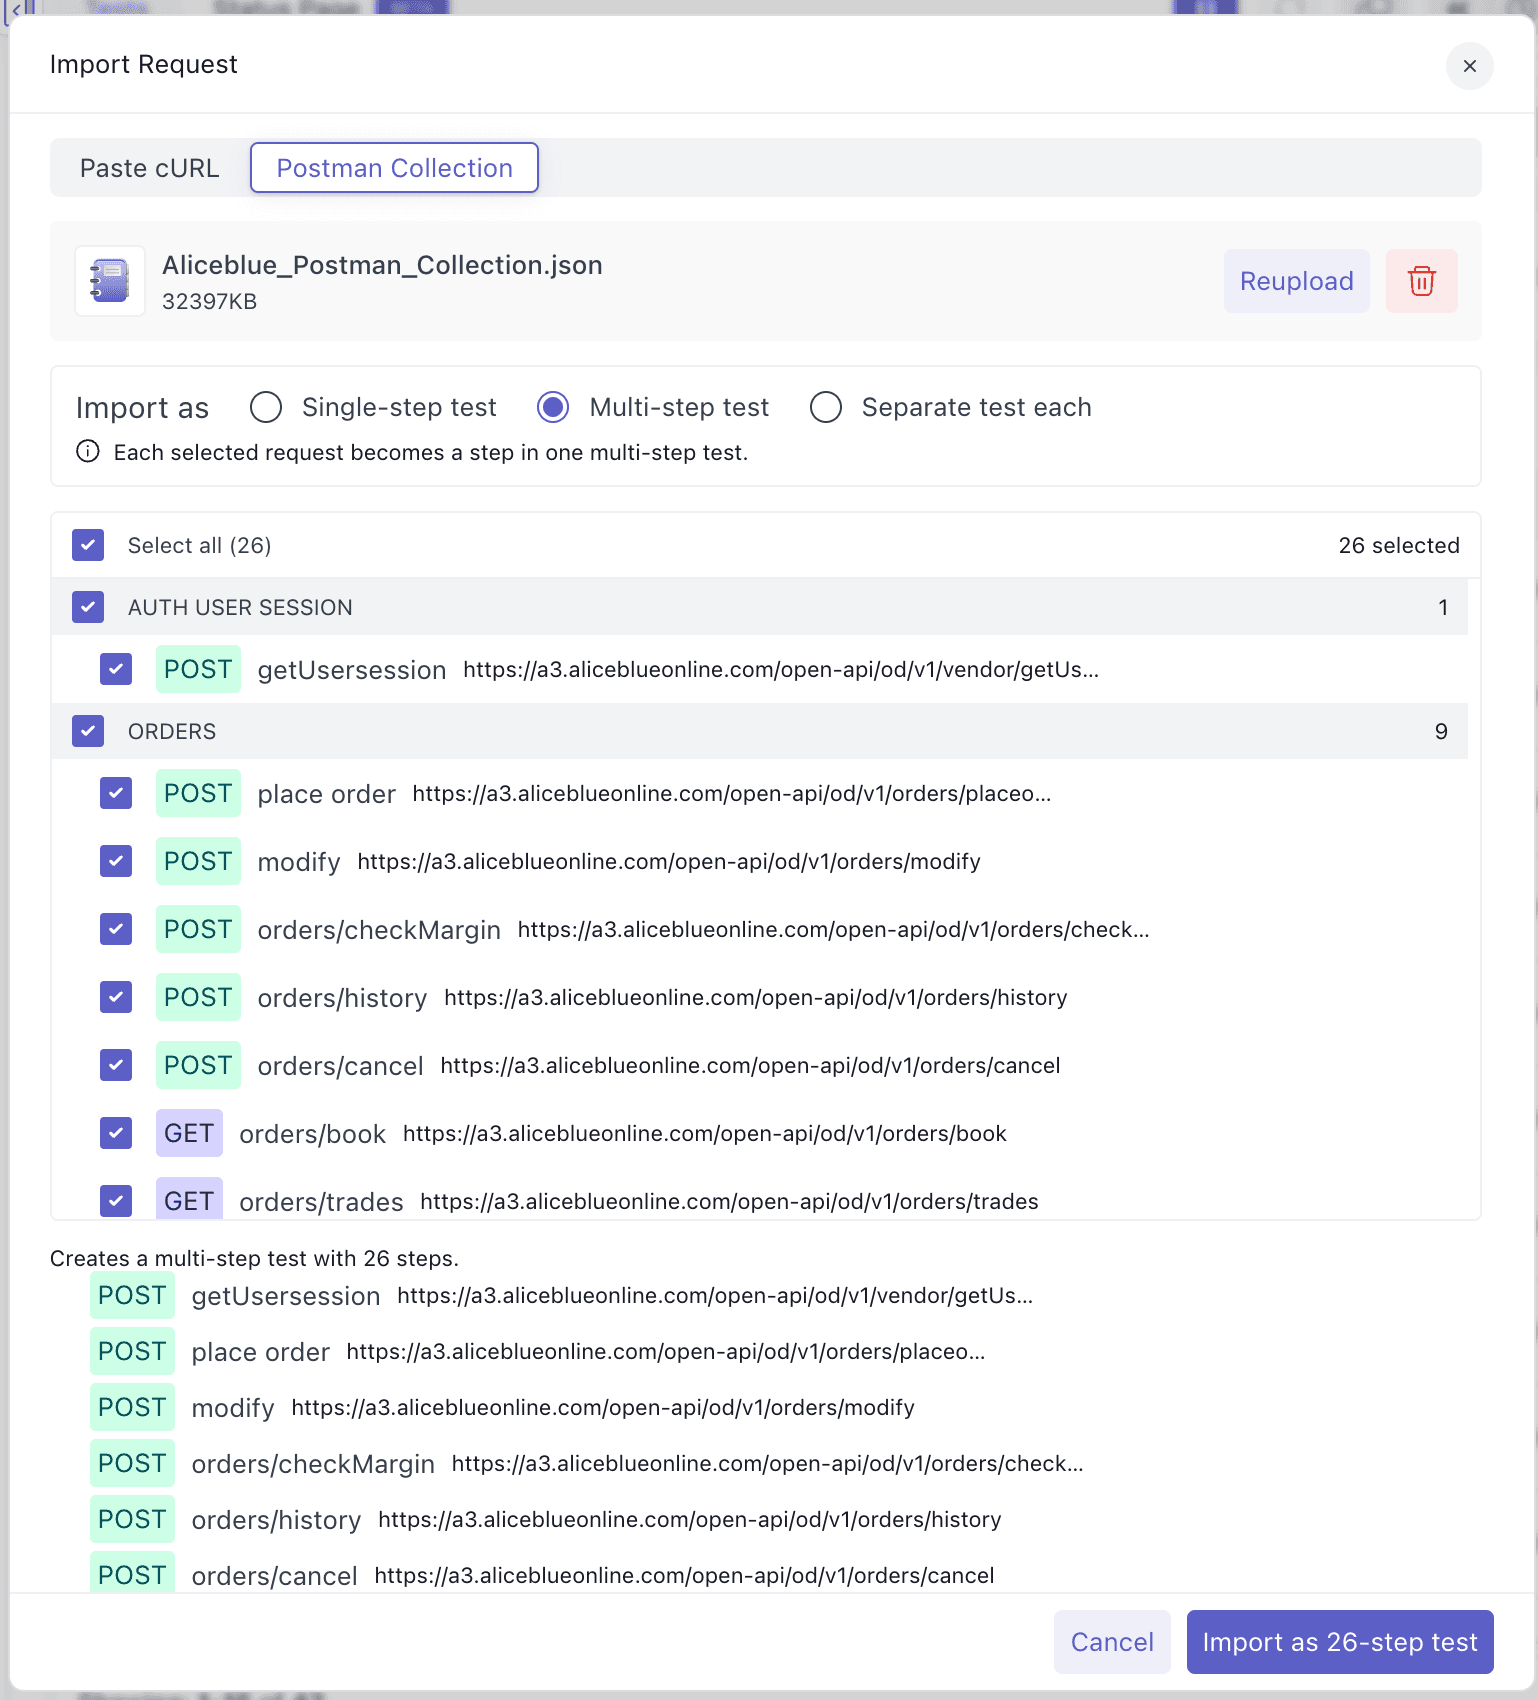
4 Review and import#
Check the preview, unresolved variables and item(s) need attention list, then click Import. The button label tells you what will be created, for example Import as 4-step test or Import 12 tests.
What gets imported from Postman#
Variables. Collection-level and folder-level variables are substituted into URLs, headers, query parameters, bodies and auth fields, including variables that reference other variables. Disabled variables are skipped. Path variables such as :id are filled from the request's path variable values.
Postman environment and global variables are not part of a collection export, so any {{variable}} that can't be resolved is kept as-is. The dialog lists every unresolved variable so you can replace it after importing. Postman dynamic variables such as {{$guid}} or {{$timestamp}} can't be resolved either.
Authentication. Auth is inherited the same way Postman does it: request, then folder, then collection.
| Postman auth type | Imported as |
|---|---|
| Basic, Digest, NTLM | The matching option on the Authentication tab |
| AWS Signature | Authentication → AWS Signature (access key, secret key, region, service, session token) |
| Bearer Token | Authorization: Bearer <token> header |
| API Key | A header, or a query parameter if the key is set to be sent in the query |
| OAuth 2.0 | Authorization header when the collection contains a stored access token. Otherwise it is skipped with a warning, and you configure auth manually. |
| Any other type | Skipped with a warning |
An auth header generated this way never overwrites an Authorization (or API key) header that the request already sets.
Body.
- raw: imported verbatim, including comments and line endings. The body type comes from Postman's language selector (JSON, XML, Text…), then the
Content-Typeheader. - x-www-form-urlencoded and form-data: imported as key/value pairs. File fields in form-data are skipped.
- GraphQL: converted to a JSON body
{"query": ..., "variables": ...}. - binary / file: not imported. Upload the file on the test after importing.
Other settings. Disabled headers and query parameters are skipped. A Cookie header goes into the Cookies field. The collection's Automatically follow redirects and Enable SSL certificate verification settings are applied to Follow redirects and Ignore server certificate error. When the collection doesn't set them, redirects are followed and certificate errors are ignored, which matches Postman's defaults.
After importing#
Single-step and multi-step tests#
The form is filled in and you continue with the usual steps: assertions, locations, frequency and notifications. If you didn't enter a Name, the test is named after the request, or after the collection for a multi-step import.
Assertions are not imported, and Postman pre-request and test scripts are ignored. After importing, click Preview to run the request and generate assertions from the live response. In a multi-step test, use Preview on each step to capture variables to pass between steps.
Separate test each (bulk create)#
The Define Request step shows the list of tests that will be created instead of a single request form:
- Each row shows the method and URL. Edit the name to rename that test. Tests are named after the Postman request by default.
- Remove a row with × to leave it out.
- Rows with an invalid URL are flagged, and you must fix or remove them before you can create the tests.
Everything you set in the remaining steps (assertions, locations, frequency and notifications) applies to every test in the list. Assertions start with a default Status code is 200 rule, which you can change or add to.
Click Create N Tests. The tests are created a few at a time, and each row shows Created or Failed. If one test fails, the others are still created. Hover over a failed row to see why it failed.
Troubleshooting#
- "Unsupported collection format": the file isn't a Postman Collection v2.0 or v2.1. Re-export it from Postman and choose Collection v2.1.
- "This looks like a Postman Environment file": you uploaded an environment. Export the collection instead, then replace any unresolved
{{variables}}after importing. - "Unterminated quote in cURL command": part of the command is missing. Copy the entire command again, including the closing quote.
- "The command must start with
curl": paste the full command, starting withcurl, not just the URL or its arguments. - URL still shows
{{variable}}or:param: the value came from a Postman environment or wasn't set in the collection. Replace it in the test's URL before saving. - Body or file is missing: bodies loaded from files (
-d @file.json,-F file=@photo.png, Postman binary bodies and form-data file fields) can't be read by the browser, so they aren't imported. Paste the payload or upload the file on the test.
Need assistance or want to learn more about Middleware? Get in touch with us via our Contact Us or join our Slack channel.