Setup - Middleware MCP Server
Point a supported MCP client at the Middleware MCP Server and sign in with your Middleware account. This page covers the prerequisites, the sign-in flow, and the exact steps for each client.
Prerequisites#
- A Middleware account with access to the project you want to query.
- An MCP client that supports remote servers over HTTP with OAuth, such as Claude Code, Claude Desktop, Cursor, VS Code (GitHub Copilot), Windsurf, Antigravity, Gemini CLI, or Codex CLI.
- A web browser, used once to sign in and authorize the connection.
The endpoint URL#
Every client connects to the same endpoint:
1https://mcp.middleware.io/mcpUse this URL wherever a client asks for an MCP server URL. When a client asks for a transport type, choose http (some clients label this "Streamable HTTP" or "Remote").
How sign-in works#
The Middleware MCP Server uses OAuth, so you never paste a token by hand. The first time a client connects, it opens your browser:
1 Add the endpoint to your client#
Configure https://mcp.middleware.io/mcp as a remote MCP server (see the steps for your client below).
2 Sign in to Middleware#
Your client opens a browser window. Log in to your Middleware account.
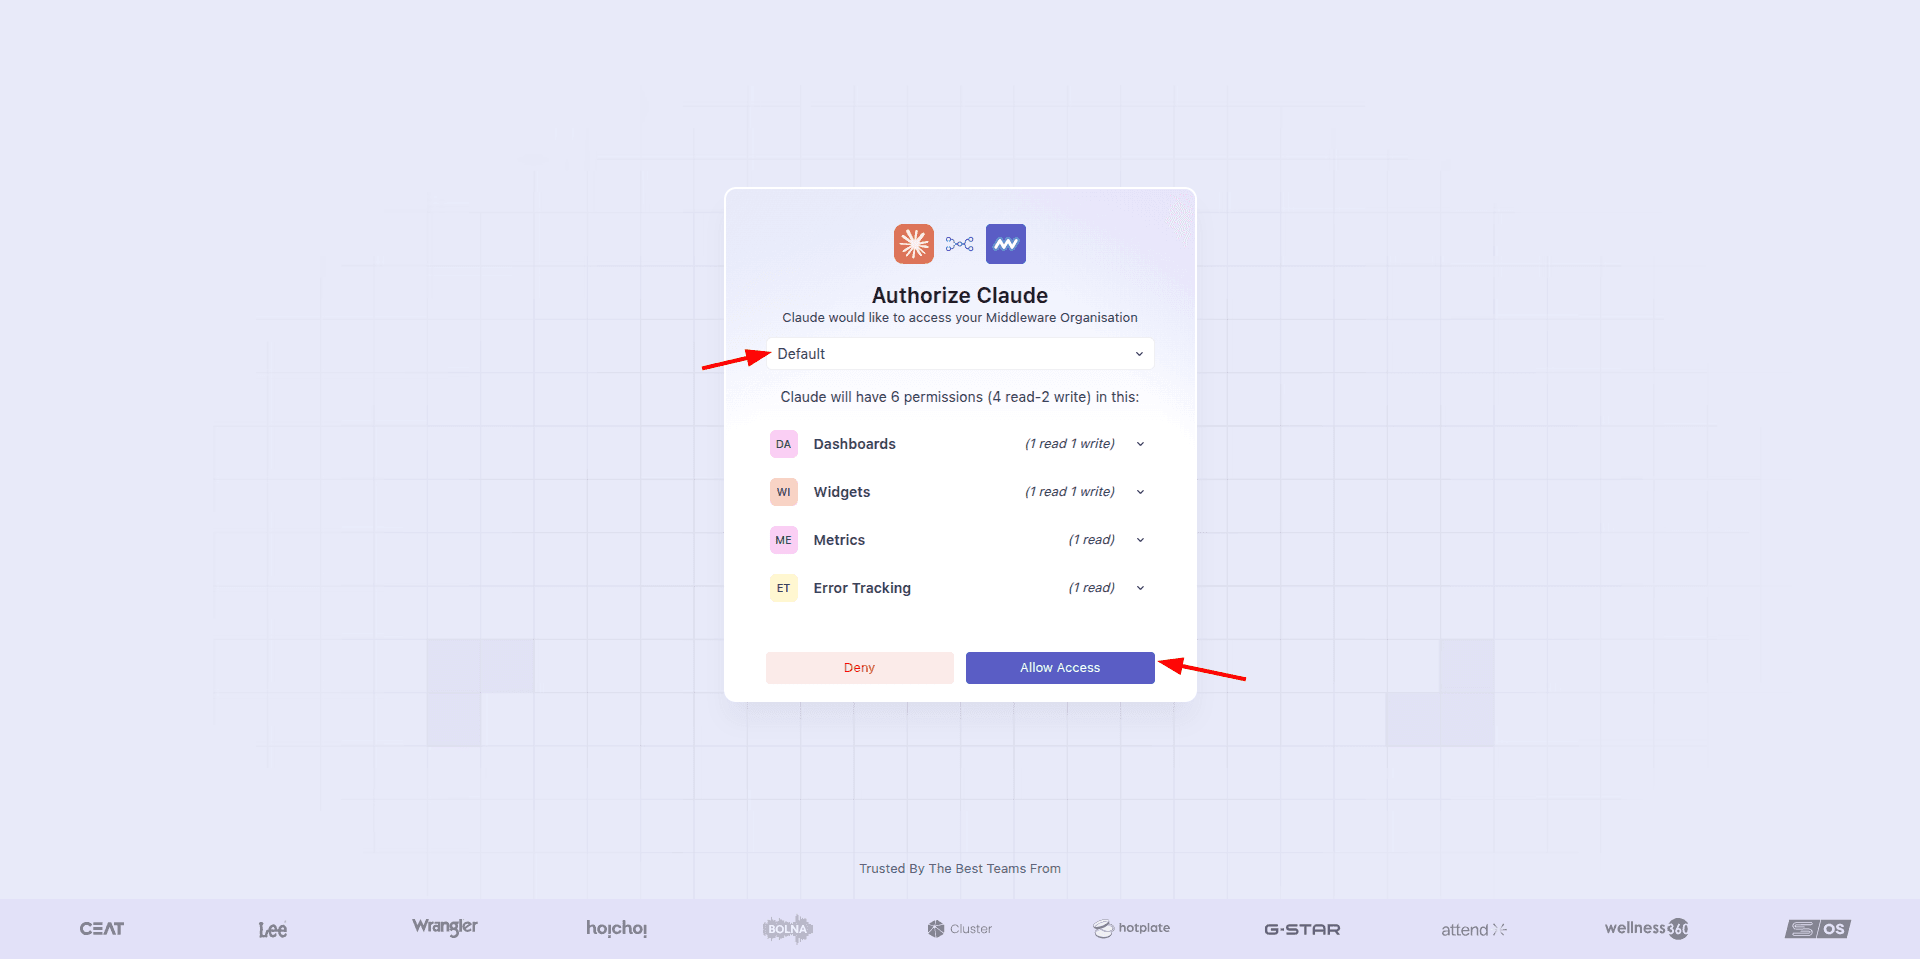
3 Select your project and approve#
On the authorization screen, select the project in your account that you want to connect, then approve the requested access.
4 Start using the tools#
Once you approve, the client connects and the Middleware tools appear in your assistant. Your sign-in is reused on future sessions, so you only do this once.
Connect your client#
Select your client for the exact steps. Every client connects to https://mcp.middleware.io/mcp and signs in through your browser, where you select the project to connect.
Register the server with the CLI:
1claude mcp add --transport http middleware https://mcp.middleware.io/mcpThen run /mcp inside Claude Code, select middleware, and choose Authenticate. Your browser opens; sign in, select your project, and approve.
To configure it by hand, add this to ~/.claude.json (or a project .mcp.json):
1{
2  "mcpServers": {
3    "middleware": {
4      "type": "http",
5      "url": "https://mcp.middleware.io/mcp"
6    }
7  }
8}
Add Middleware as a custom connector:
- Go to Settings → Connectors.
- Click Add custom connector.
- Set the name to Middleware and the URL to
https://mcp.middleware.io/mcp, then click Add. - Click Connect, sign in, select your project, and approve.
Open a new chat, click the tools icon, and make sure the Middleware connector is enabled.
Custom connectors are available on Claude paid plans.
Add the server to ~/.cursor/mcp.json (all projects) or .cursor/mcp.json (one project):
1{
2  "mcpServers": {
3    "middleware": {
4      "url": "https://mcp.middleware.io/mcp"
5    }
6  }
7}
Open Cursor Settings → MCP & Integrations, click Needs login next to middleware, then sign in, select your project, and approve.
Add a .vscode/mcp.json file in your workspace, or run MCP: Add Server → HTTP from the Command Palette:
1{
2  "servers": {
3    "middleware": {
4      "type": "http",
5      "url": "https://mcp.middleware.io/mcp"
6    }
7  }
8}
Click Start above the server entry, sign in, select your project, and approve. Then open Copilot Chat in Agent mode and confirm the Middleware tools under the Tools button.
VS Code uses the servers key, not mcpServers.
Edit ~/.codeium/windsurf/mcp_config.json, or use Settings → Cascade → MCP Servers → Add custom server:
1{
2  "mcpServers": {
3    "middleware": {
4      "serverUrl": "https://mcp.middleware.io/mcp"
5    }
6  }
7}
In Settings → Cascade → MCP Servers, click Refresh, then sign in, select your project, and approve.
Open the MCP Store (... menu → Manage MCP Servers → Add custom server), or edit mcp_config.json:
1{
2  "mcpServers": {
3    "middleware": {
4      "serverUrl": "https://mcp.middleware.io/mcp"
5    }
6  }
7}
Refresh the server list, then sign in, select your project, and approve. If authorization fails, run Authentication: Remove Dynamic Authentication Providers and reconnect.
Register the server with the CLI:
1gemini mcp add --transport http middleware https://mcp.middleware.io/mcpOr add it to ~/.gemini/settings.json:
1{
2  "mcpServers": {
3    "middleware": {
4      "httpUrl": "https://mcp.middleware.io/mcp"
5    }
6  }
7}
Start Gemini CLI, run /mcp auth middleware, then sign in, select your project, and approve.
Register the server with the CLI:
1codex mcp add middleware --url https://mcp.middleware.io/mcpOr add it to ~/.codex/config.toml:
1[mcp_servers.middleware]
2url = "https://mcp.middleware.io/mcp"
Run codex mcp login middleware, then sign in, select your project, and approve.
Any client that supports remote MCP servers over HTTP with OAuth can connect. Use this configuration (field names vary by client):
1{
2  "mcpServers": {
3    "middleware": {
4      "type": "http",
5      "url": "https://mcp.middleware.io/mcp"
6    }
7  }
8}
On first connect, the client opens your browser to sign in. Select your project and approve. Common field-name variations: VS Code uses servers; Windsurf and Antigravity use serverUrl; Gemini CLI uses httpUrl.
Verify your connection#
Once connected, ask your assistant a read-only question:
- "List all my dashboards in Middleware."
- "What resource types are available in my Middleware account?"
- "Show me the errors from the last hour."
If you get an answer, you are connected. For the full list of tools your assistant can call, see MCP Tools.
Restrict tools per connection#
For a read-only connection, exclude specific tools by adding the exclude_tools query parameter to the endpoint URL. Excluded tools are hidden from the client and cannot be called.
1https://mcp.middleware.io/mcp?exclude_tools=create_dashboard,update_dashboard,delete_dashboard,clone_dashboard,set_dashboard_favorite,create_widget,update_widget,delete_widget,update_widget_layoutsThe example above removes every write tool, leaving a read-only connection. Adjust the comma-separated list to fit your needs. The tool names match those in MCP Tools.
Troubleshooting#
The browser sign-in never opens. Make sure your client supports remote MCP servers with OAuth, then trigger the connect/authenticate action again (for example /mcp in Claude Code, or Connect in Claude Desktop). If a URL is printed in the terminal, open it manually.
You see the wrong project's data, or none. The server uses the project you pick on the authorization screen. Sign out and reconnect, then select the correct project.
No tools appear. Confirm the server is enabled in your client and that you are in an agent / tools mode (for example, Agent mode in Cursor and VS Code). Check that the endpoint URL is exactly https://mcp.middleware.io/mcp.
A write action is rejected. The write tool may be excluded via exclude_tools, or your account may lack permission to modify the selected project. Remove the tool from exclude_tools and reconnect, then confirm your account's permissions in the Middleware app.
Connection drops or times out. Make sure your network allows outbound HTTPS to mcp.middleware.io and app.middleware.io, and that no proxy strips the Authorization header.
Still stuck? Get in touch with us via our Contact Us with your client, its version, and the error message.
Need assistance or want to learn more about Middleware? Get in touch with us via our Contact Us or join our Slack channel.