Kubernetes Agent with Argo CD
This guide shows how to install and manage the Middleware Infrastructure Agent (mw‑agent) on a Kubernetes cluster using Argo CD. You can follow either the UI‑driven flow or a fully declarative GitOps approach.
Prerequisites#
Before you begin, ensure:
A running Kubernetes cluster (v1.17+)
1kubectl version --client
2  kubectl cluster-info
3  kubectl get nodes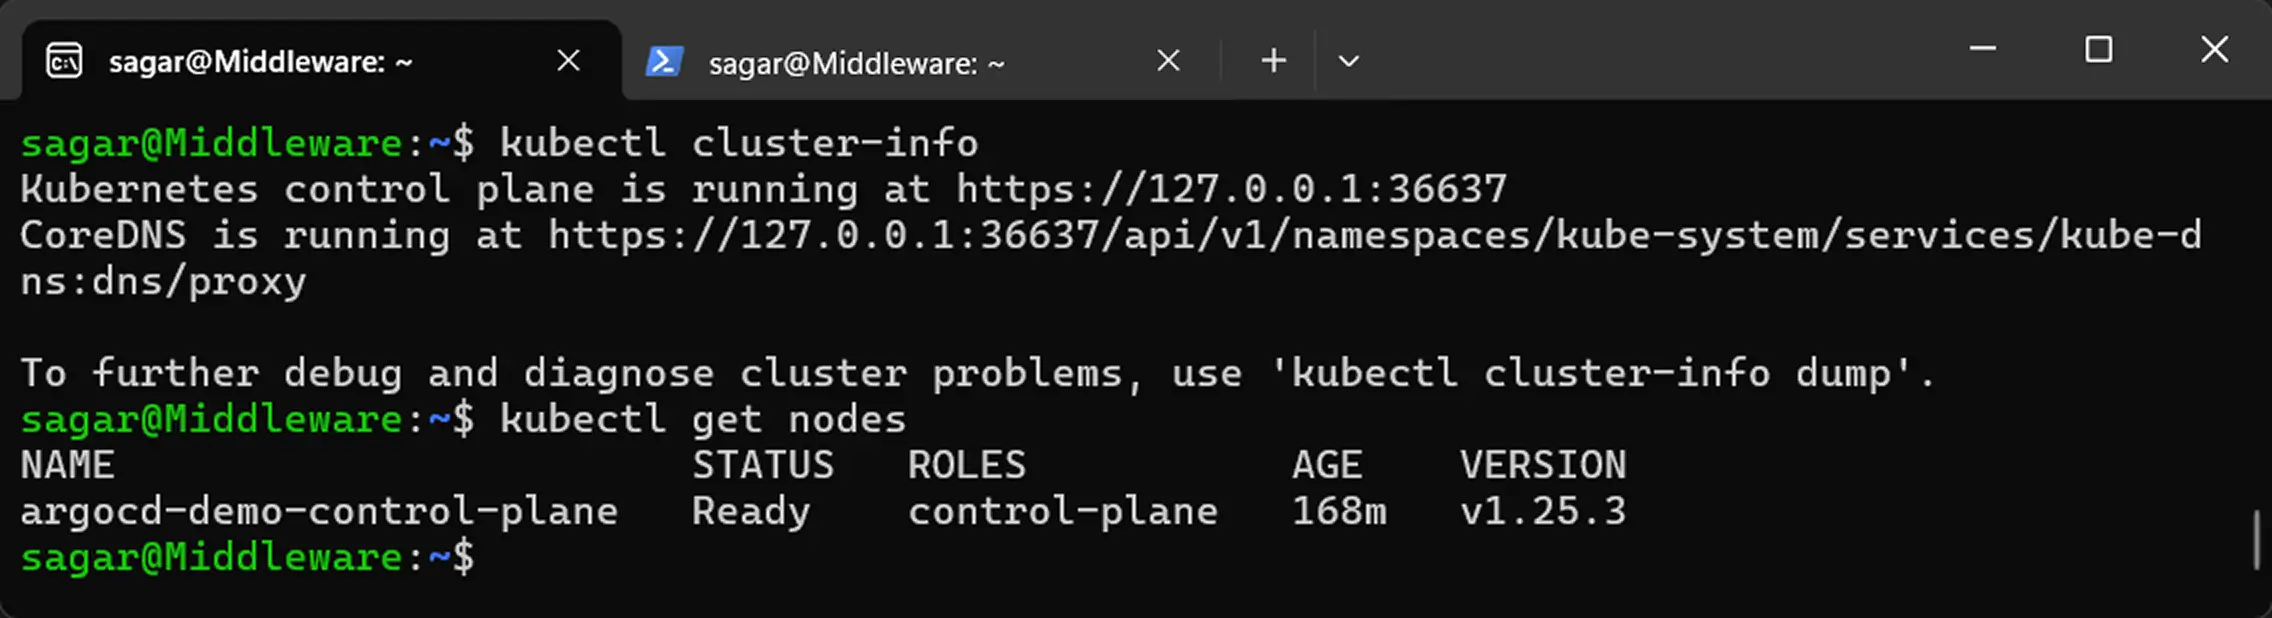
kubectlconfigured to target your cluster:1kubectl config current-context
Argo CD installed in the argocd namespace
1kubectl get pods -n argocd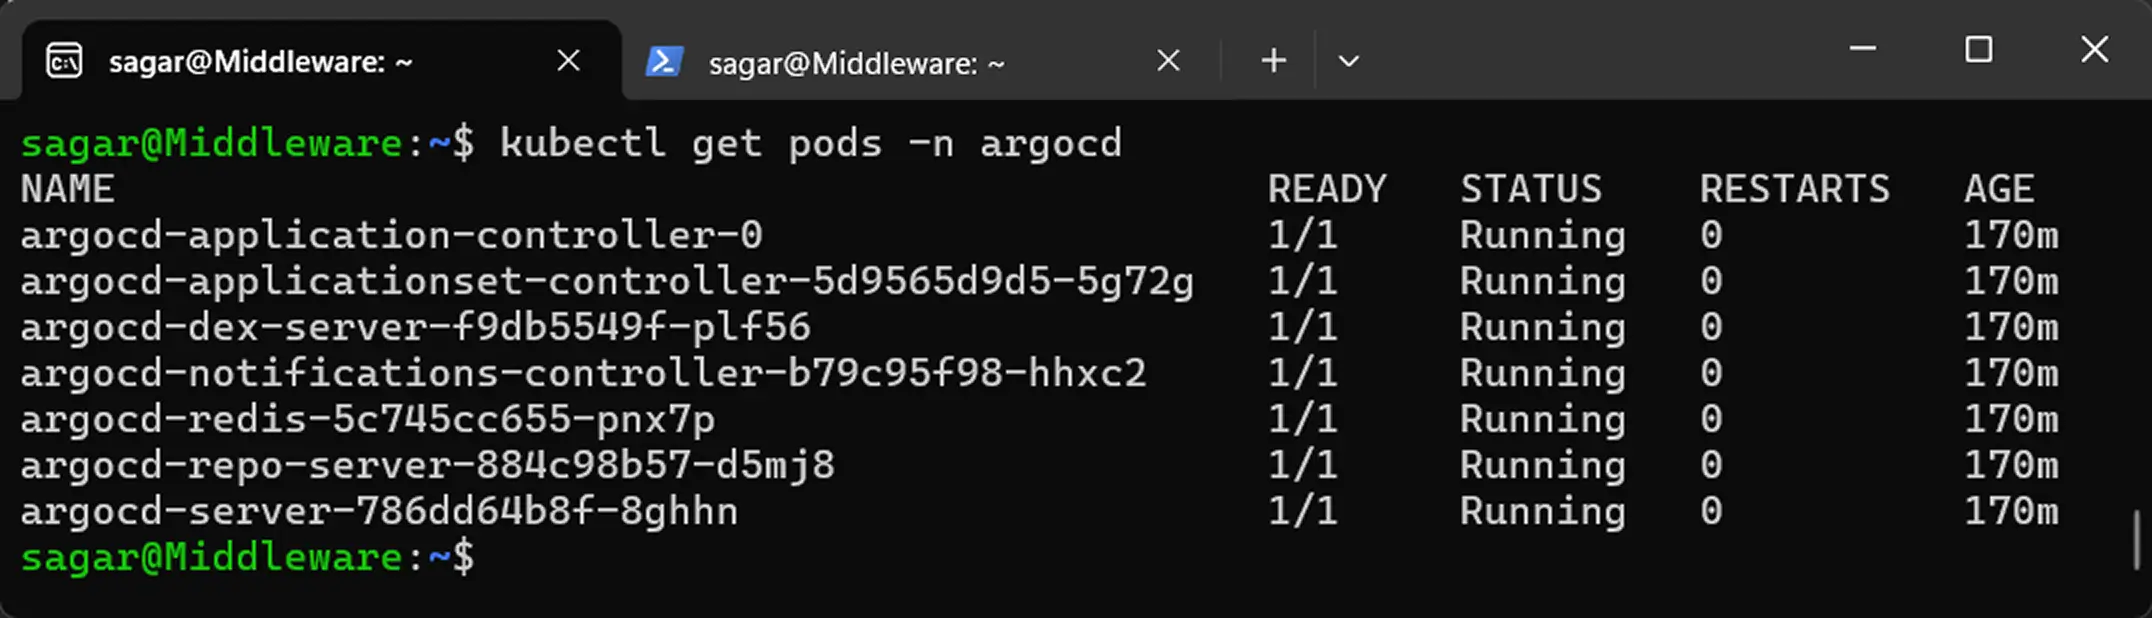
(Optional) Argo CD CLI installed locally
1argocd version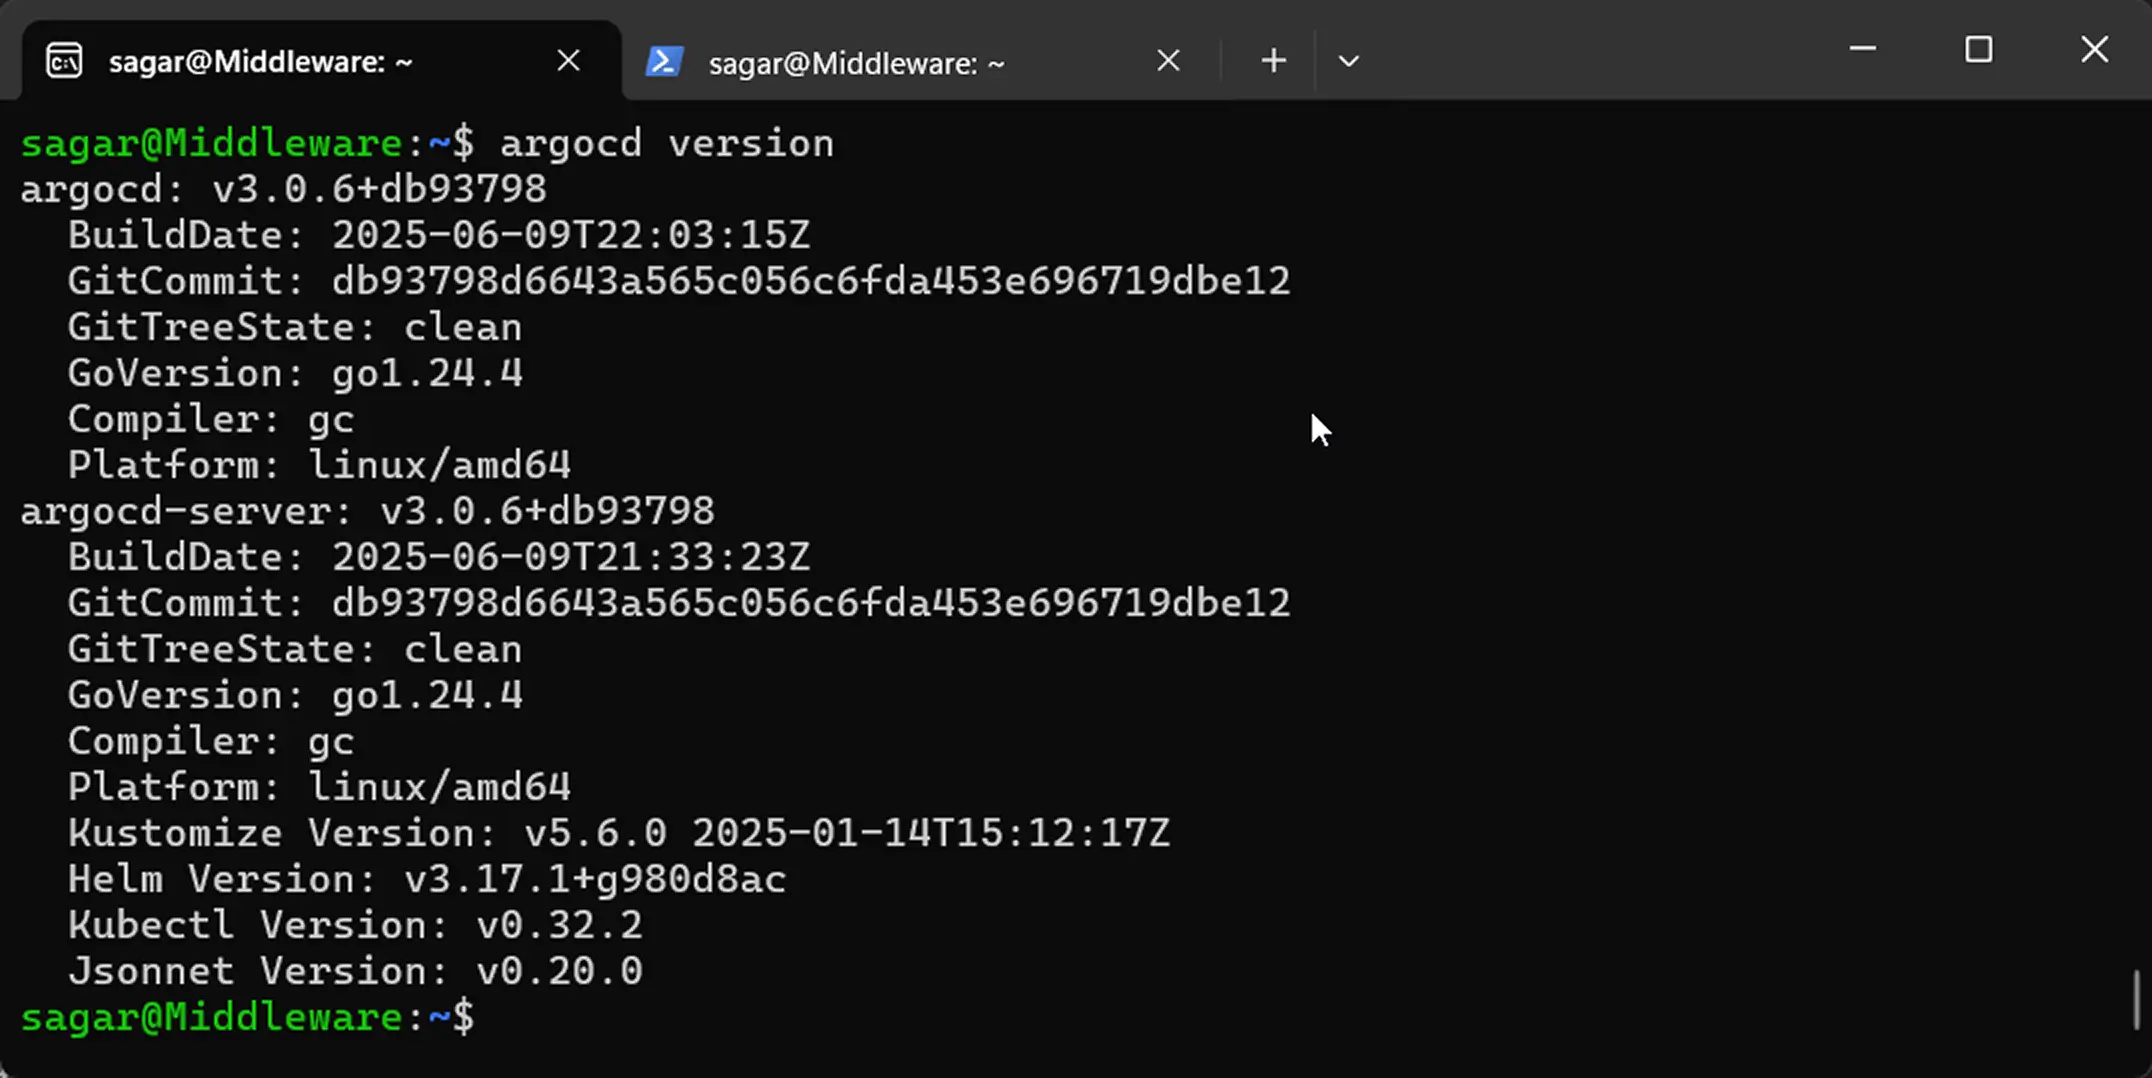
If you haven’t installed Argo CD CLI and want to install it, then you can follow the given instructions:
1# Create the Argo CD namespace
2  kubectl create namespace argocd
3
4  # Install core components
5  kubectl apply -n argocd \
6    -f https://raw.githubusercontent.com/argoproj/argo-cd/stable/manifests/install.yaml
7
8  # Verify pods are Running
9  kubectl get pods -n argocd
Once done, open a second terminal window and execute the following to forward port at 8080 to access Argo CD on localhost:
1kubectl port-forward svc/argocd-server -n argocd 8080:443Generate Helm values#
Use Middleware’s helper script to produce generated_values.yaml with your API key, target URL, and cluster name:
1MW_API_KEY="<MW_API_KEY>" MW_TARGET=https://<MW_UID>.middleware.io:443 bash -c "$(curl -L https://install.middleware.io/scripts/generate-helm-values.sh)"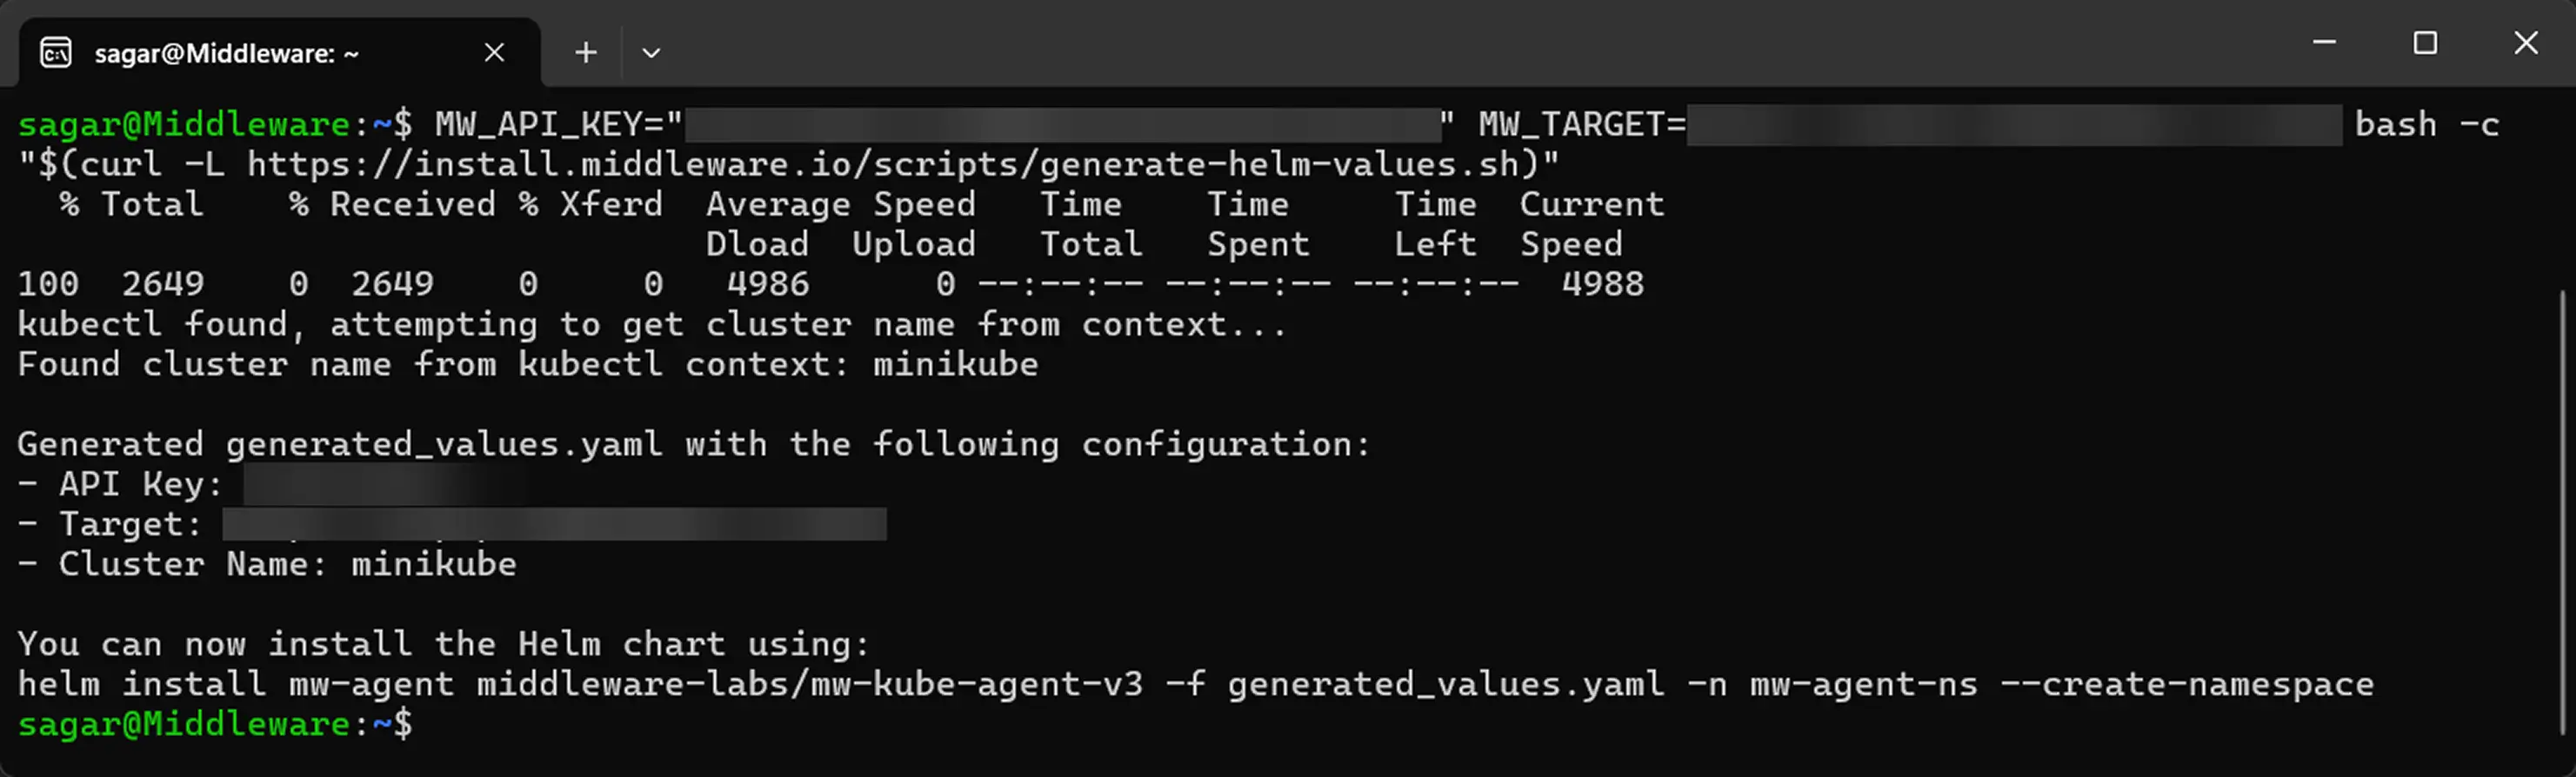
The generated file should follow the given syntax. If your file does not look like this, revisit the previous command with correct credentials:
1global:
2  mw:
3    apiKey: <MW_API_KEY>
4    target: https://<MW_UID>.middleware.io:443
5  clusterMetadata:
6    name: your-cluster-name # Override
7  mw-autoinstrumentation:
8    enabled: false
Installation methods#
Once you have your prerequisites ready with your Helm values, you can choose from the two methods we propose:
We are assuming that you are accessing the Arco CD UI for the first time, which means you don’t have a password to access the dashboard.
To know your password, you can execute the following command:
1kubectl -n argocd get secret argocd-initial-admin-secret -o jsonpath="{.data.password}" | base64 -dThe above command would print a 16-character-long string, which you will use as a password.
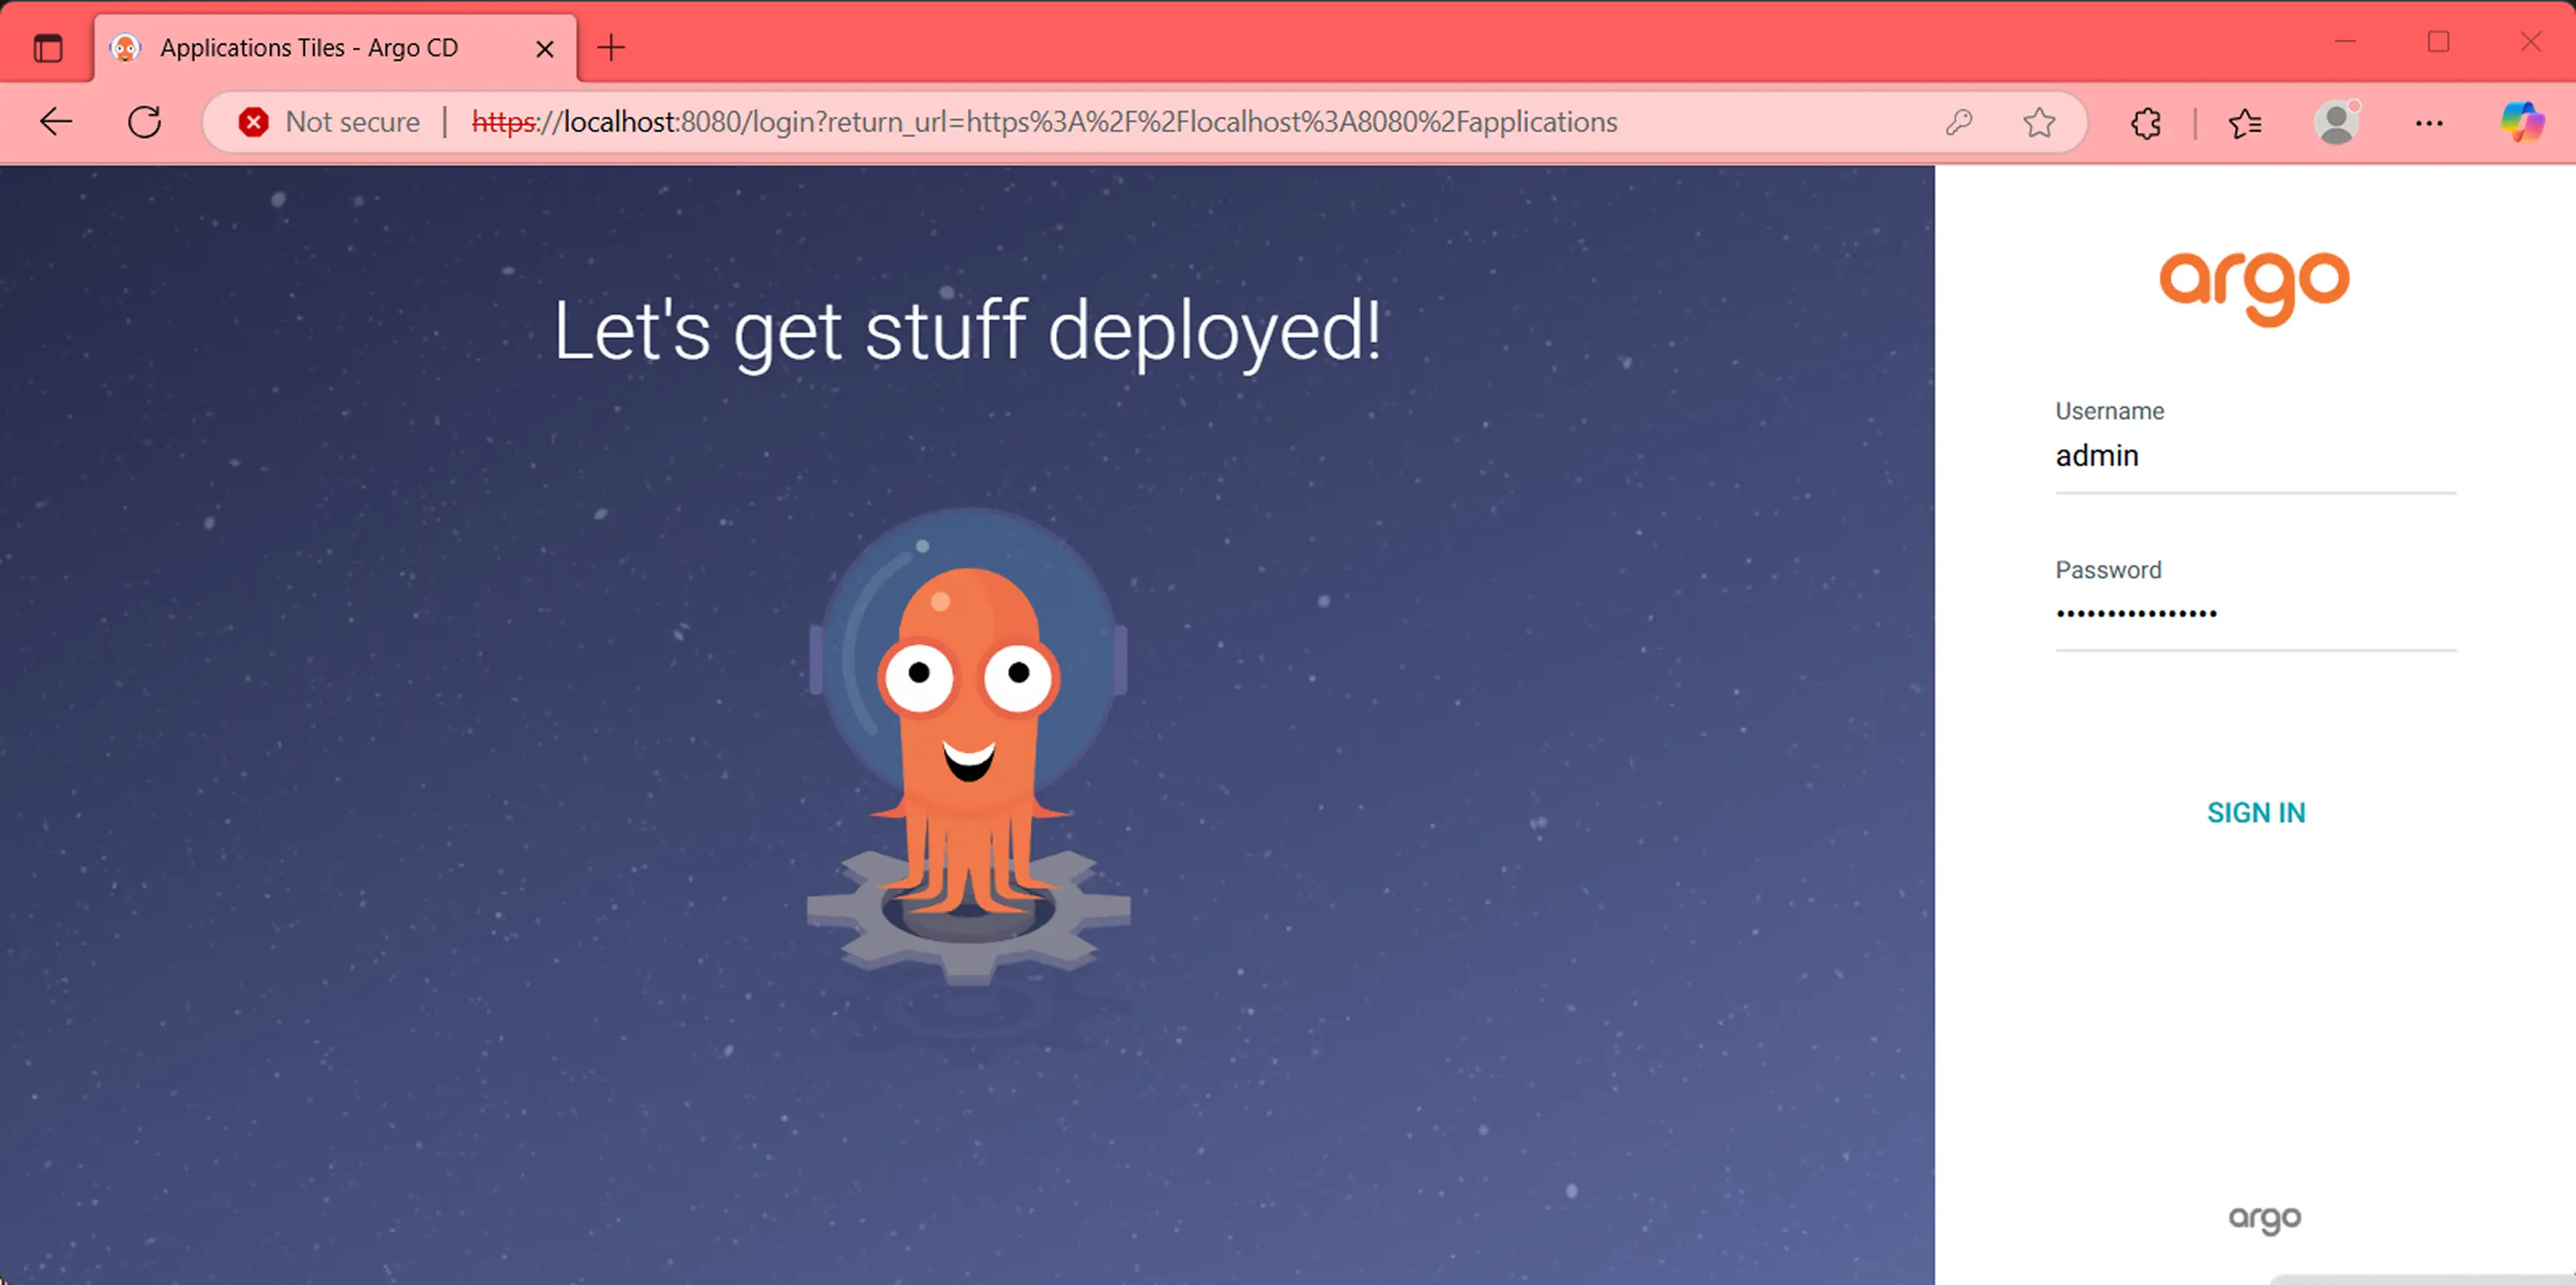
1 Log in to the Argo CD UI#
Log in to the Argo CD UI at https://localhost:8080
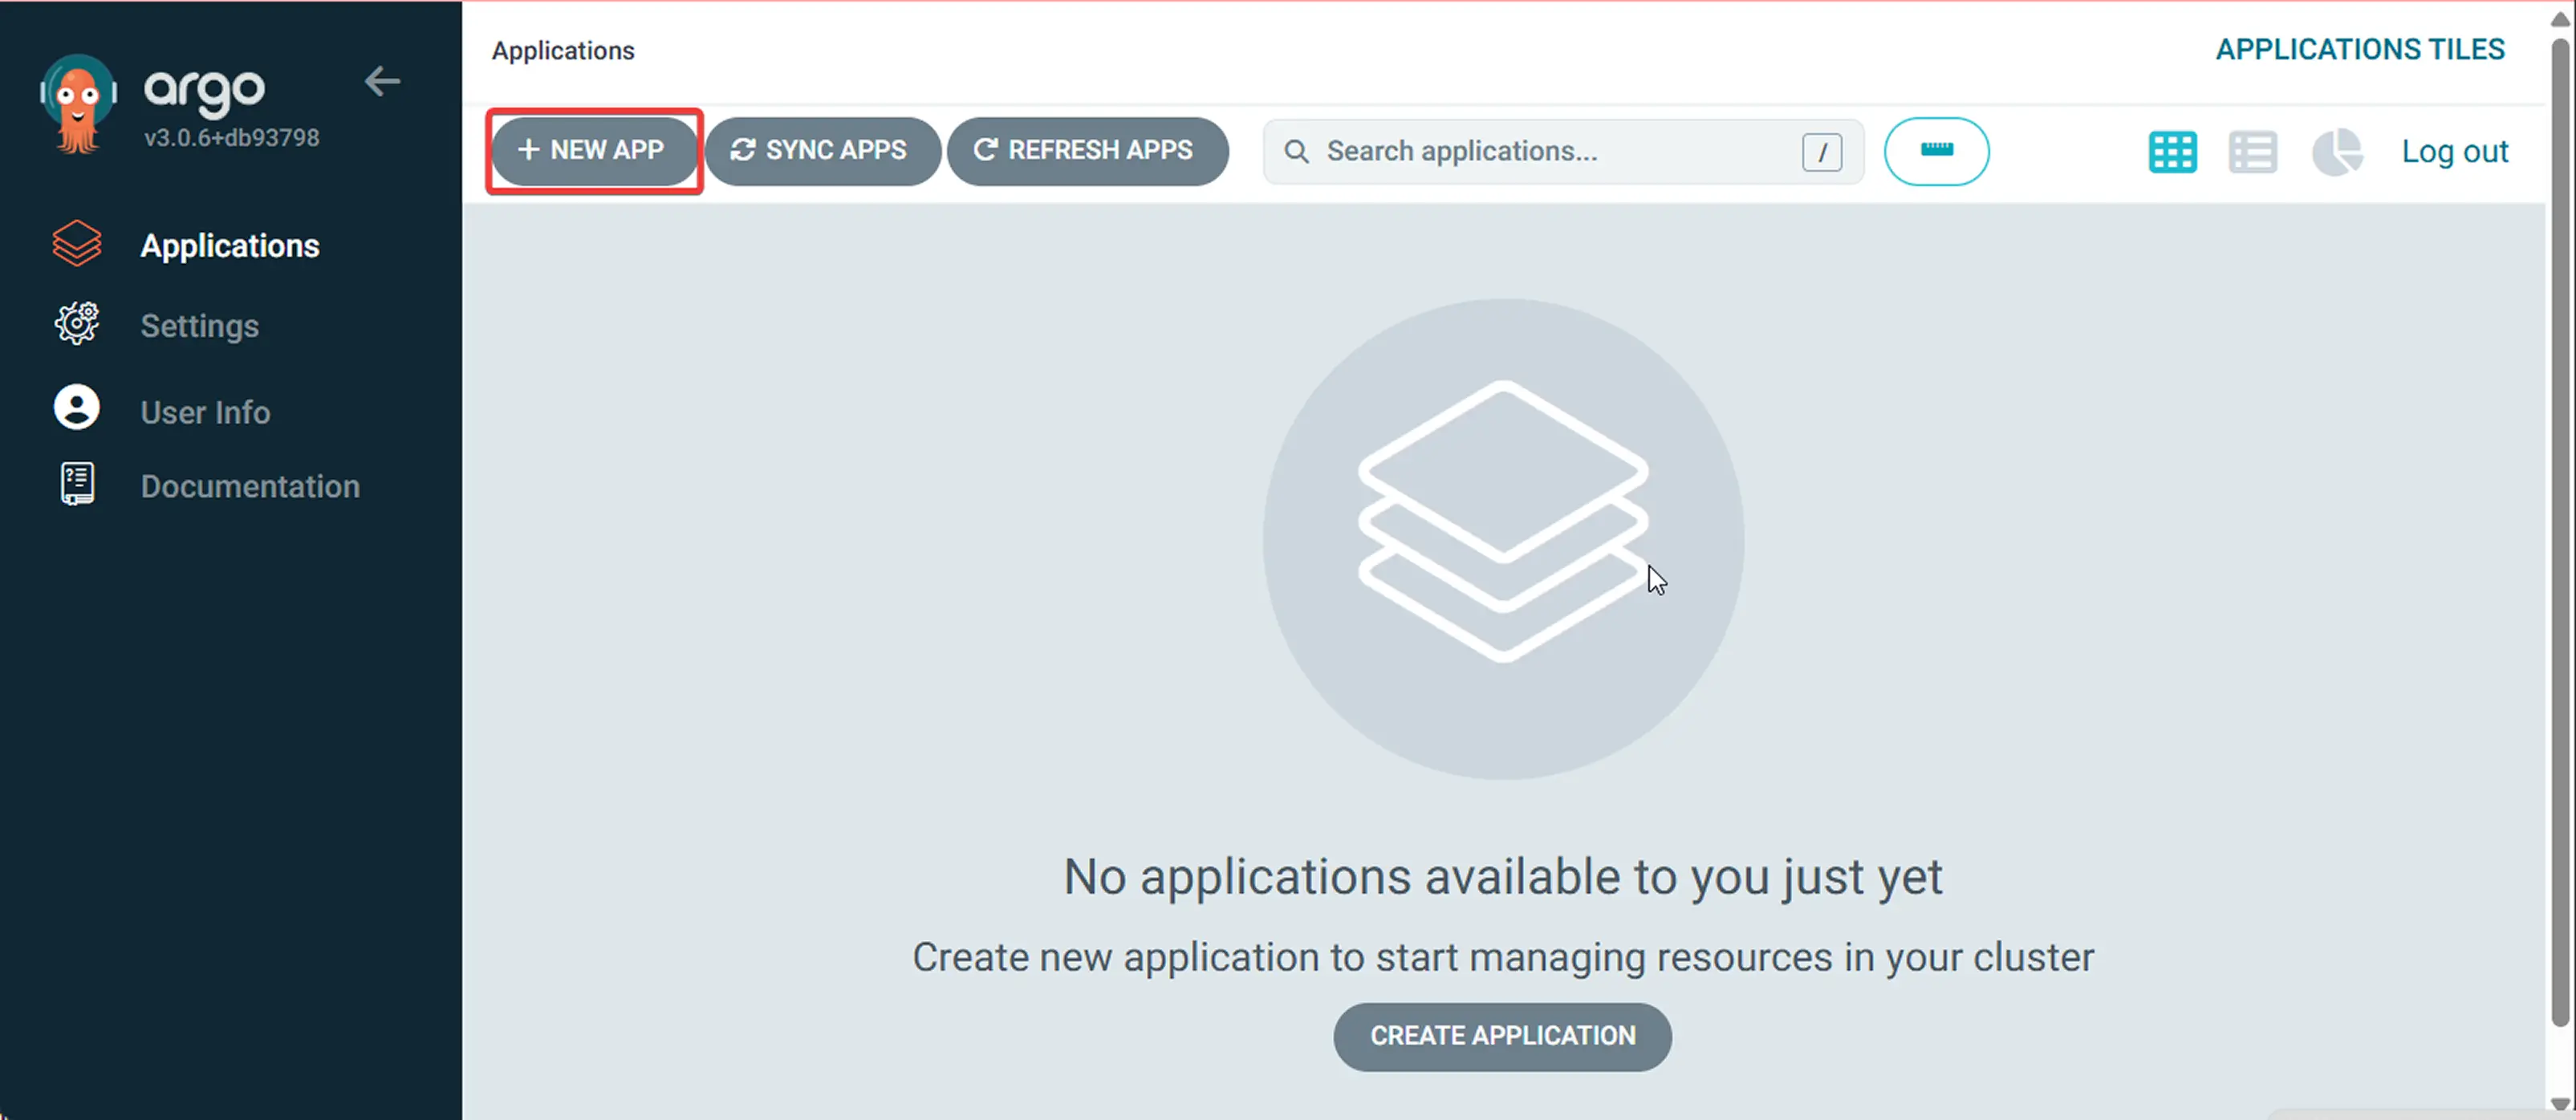
Next, in the Argo CD UI, click + New App.
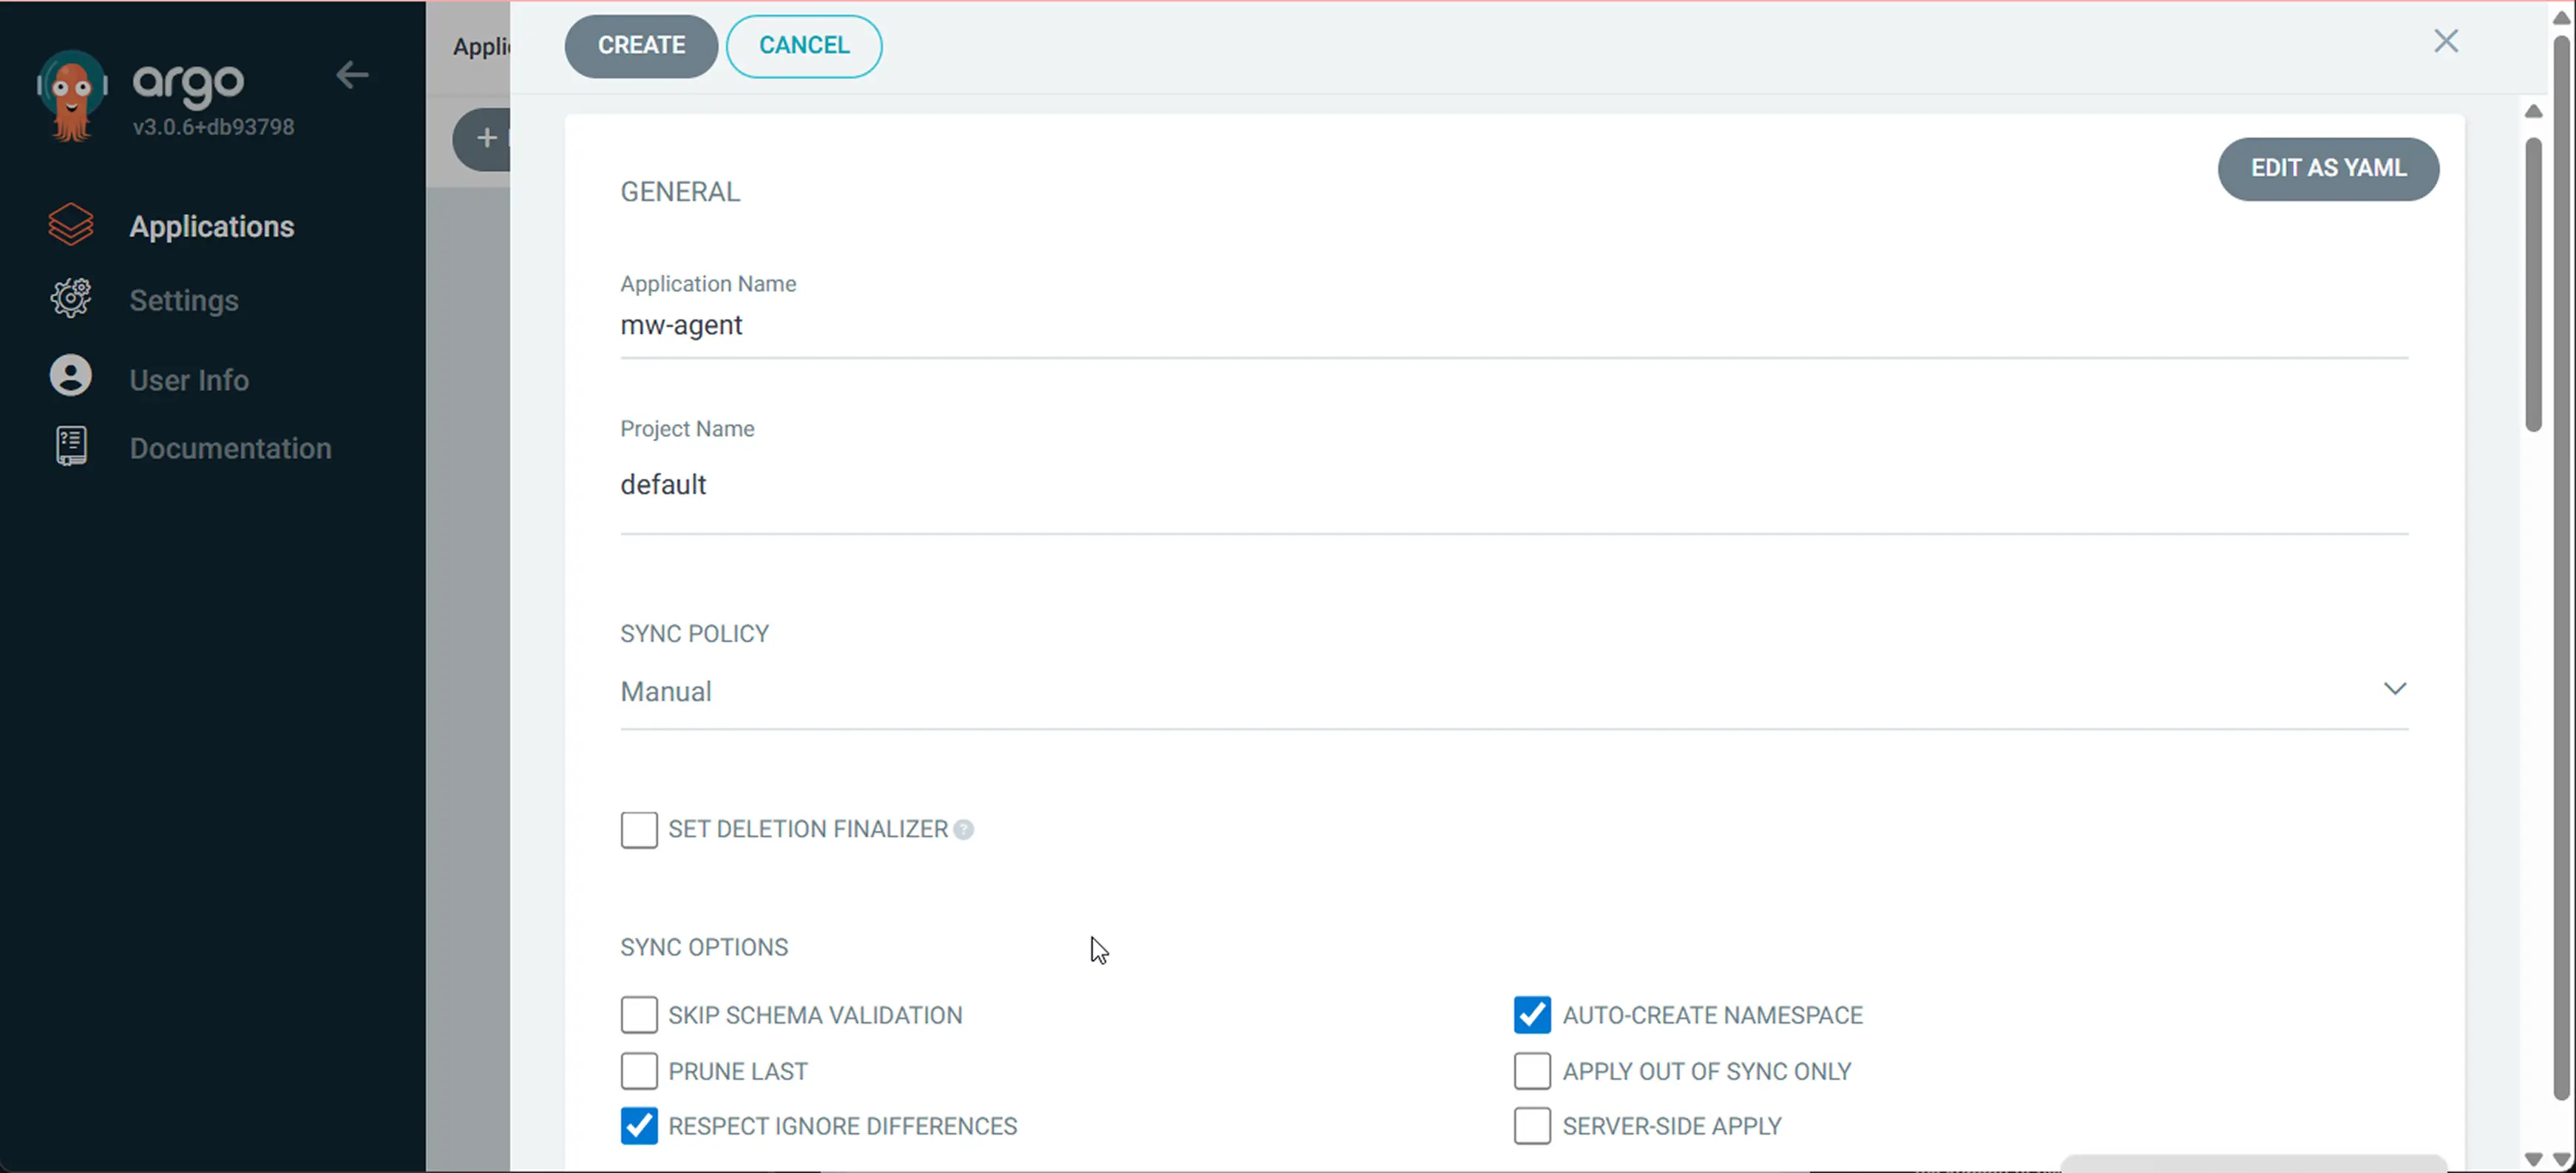
2 Name the application#
In the General section, enter the following:
- Application Name:
mw-agent(or your preferred name) - Project:
default(or your target project) - Sync Policy: Manual
- Check:
RESPECT IGNORE DIFFERENCESandAUTO CREATE NAMESPACE
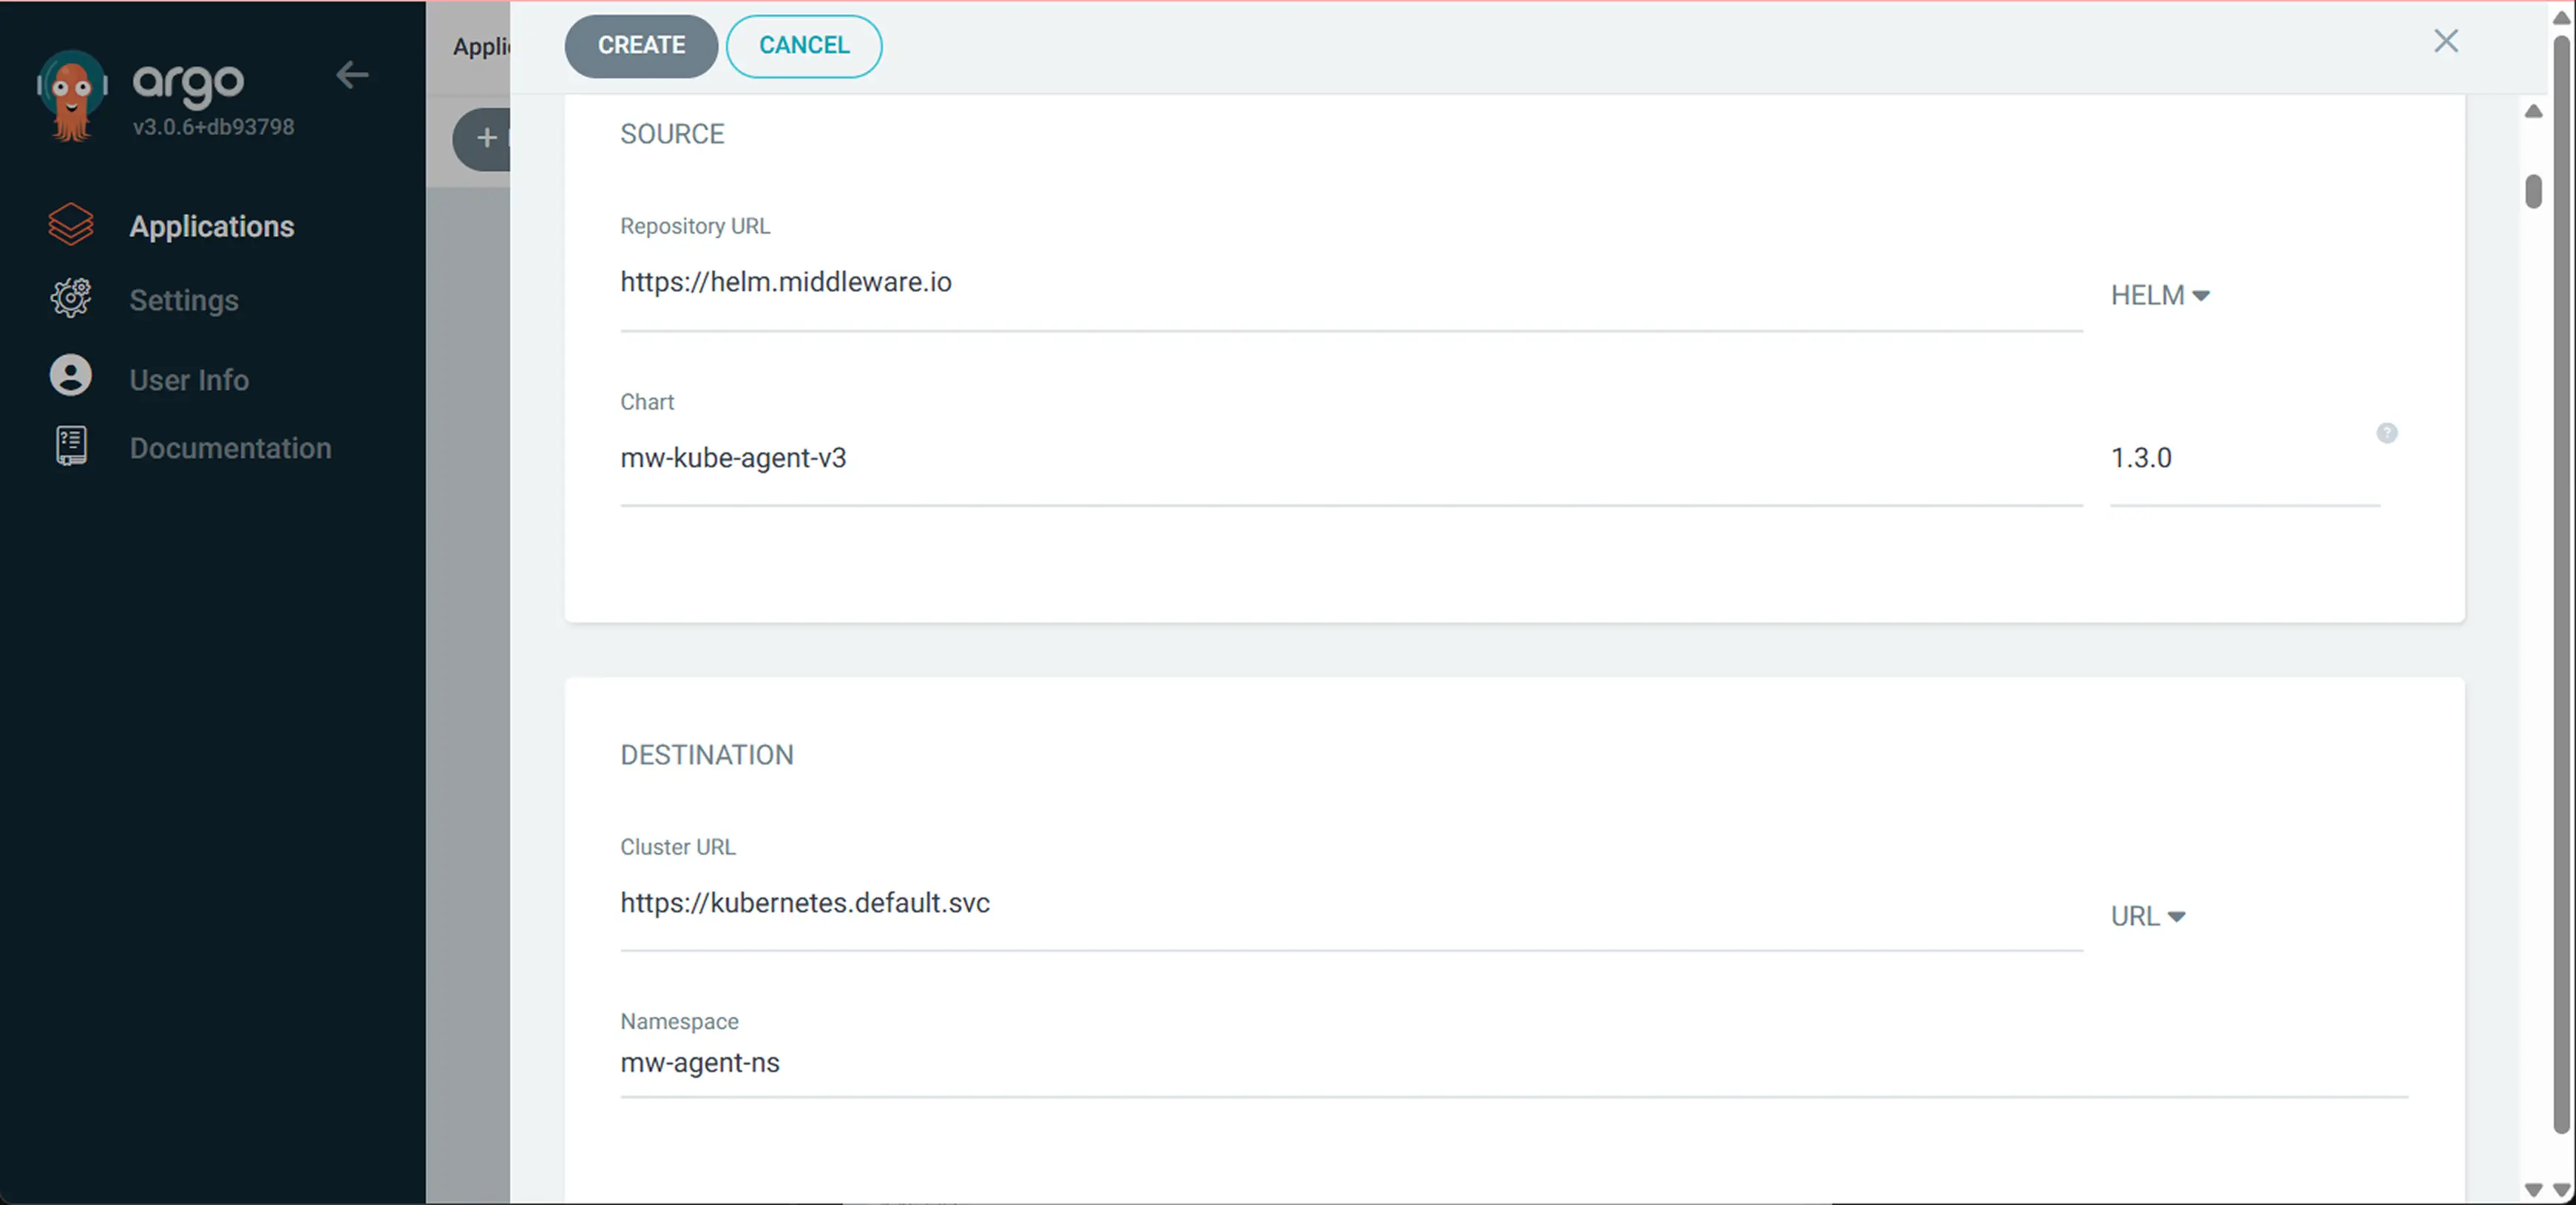
3 Configure the source and destination#
Scroll down a bit and enter the following values in the Source and Destination fields, respectively:
Source:#
- Repo URL: https://helm.middleware.io
- Type: Helm
- Chart:
mw-kube-agent-v3 - Version:
latest
Destination:#
- Cluster URL: https://kubernetes.default.svc
- Namespace:
mw-agent-ns
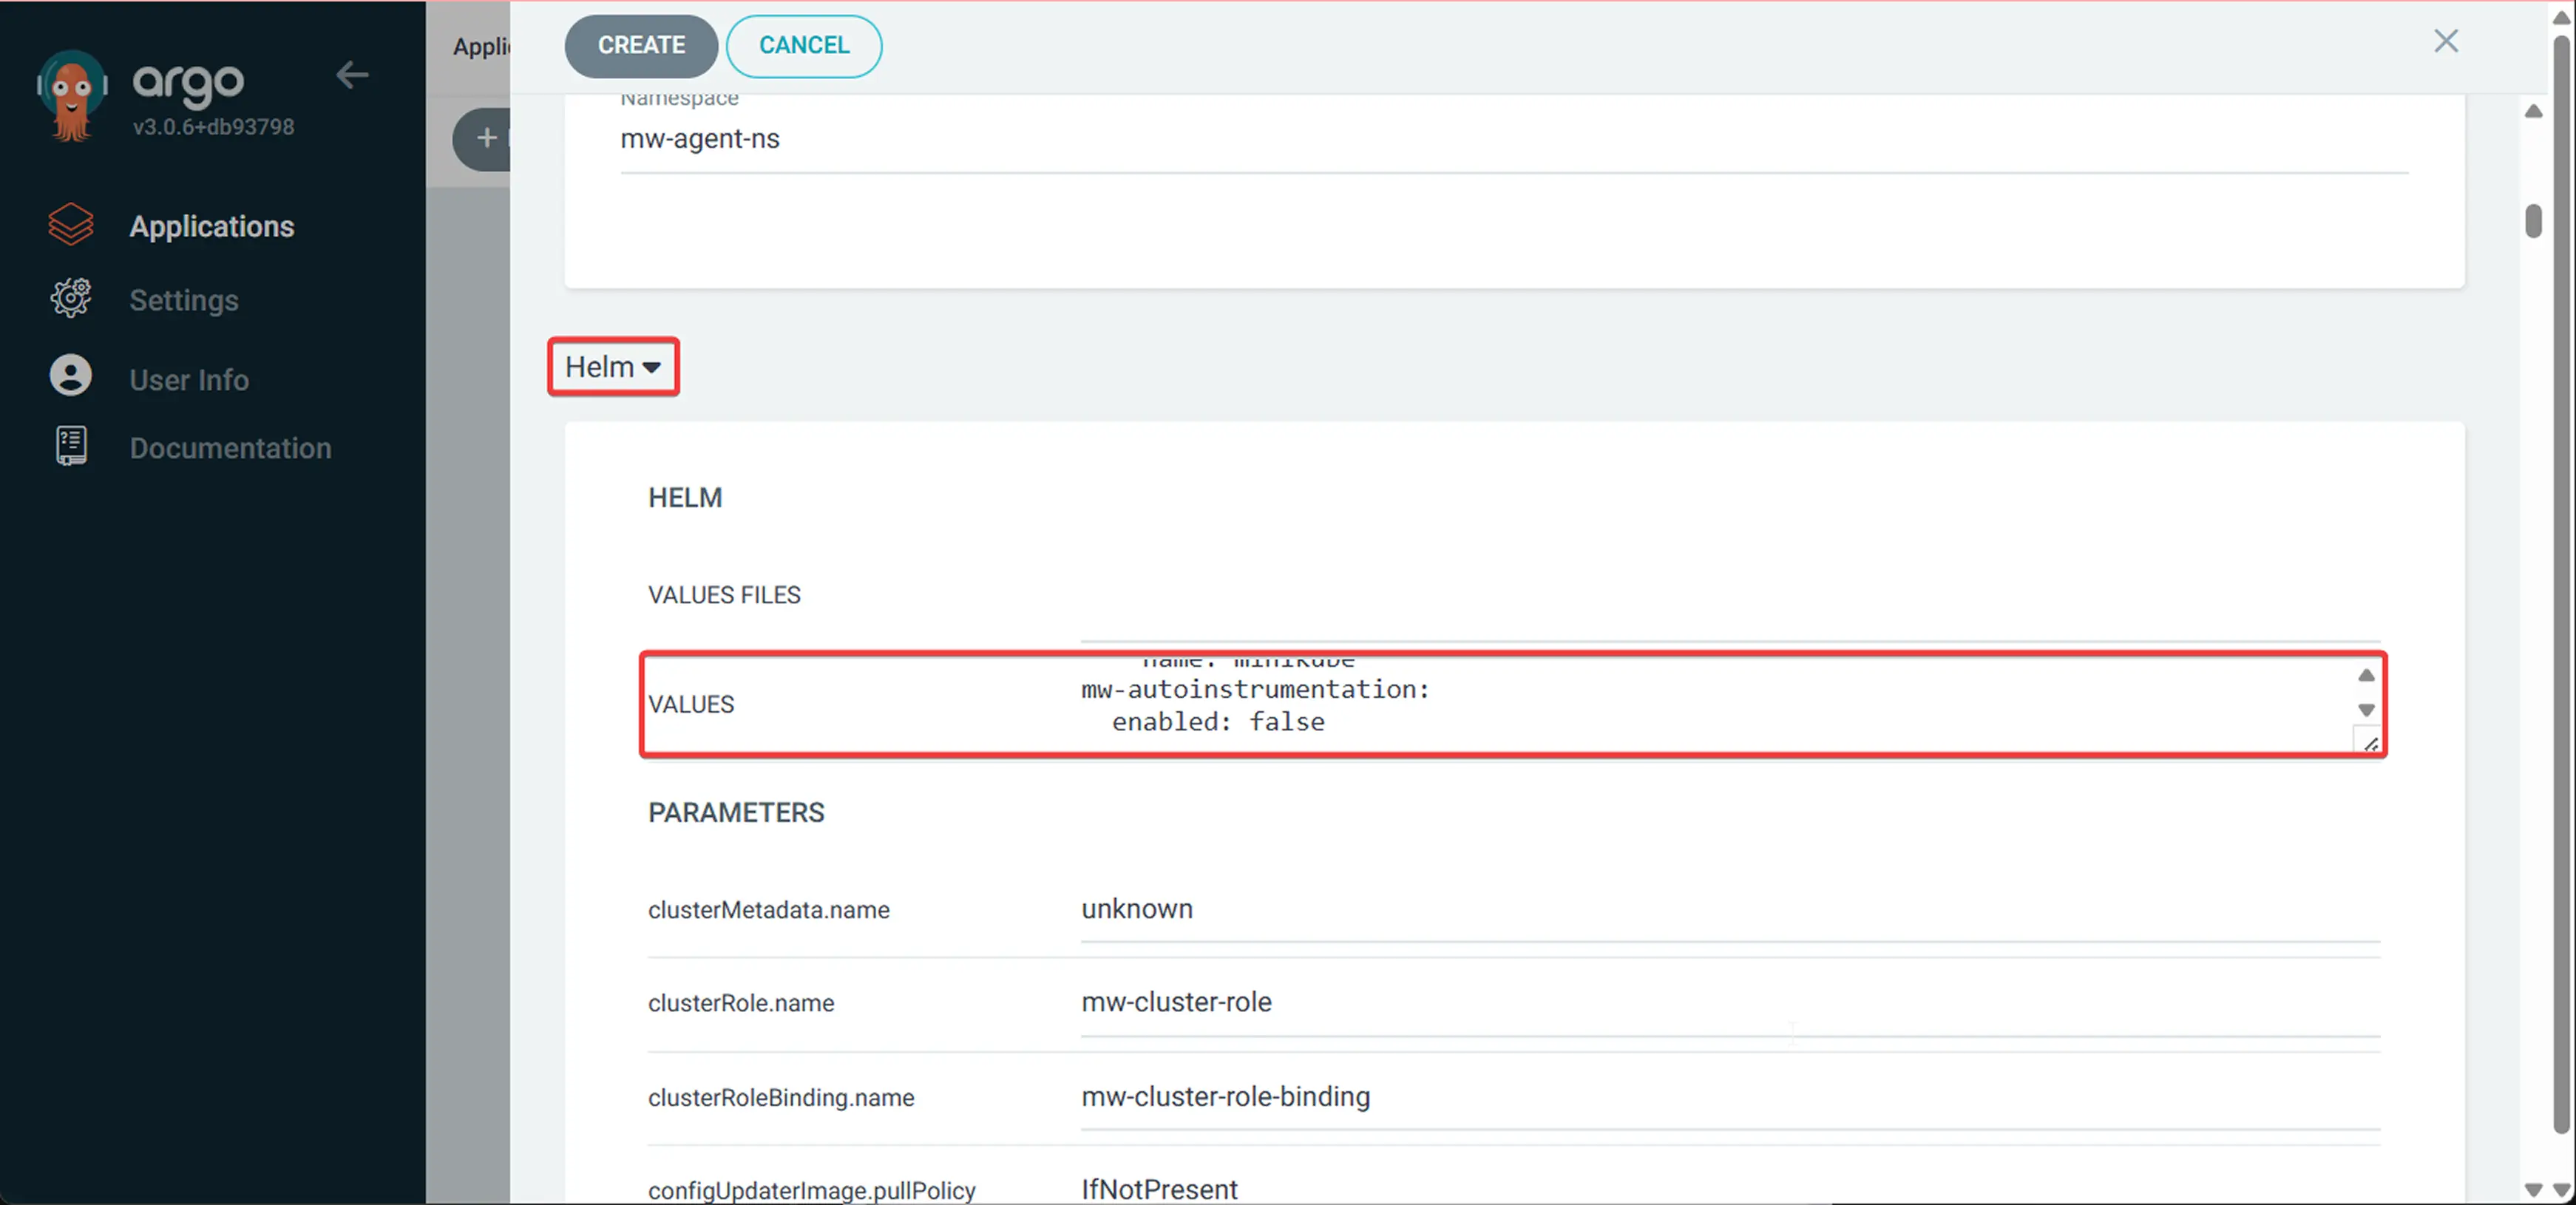
4 Configure Helm values#
In this step, you need to copy the Helm values that we generated in the prerequisites section. Make sure that you paste the values in the VALUES field, not VALUES FILES:
5 Add Ignore Differences in YAML#
Now, scroll to the top and hit the EDIT AS YAML button and add the following ignoreDifferences section to prevent sync issues with ConfigMaps:
1ignoreDifferences:
2  - group: ""
3    kind: ConfigMap
4    name: mw-deployment-otel-config
5    namespace: mw-agent-ns
6    jsonPointers:
7      - /data
8  - group: ""
9    kind: ConfigMap
10    name: mw-daemonset-otel-config
11    namespace: mw-agent-ns
12    jsonPointers:
13      - /data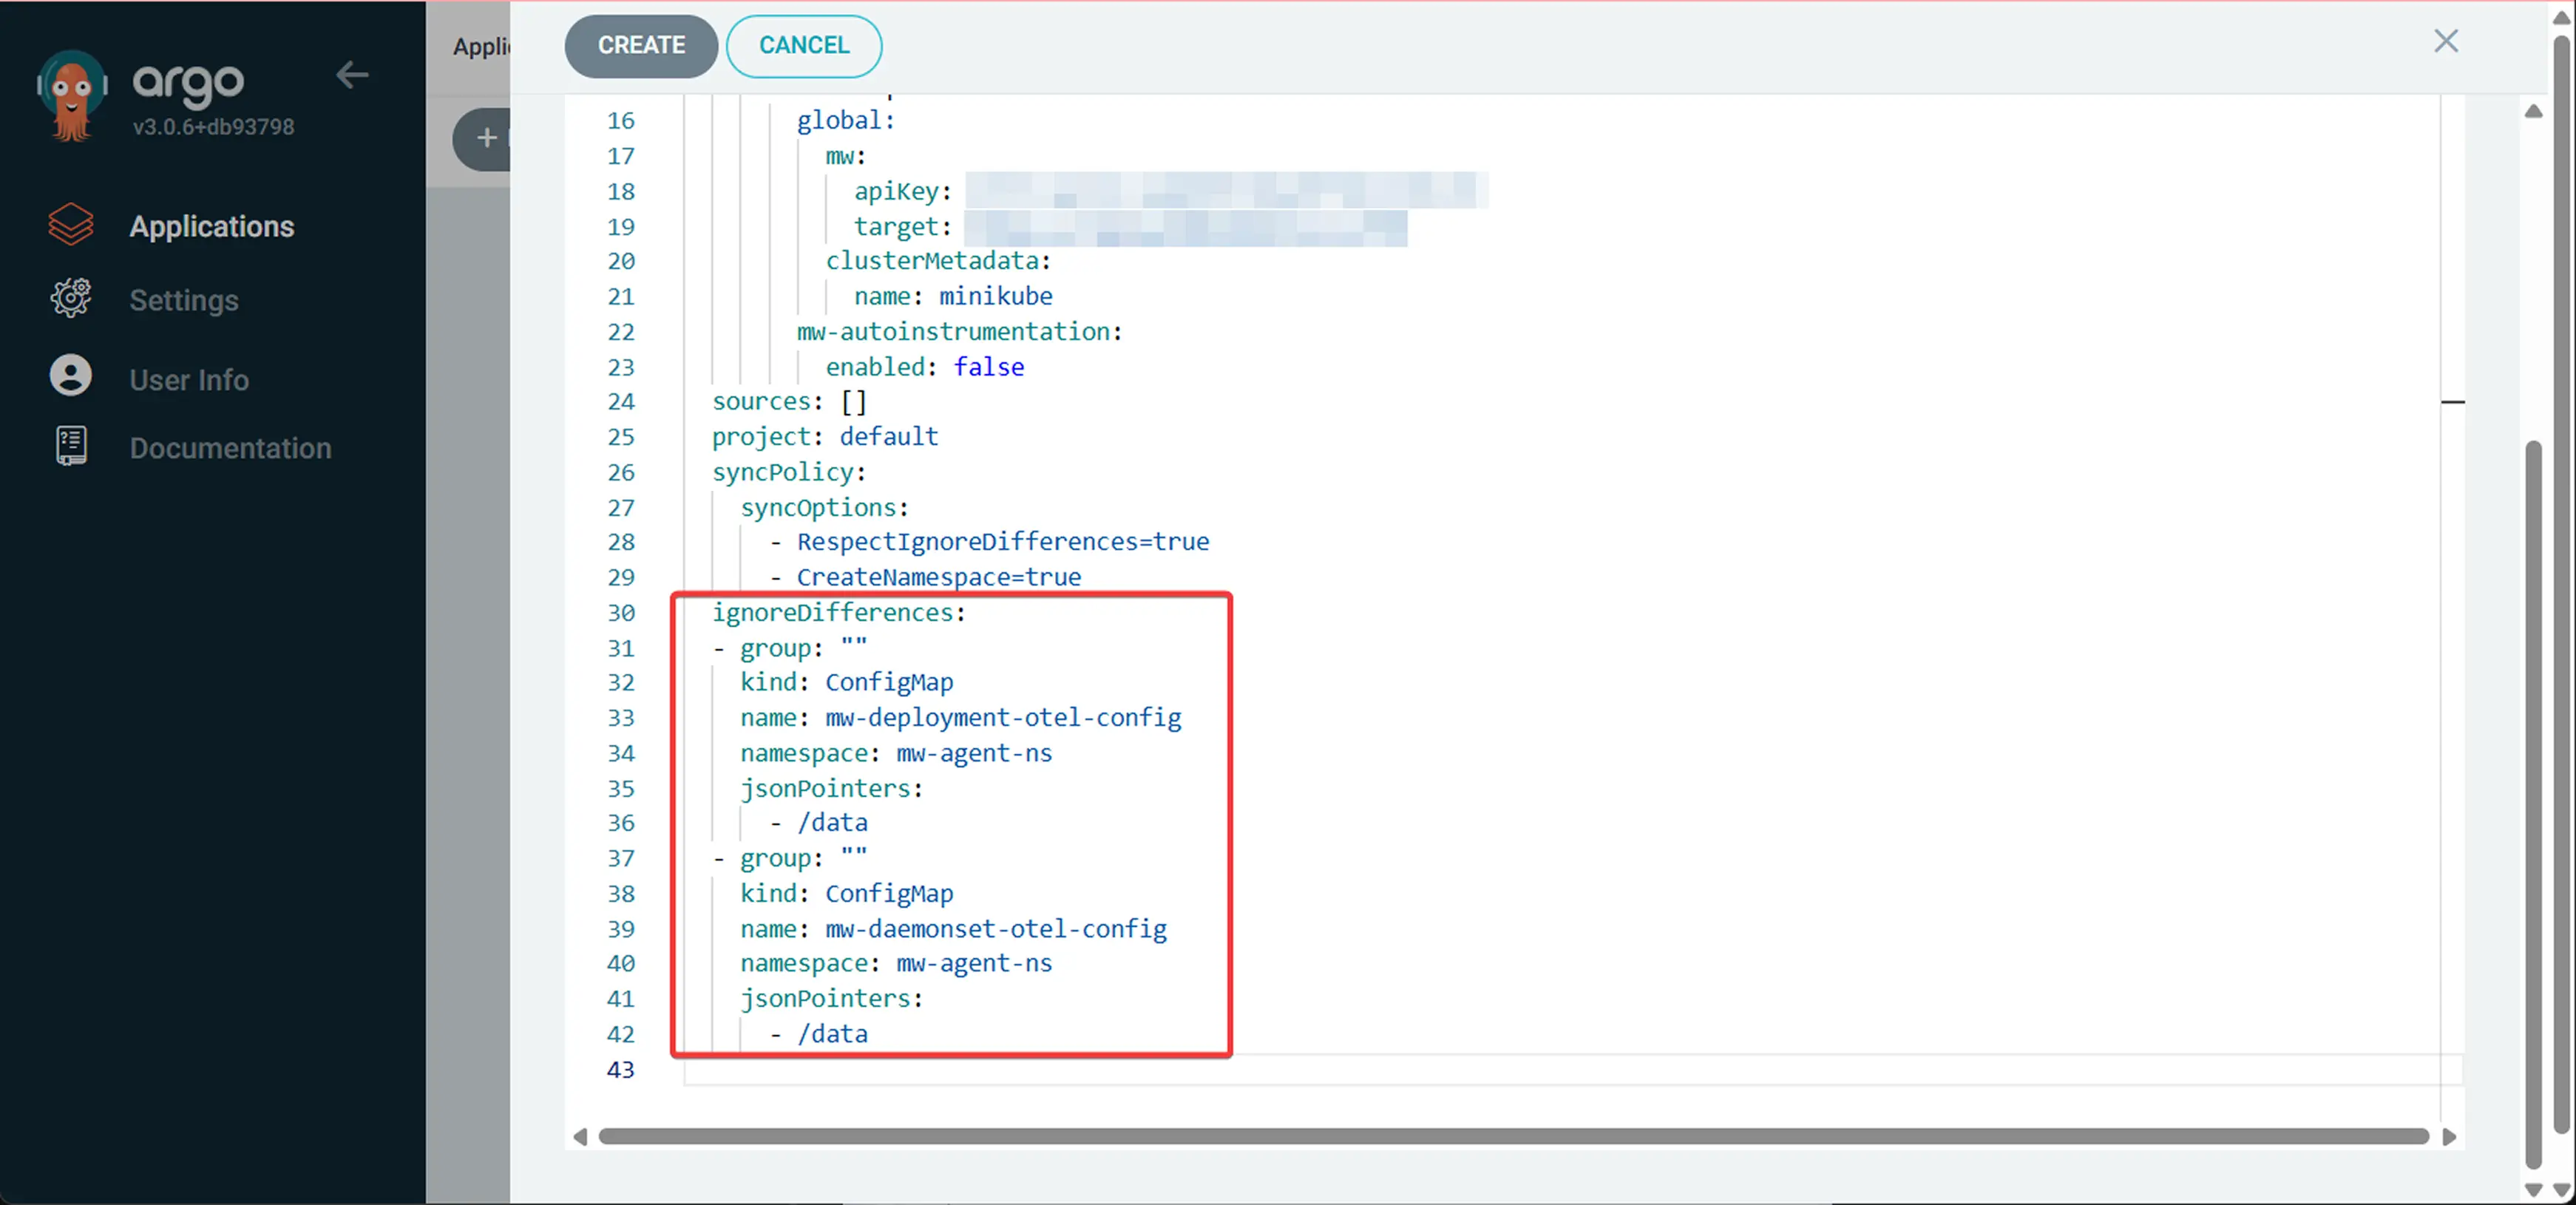
6 Deploy and sync#
- Click "CREATE" to create the application
- Click "SYNC" to deploy the Middleware agent
- Select "Synchronize" to apply all resources

Generate the Helm values file for the MW Agent as outlined, like we did, then commit and push it to your Git repository.
After that, create an ArgoCD Application that points to this values file:
1apiVersion: argoproj.io/v1alpha1
2  kind: Application
3  metadata:
4    name: mw-agent
5    namespace: argocd
6  spec:
7    project: default
8    source:
9      repoURL: https://helm.middleware.io
10      targetRevision: 1.2.0
11      chart: mw-kube-agent-v3
12      helm:
13        values: |
14          global:
15            mw:
16              apiKey: <MW_API_KEY>
17              target: https://<MW_UID>.middleware.io:443
18            clusterMetadata:
19              name: your-cluster-name
20          mw-autoinstrumentation:
21            enabled: false
22    destination:
23      server: https://kubernetes.default.svc
24      namespace: mw-agent-ns
25    syncPolicy:
26      syncOptions:
27        - RespectIgnoreDifferences=true
28        - CreateNamespace=true
29    ignoreDifferences:
30      - kind: ConfigMap
31        name: mw-deployment-otel-config
32        namespace: mw-agent-ns
33        jsonPointers:
34          - /data
35      - kind: ConfigMap
36        name: mw-daemonset-otel-config
37        namespace: mw-agent-ns
38        jsonPointers:
39          - /data
40
41  # Alternative approach: External values files
42  # Change 'source:' to 'sources:' and add:
43  # sources:
44  #   - repoURL: https://helm.middleware.io
45  #     targetRevision: 1.2.0
46  #     chart: mw-kube-agent-v3
47  #     helm:
48  #       valueFiles:
49  #         - $values/mw-agent-values.yaml
50  #   - repoURL: https://github.com/your-org/config-repo.git
51  #     targetRevision: HEAD
52  #     ref: values
Apply the configuration:
1kubectl apply -f middleware-argocd-app.yamlVerification#
In this section, we will walk you through three different ways you can verify the configuration you have done so far.
Method 1: Check Argo CD application status#
You can verify if the application is healthy in Argo CD UI or via CLI:
1argocd app get mw-agent | head -10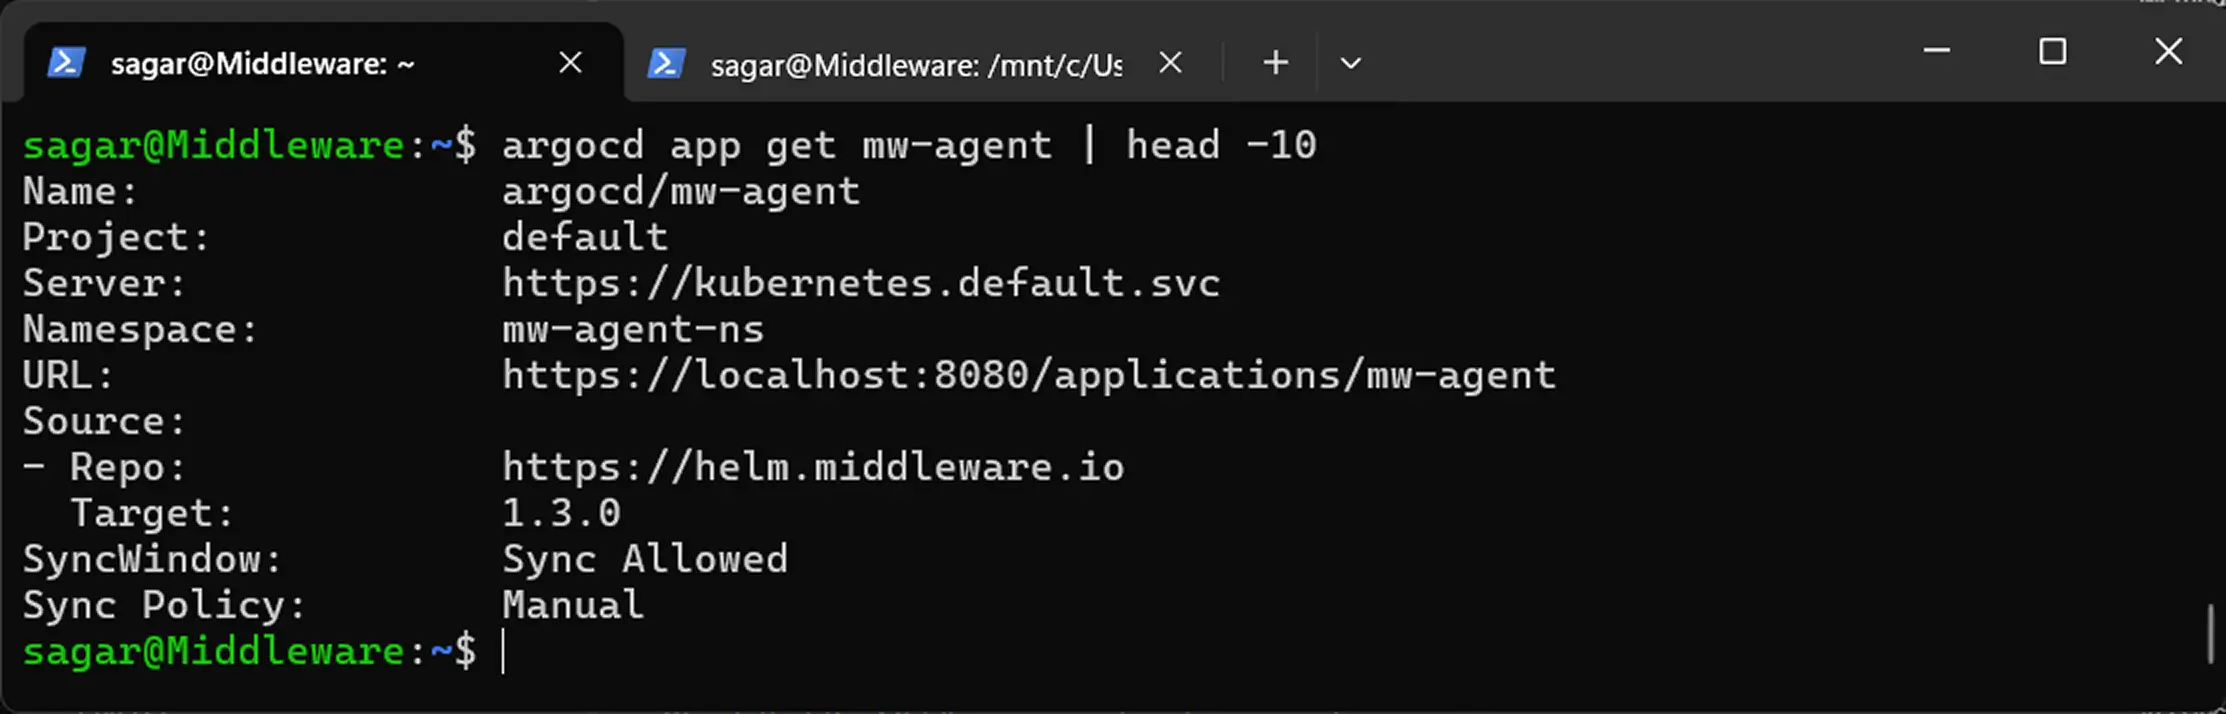
Here we have piped the command with head to only show the first 10 lines which are necessary. If you want more information, you can remove the head command part but remember, it will flood the entire terminal screen so the best idea is to redirect the output to a file.
Method 2: Verify Kubernetes resources#
Check that the Middleware agent pods are running:
1kubectl get pods -n mw-agent-ns
Method 3: Validate through Middleware dashboard#
Navigate to your Middleware dashboard and confirm that metrics are appearing. It may take a few minutes for data to start flowing.
Upgrade#
Like configuration, you have two methods to upgrade your application to the latest or desired version.
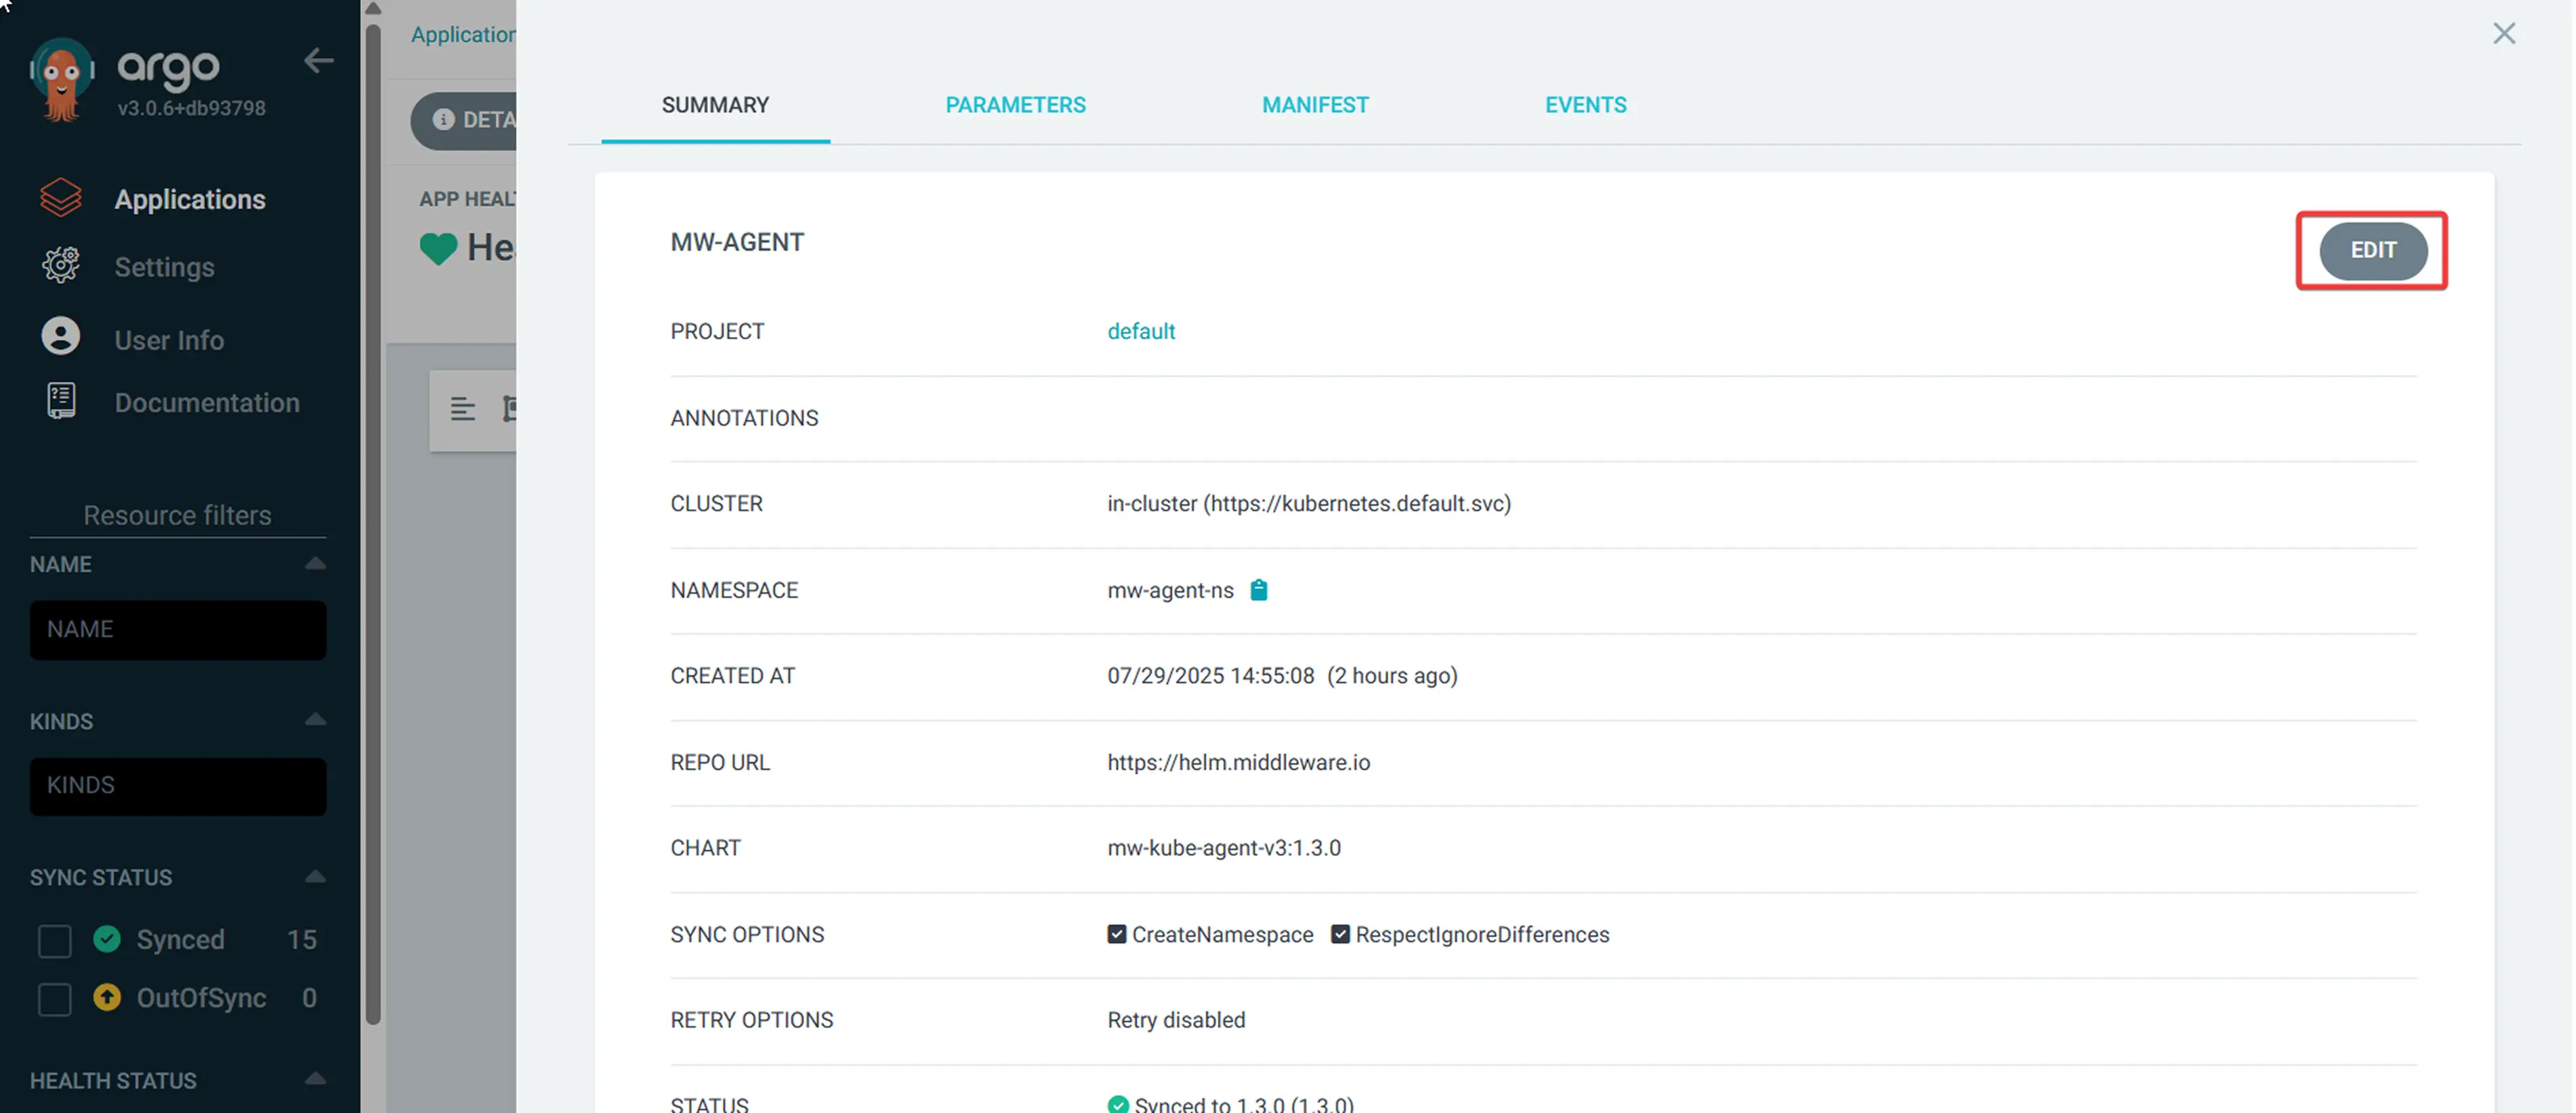
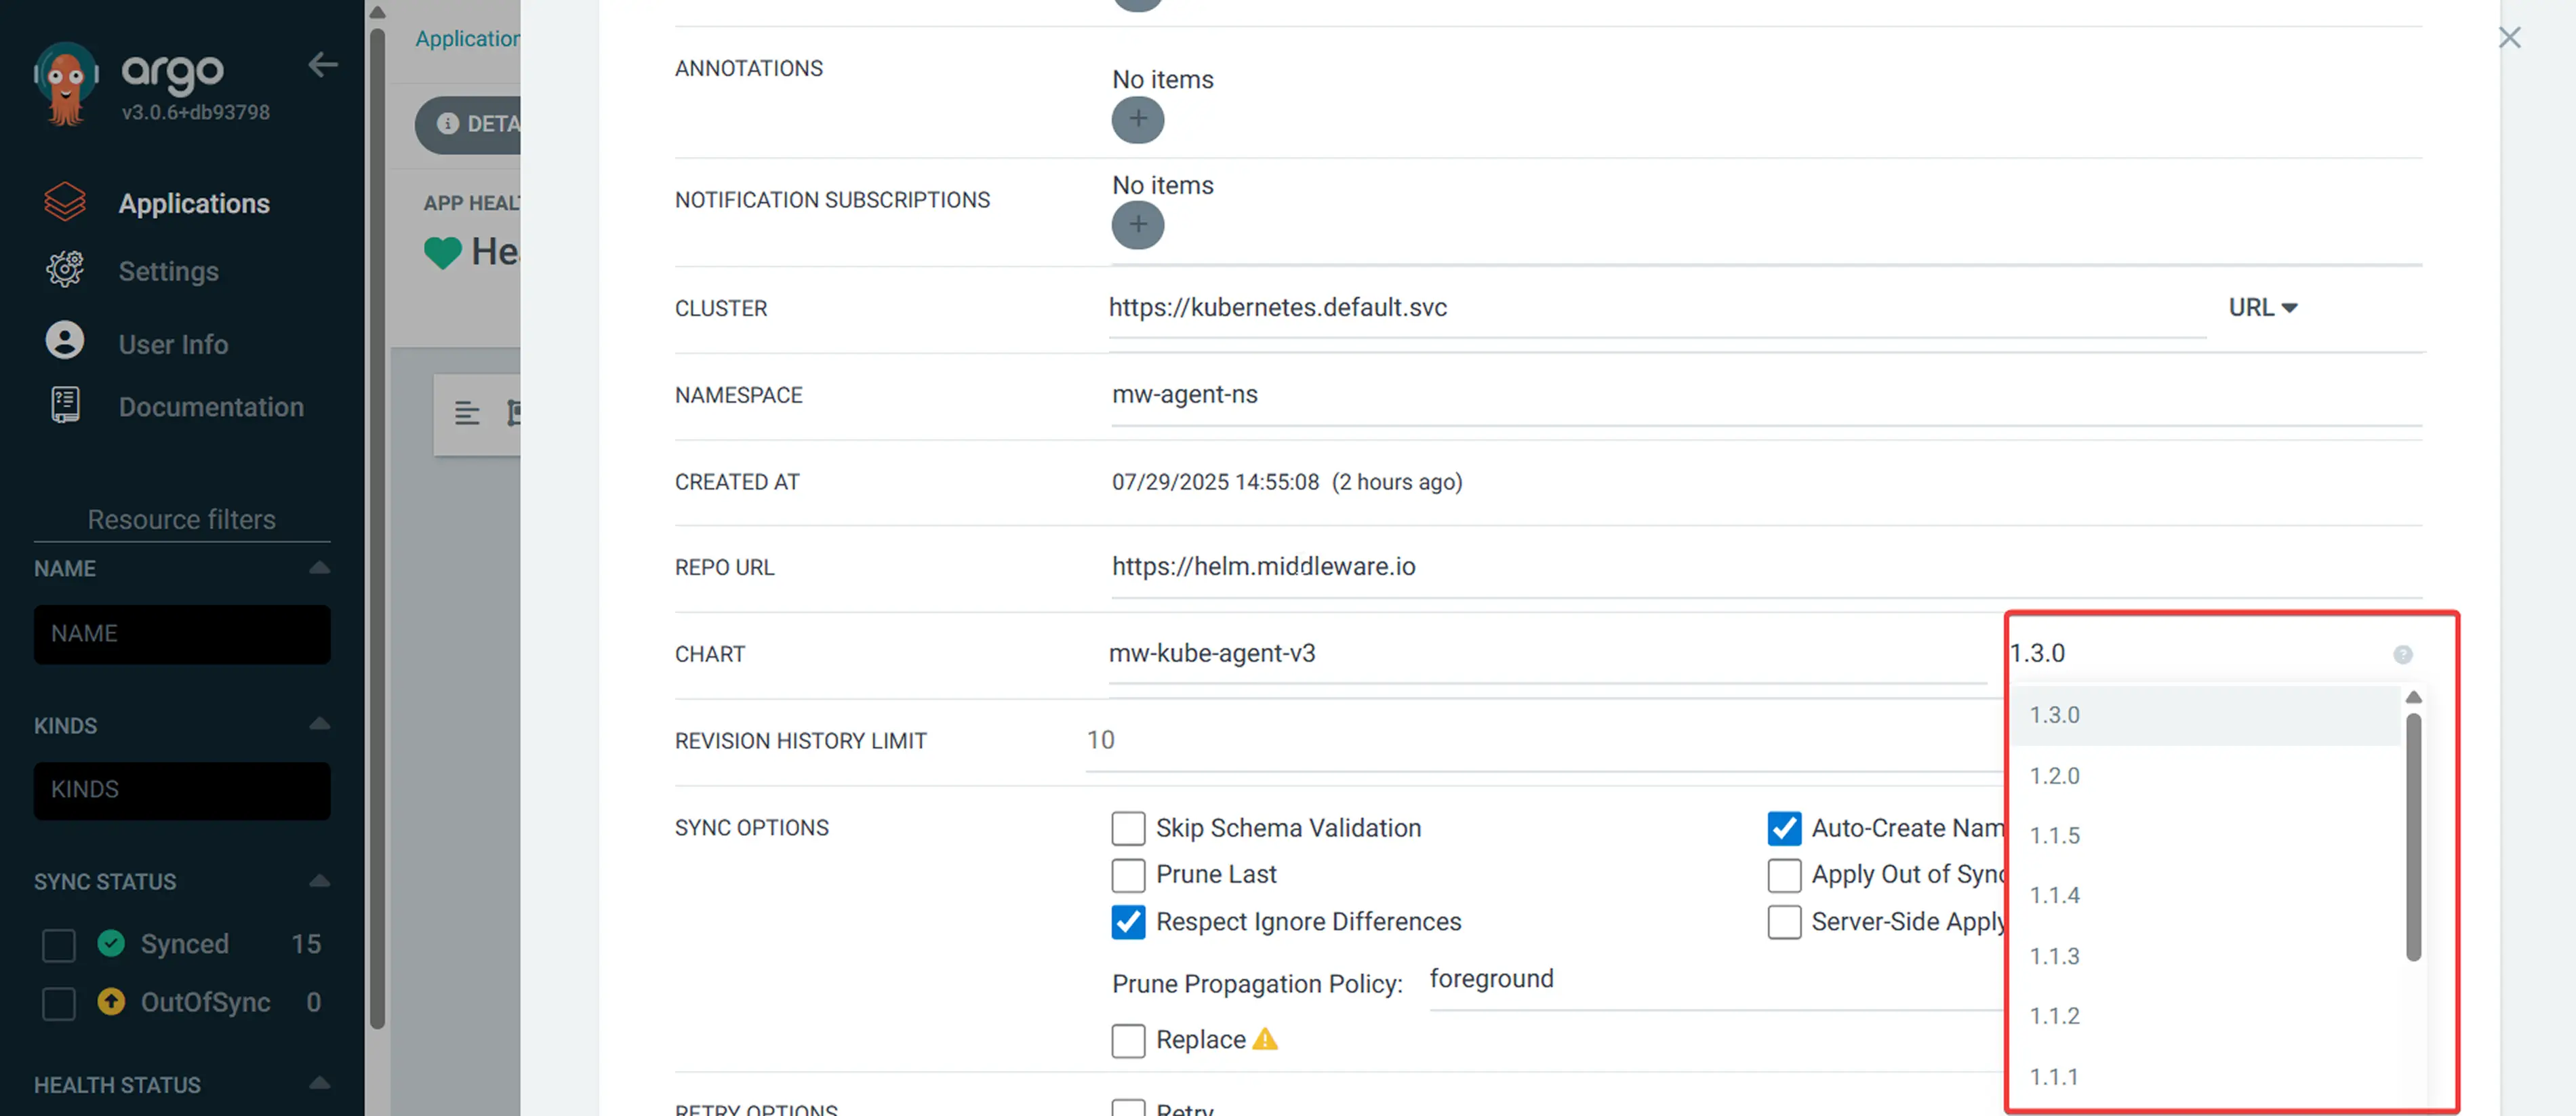
Via Argo CD UI
- Navigate to your Middleware application in Argo CD UI
- Click on the application name
- Click "DETAILS" and then "EDIT"
- Update the target revision to the desired version
- Click "SAVE" and then "SYNC"
Common Issues#
Application Not Syncing:#
- Check Argo CD has proper permissions to access the target namespace
- Verify the Helm chart repository is accessible
- Review Argo CD application events for specific error messages
Pods Not Starting:#
- Check resource quotas in the target namespace
- Review pod logs:
1kubectl logs -n mw-agent-ns -l app=mw-kube-agentNo Metrics in Dashboard:#
- Confirm Kubernetes cluster has internet access
- Verify API key and target are correct
- Check agent logs for connection errors
- Ensure only one MW Agent is running per node
Argo CD-Specific Issues#
- Continuous Out-of-Sync Status: Ensure ignoreDifferences is properly configured for ConfigMaps that are dynamically updated by the agent.
- Permission Denied: Verify Argo CD has proper RBAC permissions to create resources in the mw-agent-ns namespace.
Uninstall#
For uninstallation, you have two ways. You can either use the GUI or the terminal. Also you are required follow a different method if you followed the declarative configuration.
- Navigate to the Middleware application in Argo CD UI
- Hit the "DELETE" button
- Confirm deletion by typing the application name

To remove Argo CD using CLI, execute the following command. It will prompt you with a confirmation where you have to enter y and press enter to confirm the removal:
1argocd app delete mw-agentIf you have used declarative method, you can use the following kubectl command for removal:
1kubectl delete application mw-agent -n argocdNeed assistance or want to learn more about Middleware? Contact our support team at [email protected] or join our Slack channel.